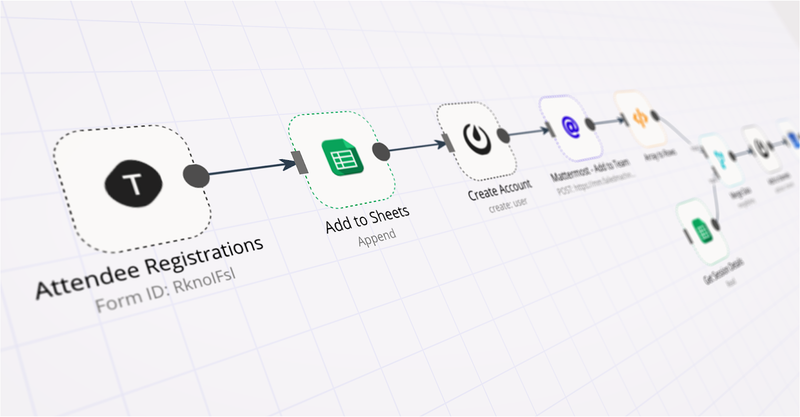
Every year, I help organize the South Indian Model United Nations, the third-largest Model UN conference in South India. We host over 850+ students and a total of around 1000 attendees at our conference each year. The team cuts across a lot of data about our speakers, sessions, and attendees. We do this with a team of just 10 people.
Automate repetitive tasks
Once you start organizing several of these conferences, you start to realize that a lot of human effort can be reduced by automating some seemingly mundane tasks — almost 45%, according to an article published by McKinsey & Company.
One example that I can think of for this is the registration process for attendees. With COVID-19 forcing us to virtualize our conference, moving online has presented us with new challenges for the registration and onboarding of delegates — we now have to coordinate video conferences, permissions management, payments, chat rooms, to name a few.
So, that’s what we did. I set out on a quest to automate our initial registration process — saving us time and ensuring that attendees aren’t left waiting for days on a payment confirmation or sending us emails about confirming their registration. And it’s magical.
If you’re organizing an event or would like to explore, you can follow along with this post using this workflow (the workflow was built using n8n@0.111.0).
Prerequisites
Set up n8n
You can get n8n up and running by following the instructions on the Quickstart page. Once you’re done, you should see a fresh install of n8n without any workflows. You can also sign-up for a free n8n cloud trial to get access to our hosted service.
Set up a form in Typeform
Since we’re going to be using this workflow to process conference registrations, we need a way to collect the information of all those who register. A form is an ideal tool for this, and I chose to use Typeform because it is straightforward to use (and works great with n8n!).
I set up a Typeform with just three questions, choosing to forego any complicated questions for brevity. It looks like the following.
Set up a Mattermost instance
Online chat rooms are great tools to facilitate in-conference communication. I chose to use Mattermost for this purpose as it is robust, open-source, straightforward to use, and supports mobile apps for both iOS and Android.
To set up an instance of Mattermost, you can follow the guides in the official documentation.
Once you’re done, create a channel for every session that you plan to organize at your conference.
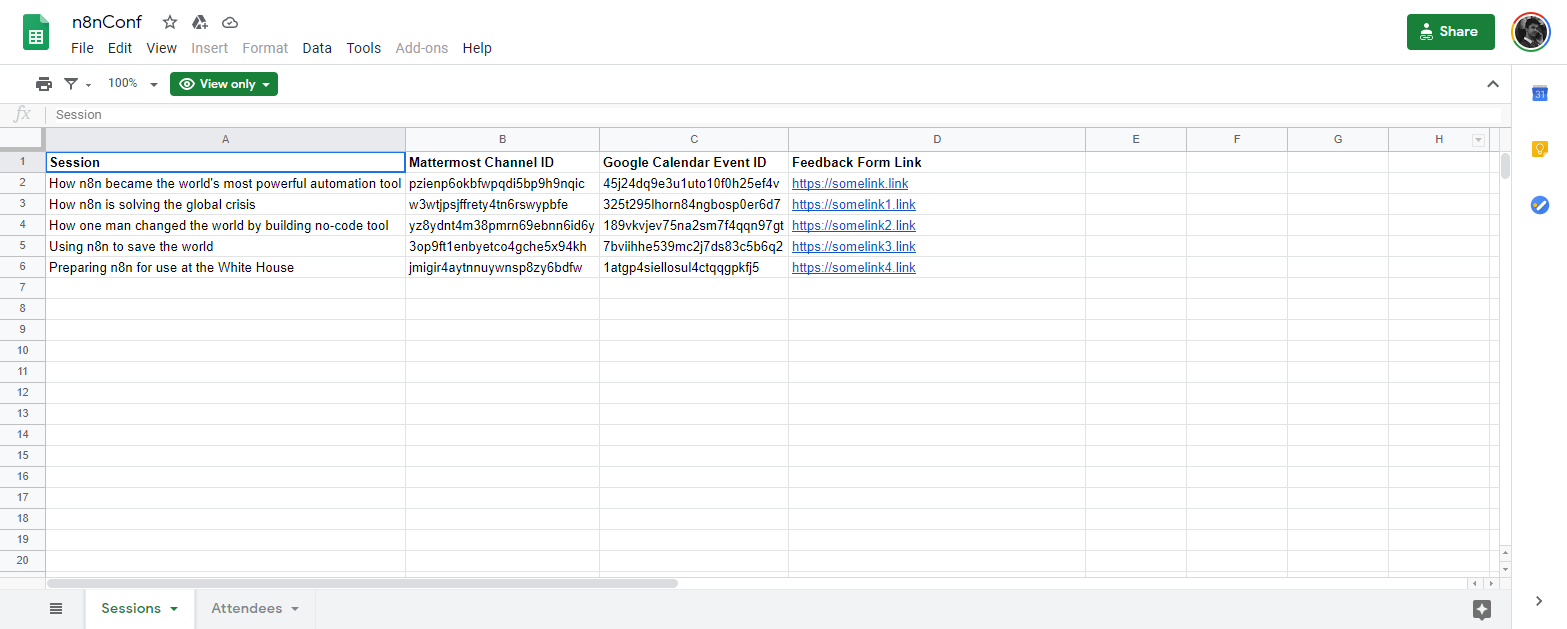
Set up a spreadsheet in Google Sheets
I wanted to be able to easily view and manipulate the information collected from the Typeform. I decided to use Google Sheets for this task. This Google Sheets document will also contain an additional spreadsheet in it (shown as a tab on the bottom) that we will use to store information about the Mattermost channels and Google Calendar events for each session.
You can find a copy of my Google Sheets file here, feel free to use it as a template when building this workflow. Make sure to have the same sheet and column names, as these are referenced in the nodes.
Here’s a screenshot of my spreadsheet for reference.
Quickstart
Many people want to experience the result before committing to a project and spending time. You can follow the steps below to get up and running quickly. To learn more about how each stage works, feel free to dig deeper into the sections below.
Note that you will have to execute each node after configuration in order to view the correct data as it is being executed.
Here are the quick start steps:
- Copy the n8n workflow from here and paste it in your n8n Editor UI (the workflow was build using n8n@0.111.0).
- Modify the following nodes in your workflow:
- Typeform (Attendee Registrations) — configure credentials and make sure to select your form in the Form dropdown list.
- Google Sheets (Add to Sheets, Get Session Details) — configure credentials and make sure to enter the Sheet ID for your sheet. The Sheet ID is the part of your Google Sheets URL between “d/” and “/edit”.
- Mattermost (Create Account, Add to channels) — configure credentials
- Mattermost ( Add to Team) — use the credentials you configured in the previous node and enable email invitations from the Mattermost System console.
- Google Calendar (Add to Event) — configure credentials and create the events for each conference session in your calendar.
- Gmail (Welcome Email) — configure credentials and customize the message to your preference.
You should have a fully functioning workflow now. Let’s take a look at what each node does. You can change this workflow to better suit your needs.
Remember to save and activate your workflow after you’re done!
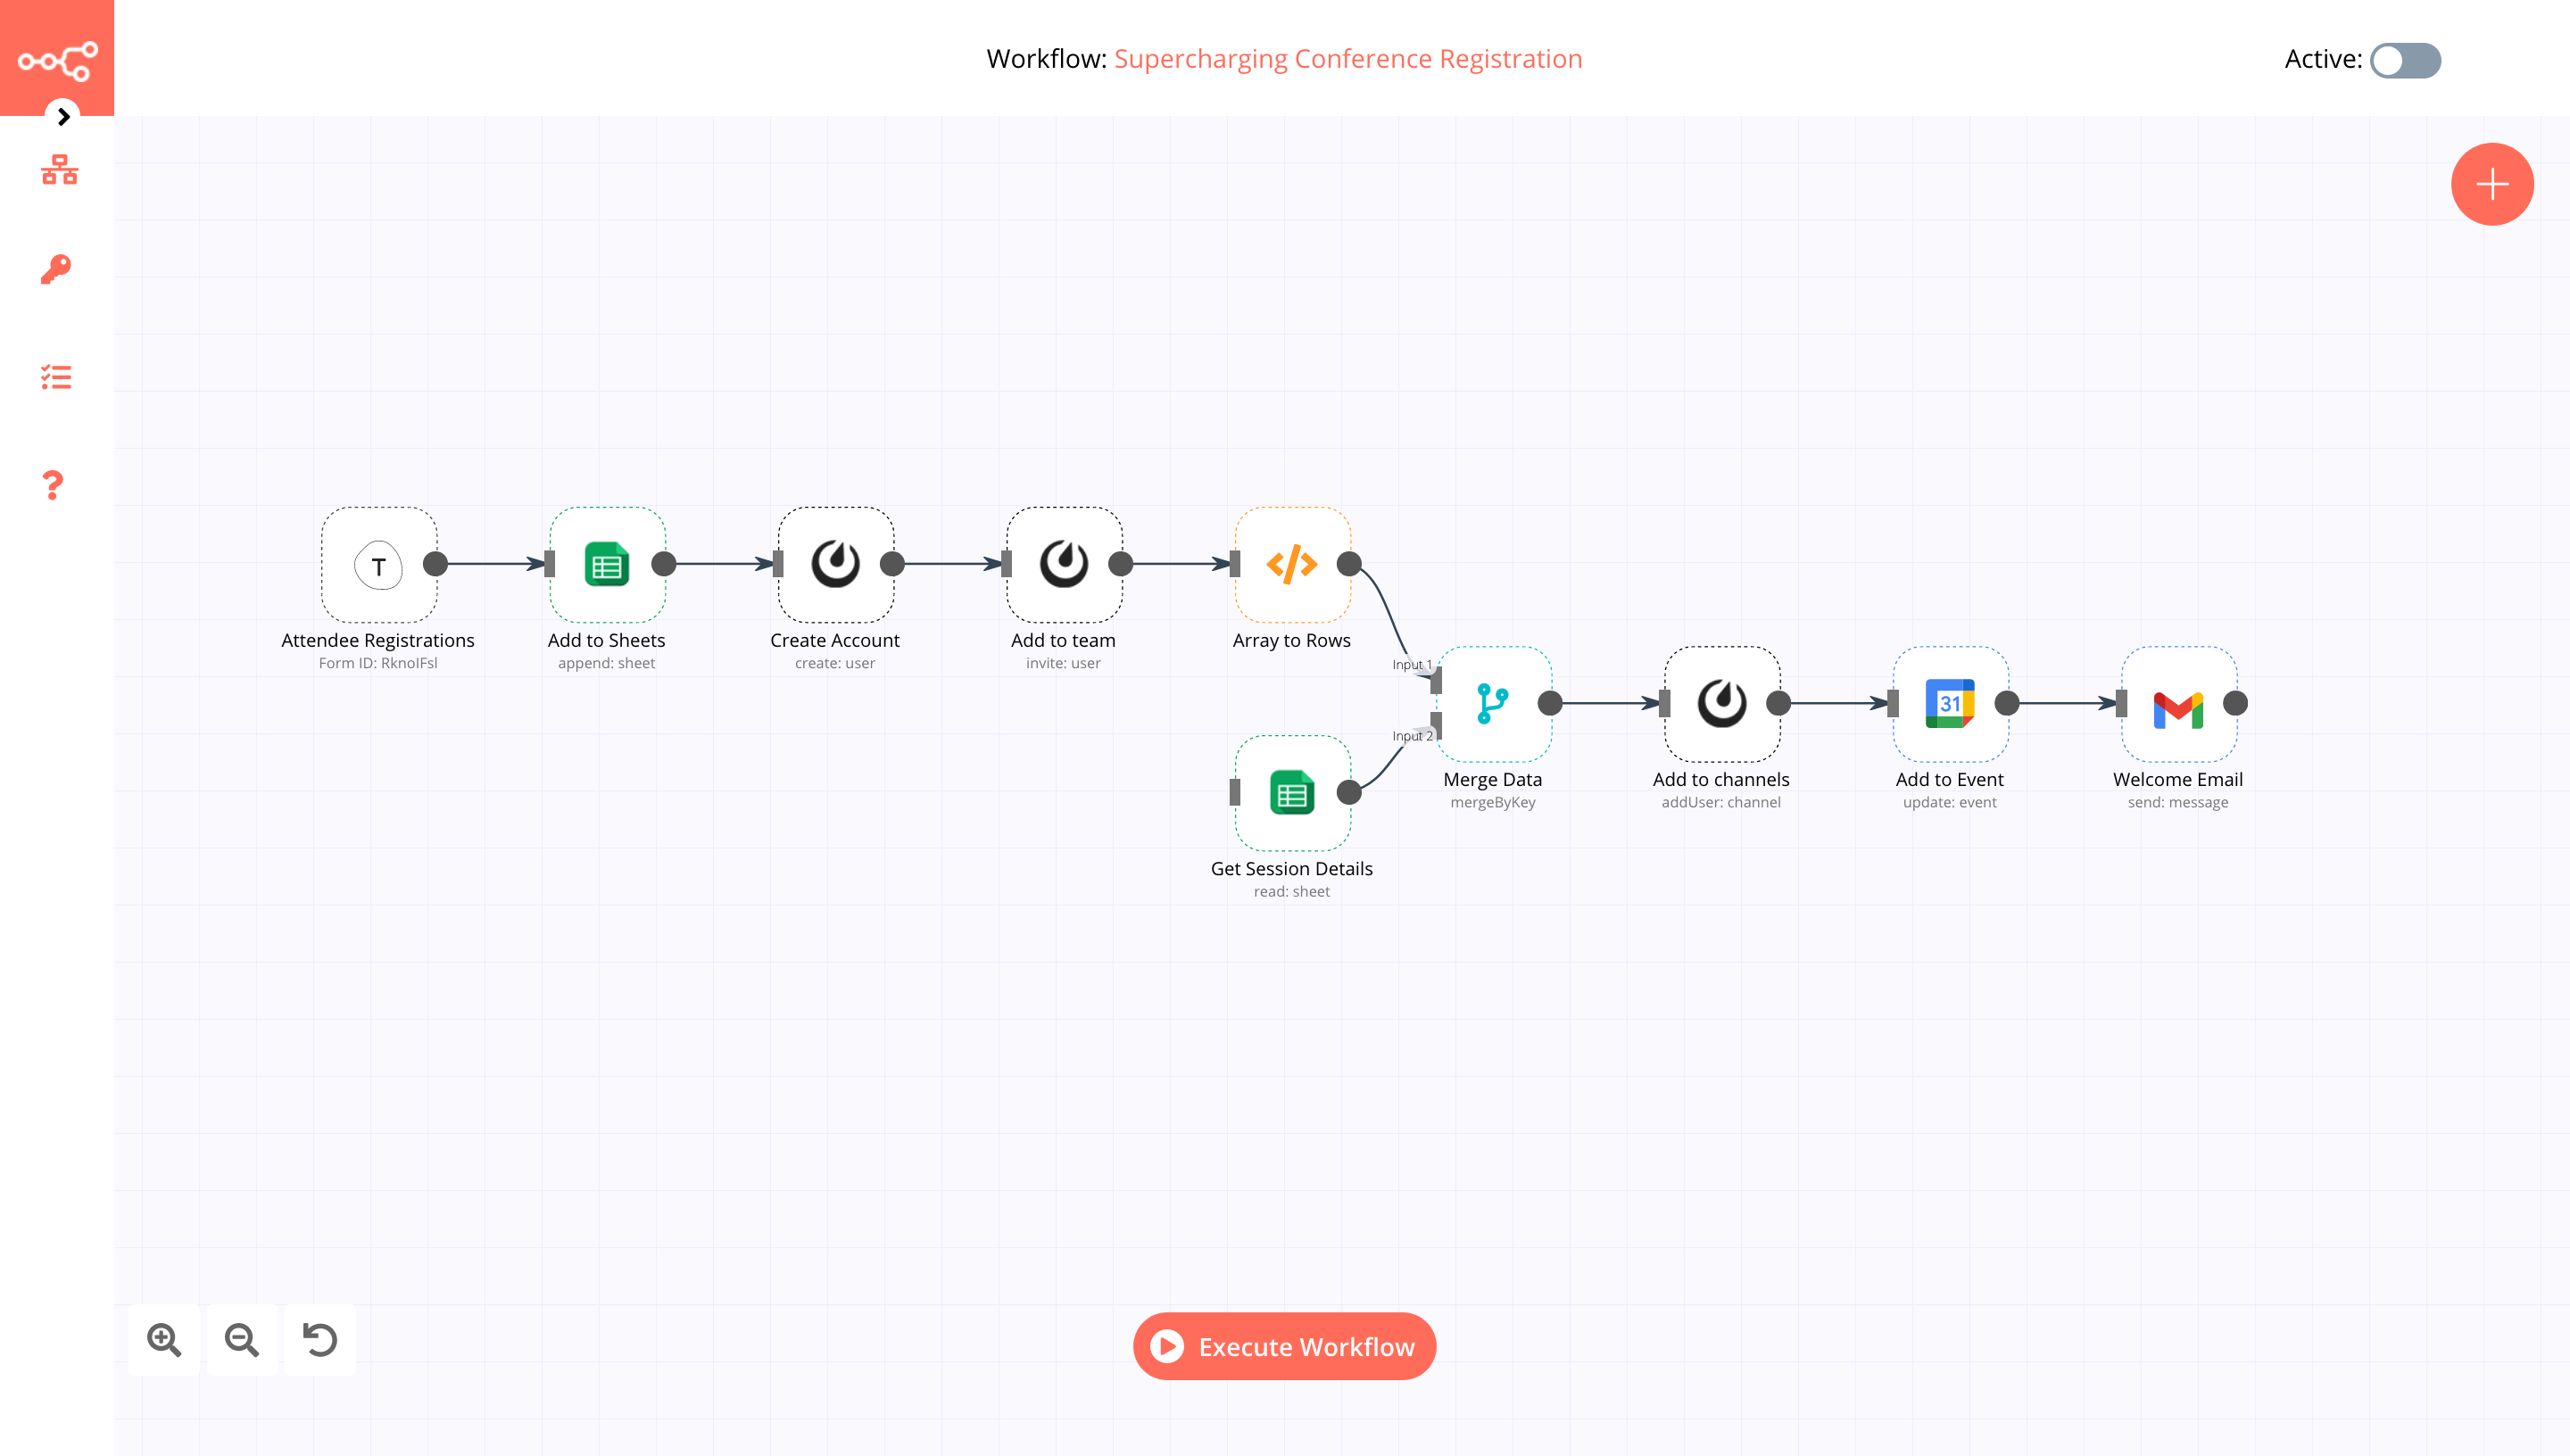
The workflow
Now that we have all the prerequisites ready to go, we can get started understanding and building your workflow.
This workflow can be divided into several stages, as it progresses from start to finish:
- Get Attendee Data
- Initialize Accounts
- Data Transformation
- Communication
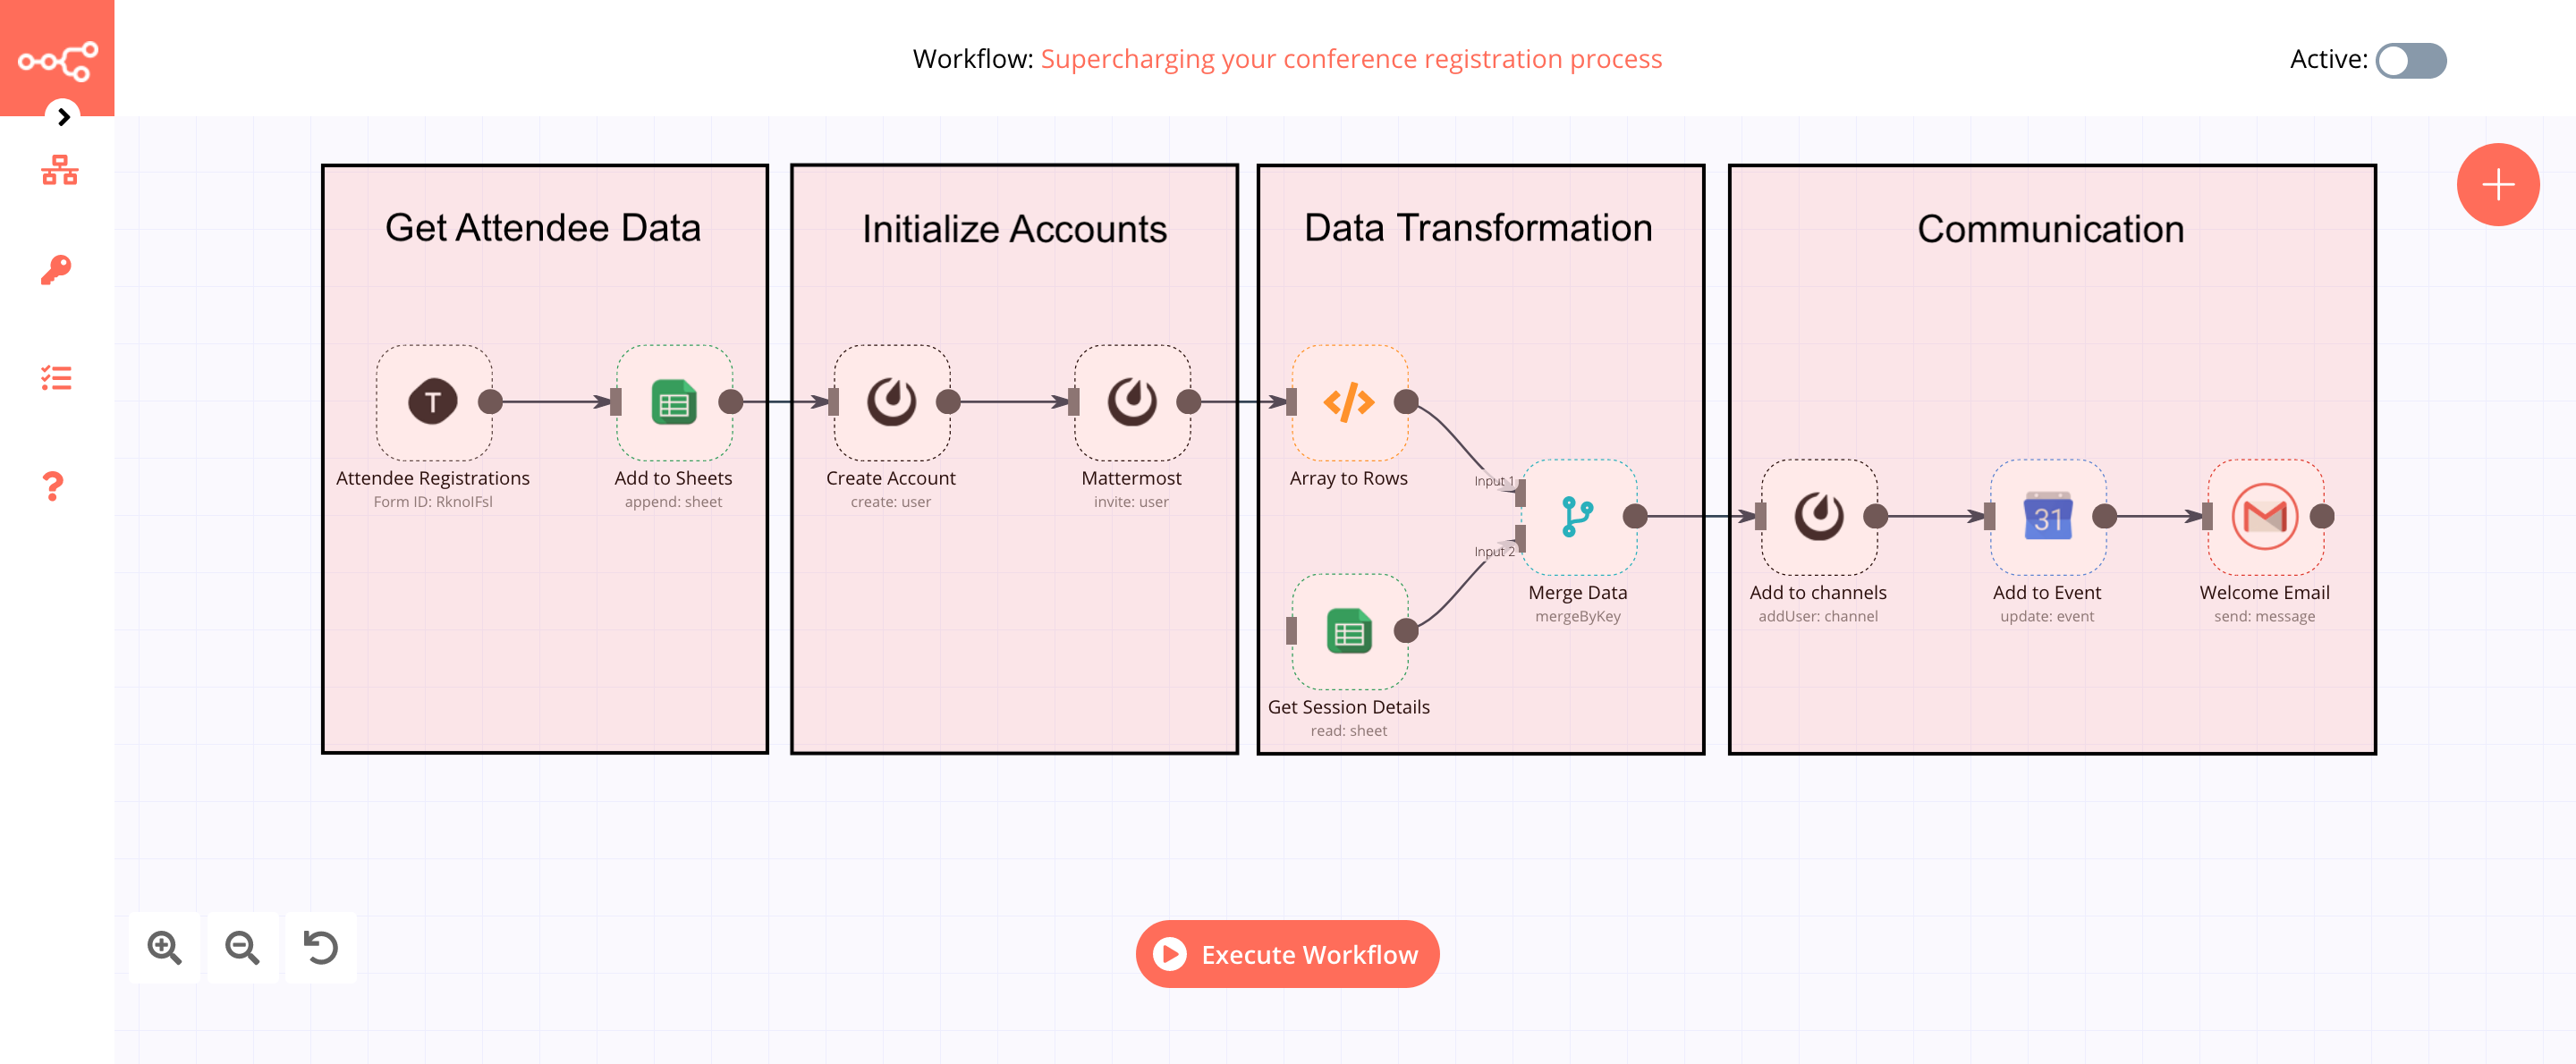
Let’s work through setting up these stages in your n8n workflow.
Stage 1 — Get Attendee Data
Node 1 — Attendee Registrations
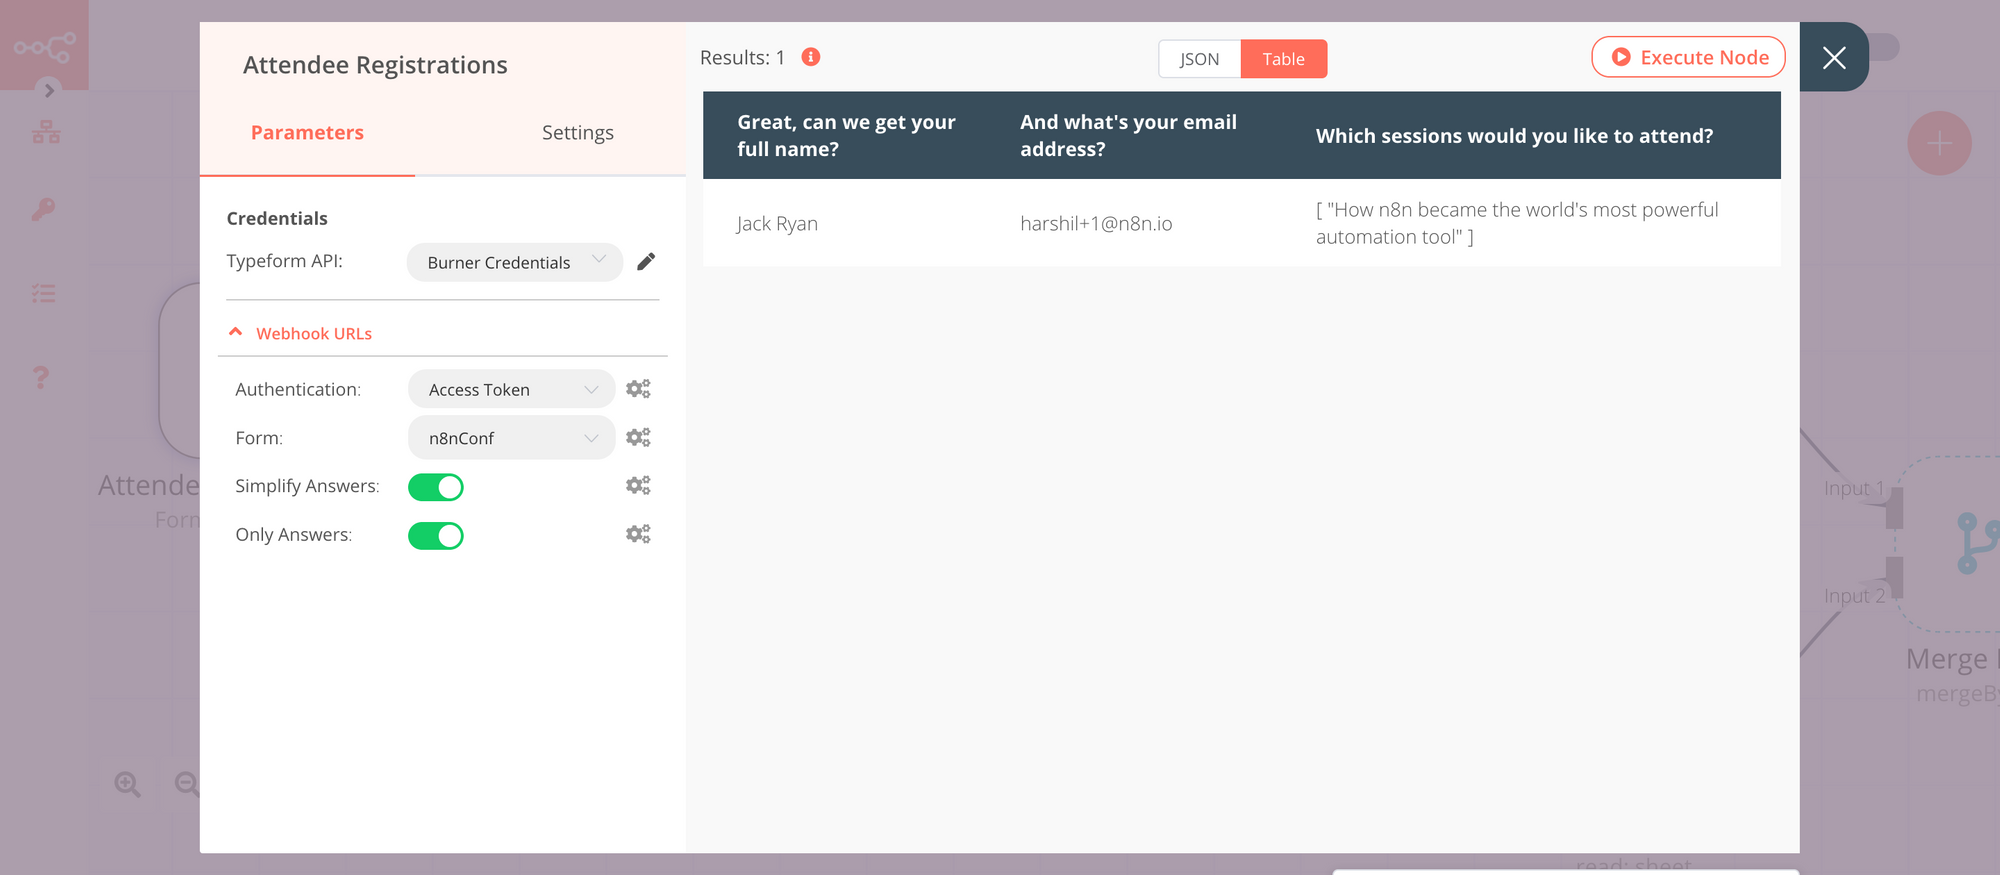
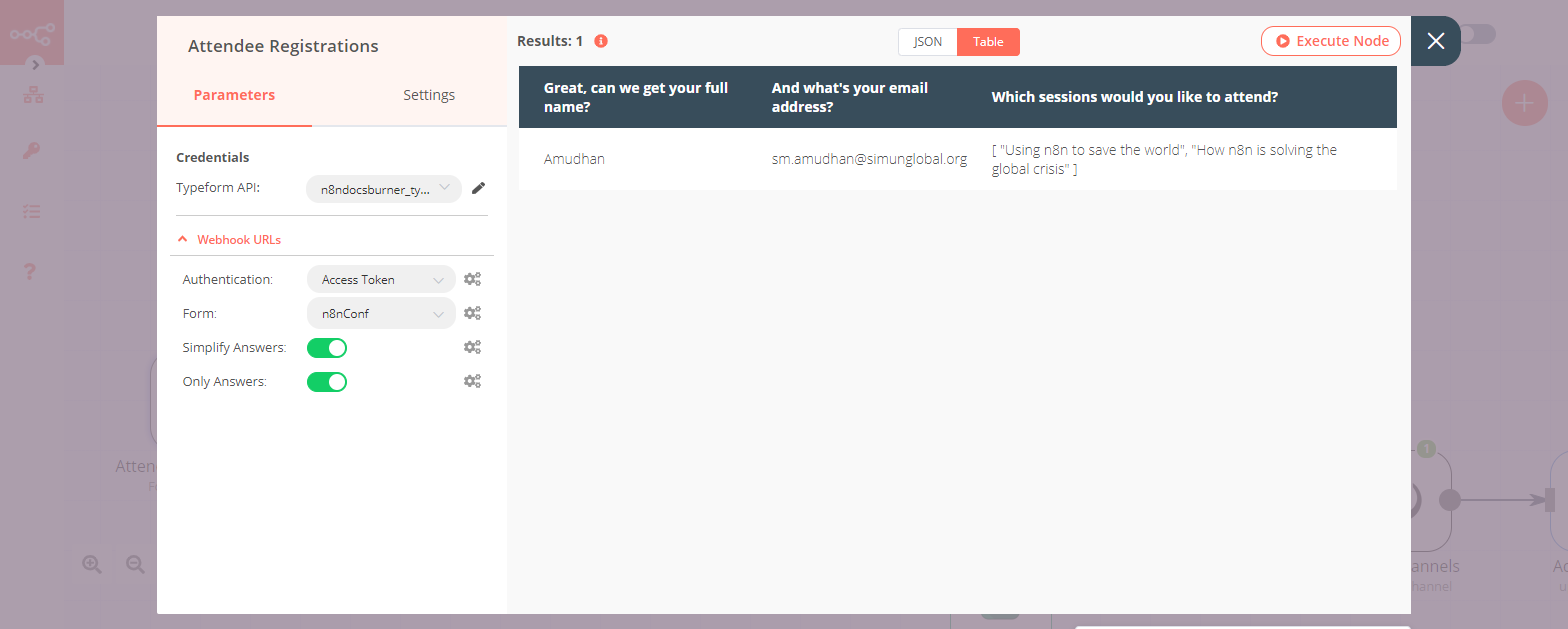
In n8n, every workflow begins with a trigger. It tells the workflow when to run and when to wait. We want the workflow to run whenever there is a new signup on your registration Typeform. We’ll use the Typeform Trigger node for this.
Configure your credentials and select the name of your registration Typeform.
Here’s a screenshot of the Attendee Registrations node.
Node 2 — Add to Sheets
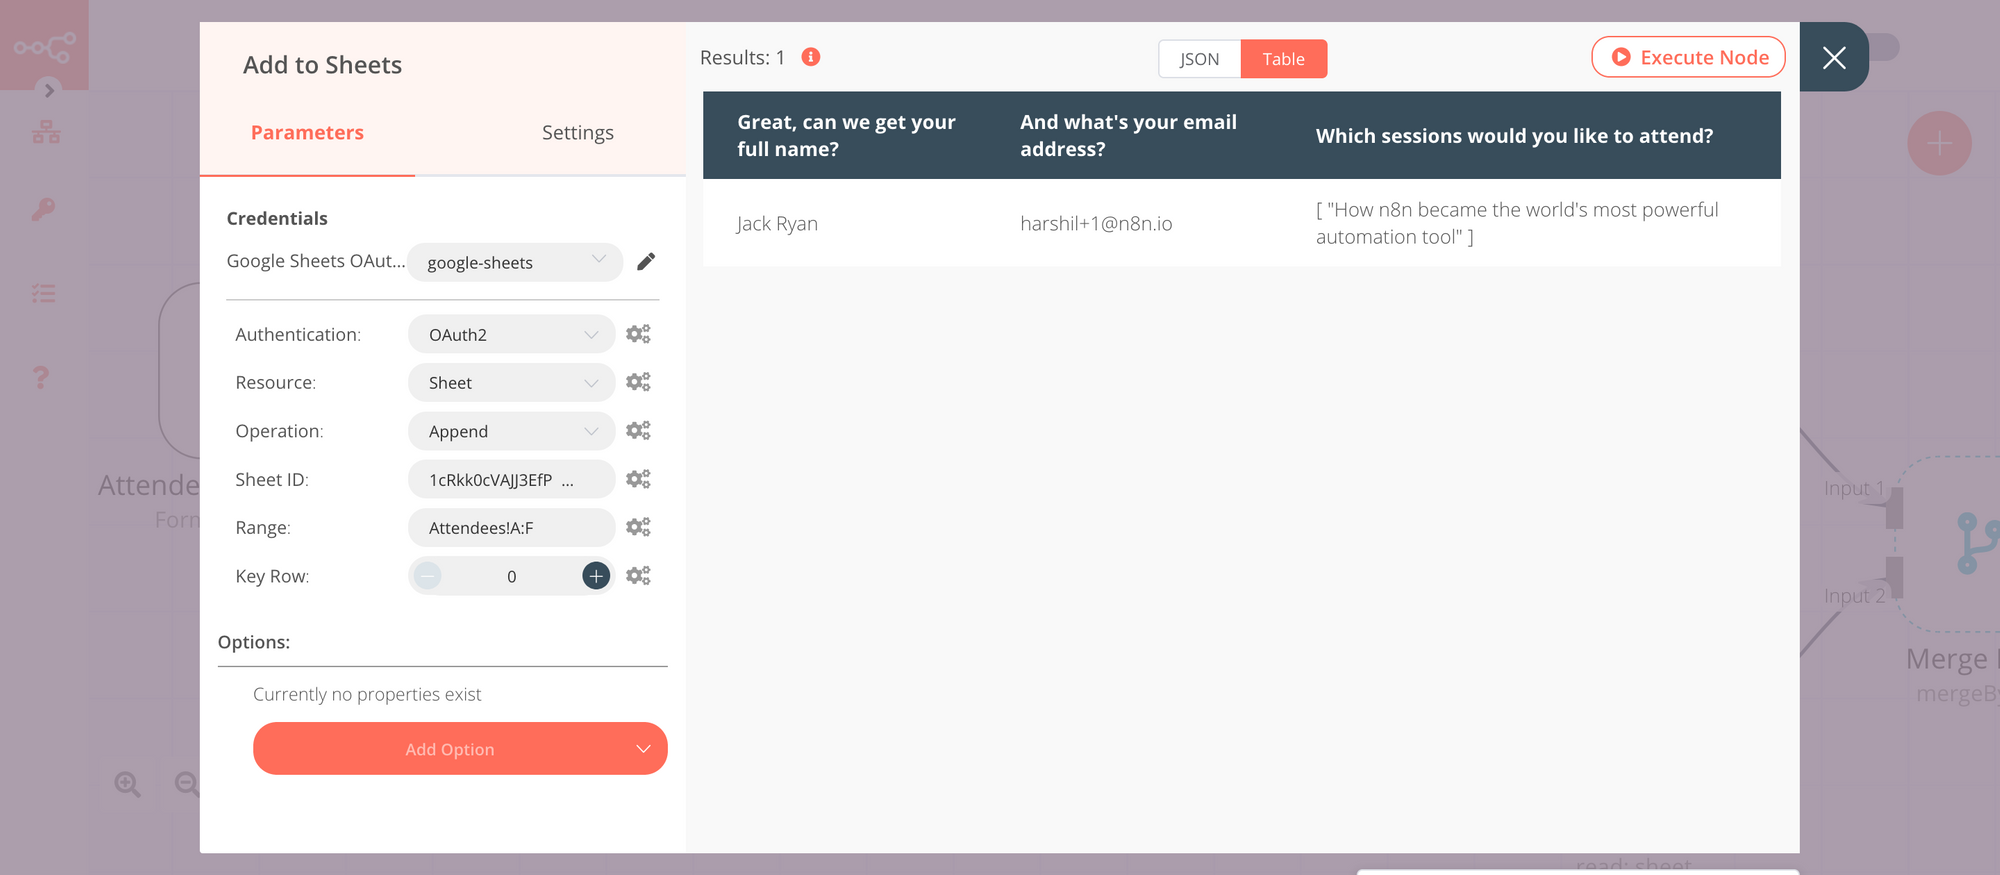
In this stage, we save the data from Typeform via a Google Sheets node so that we can easily access and manipulate this information for other processes outside of n8n, such as planning for emergencies, food and beverages, and seating allocations.
Configure your credentials, select the Append operation and enter your Sheet ID. Specify the Range. The range contains the column references corresponding to those on the spreadsheet. This tells the Google Sheets node where to add the information we just received from the Typeform node.
Here’s a screenshot of the Add to Sheets node.
Here’s a video of the steps I followed for Stage 1 of my workflow for reference.
Stage 2 — Initialize Accounts
Node 3 — Create Account
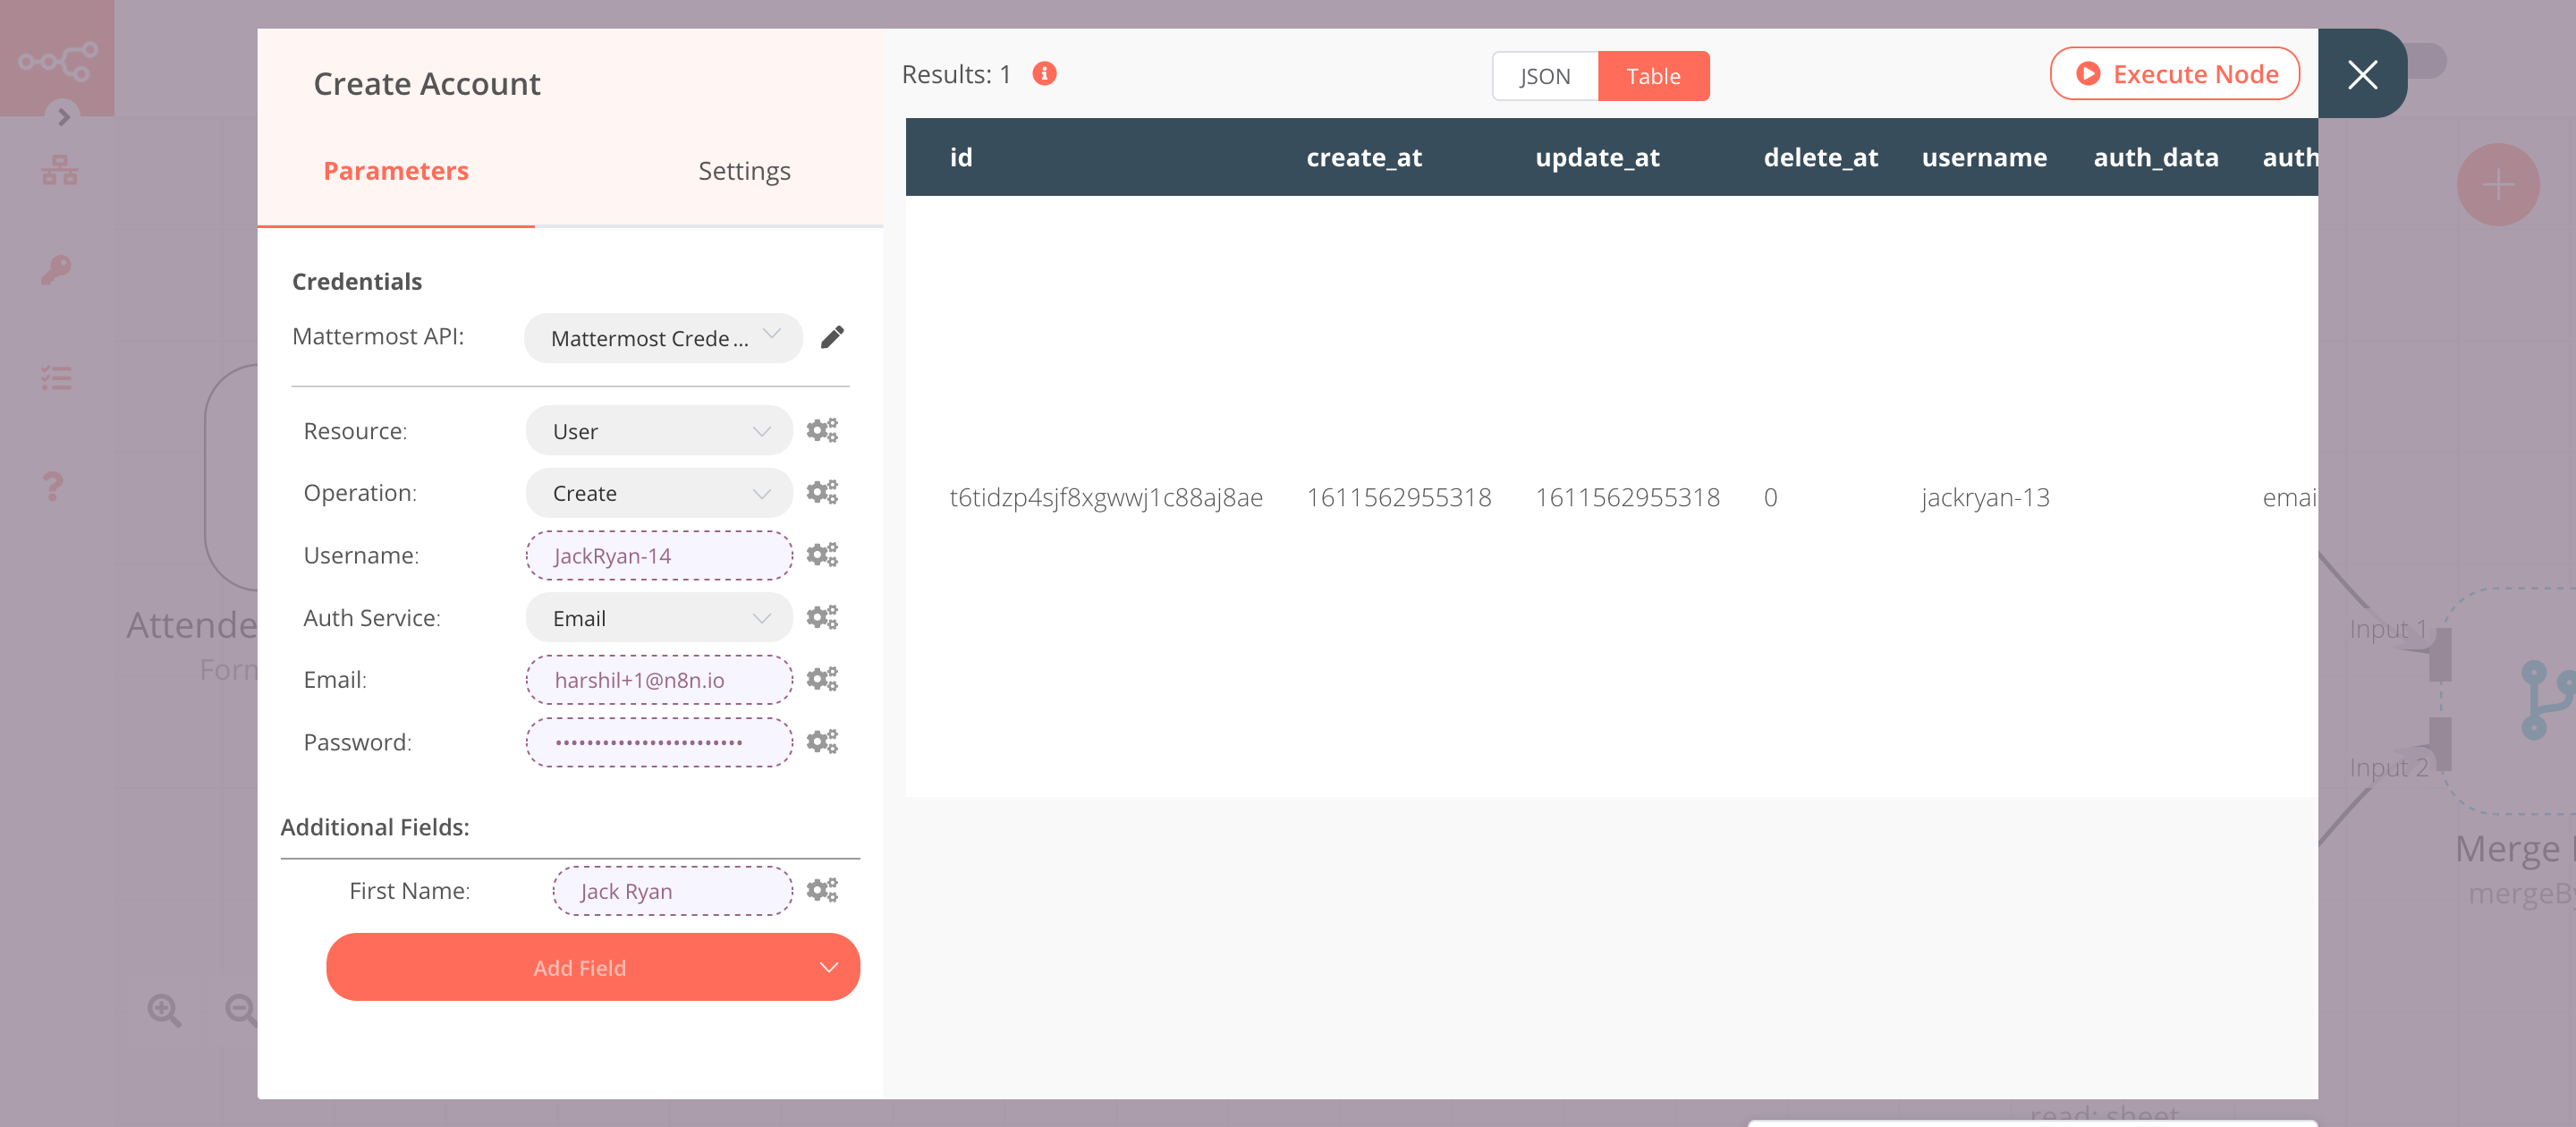
The Mattermost node is used to automatically create a Mattermost user account for the attendees.
Configure your credentials, then use the Create operation with the User resource to create a new user account for the attendees. Use the Email Auth Service in this step with the attendees’ email and a randomly generated password.
Here’s a screenshot of the Create Account node.
Node 4 — Add to Team
Mattermost organizes users into Teams, within which users can create channels to communicate with each other.
We already have a Mattermost account created and ready-to-go for your attendees from the previous step, we just need to add the user to the appropriate team.
Add another Mattermost node and select the credentials you configured in the previous node. Select 'User' from the Resource dropdown list and 'Invite' from the Operation dropdown list.
On your Mattermost System console, make sure that email invitations are enabled.
Here’s a screenshot of the Add to Team node.

Here’s a video of the steps I followed for Stage 2 of my workflow for reference.
Stage 3 — Data Transformation
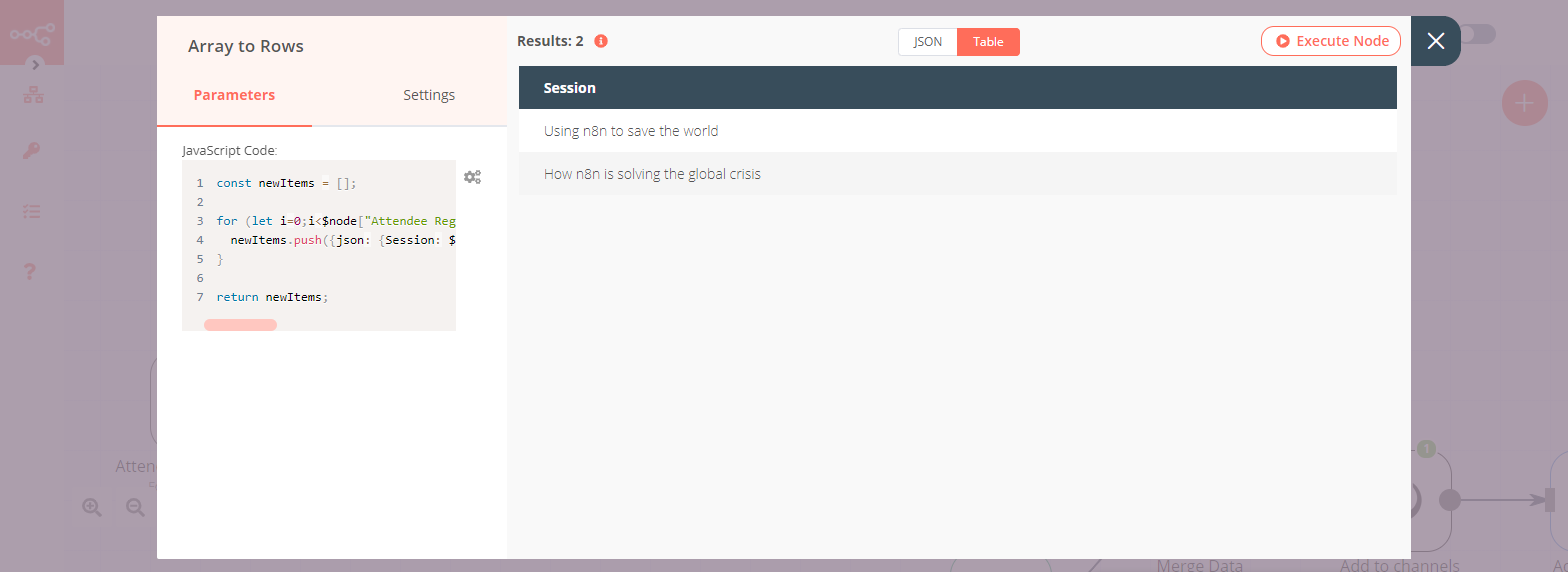
Node 5 — Array to Rows
At this stage, we have all the data we need and a ready-to-use Mattermost account for your attendees. Typeform returns the attendee registration data as an array of values in JSON string format. However, we need to make sure that the data is in a more usable JavaScript array format, as this is what n8n uses.
To transform the array values from Typeform into a more n8n friendly JavaScript array format, we will use the Function node to run the code below, which extracts every session the attendee selects during registration to a new JavaScript array.
const newItems = [];
for (let i=0;i<$node["Attendee Registrations"].json["Which sessions would you like to attend?"].length;i++) {
	newItems.push({
    	json: {
        	Session: $node["Attendee Registrations"].json["Which sessions would you like to attend?"][i]
        }
     });
}

return newItems;
Here’s a quick comparison to demonstrate this.
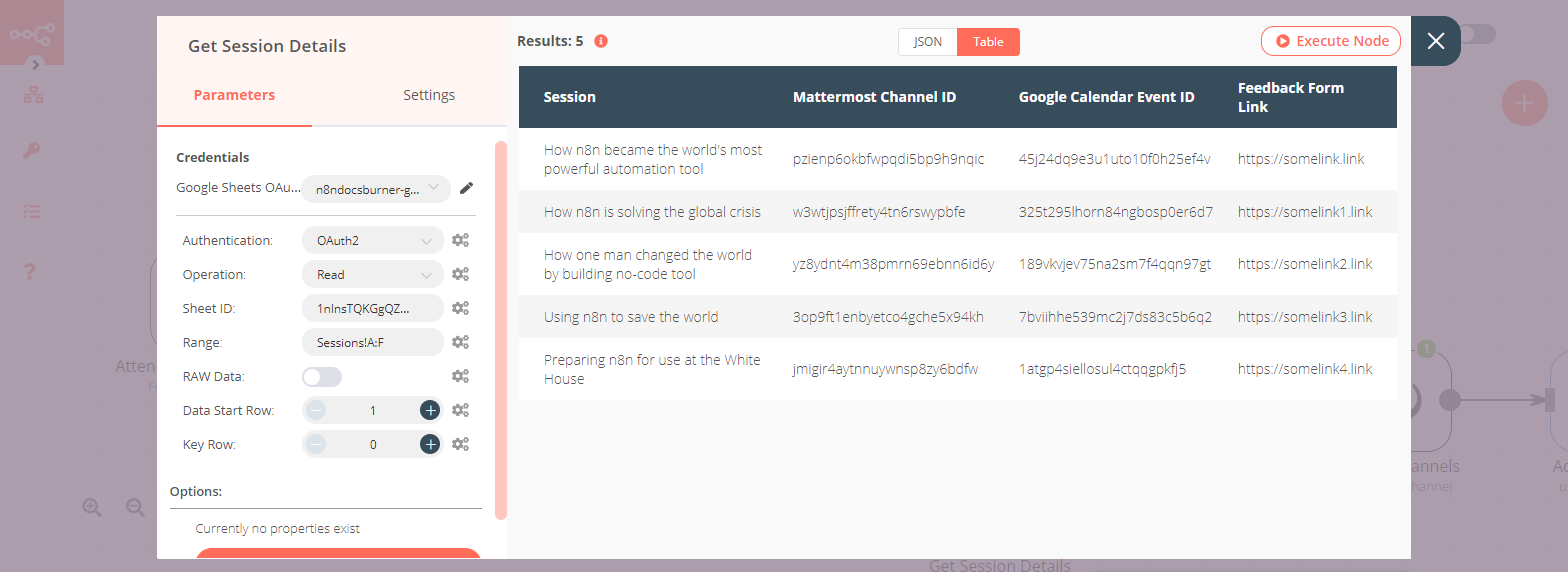
Node 6 — Get Session Details
In this stage, we read the data about the sessions that we entered in the Google Sheet during creation so that we can use it to get the relevant information personalized according to their form responses using the Merge node in the next step.
Configure your credentials, select the Read operation and enter your Sheet ID. Specify the Range. This tells the Google Sheets node where to retrieve the information from.
Here’s a screenshot of the Get Session Details node.
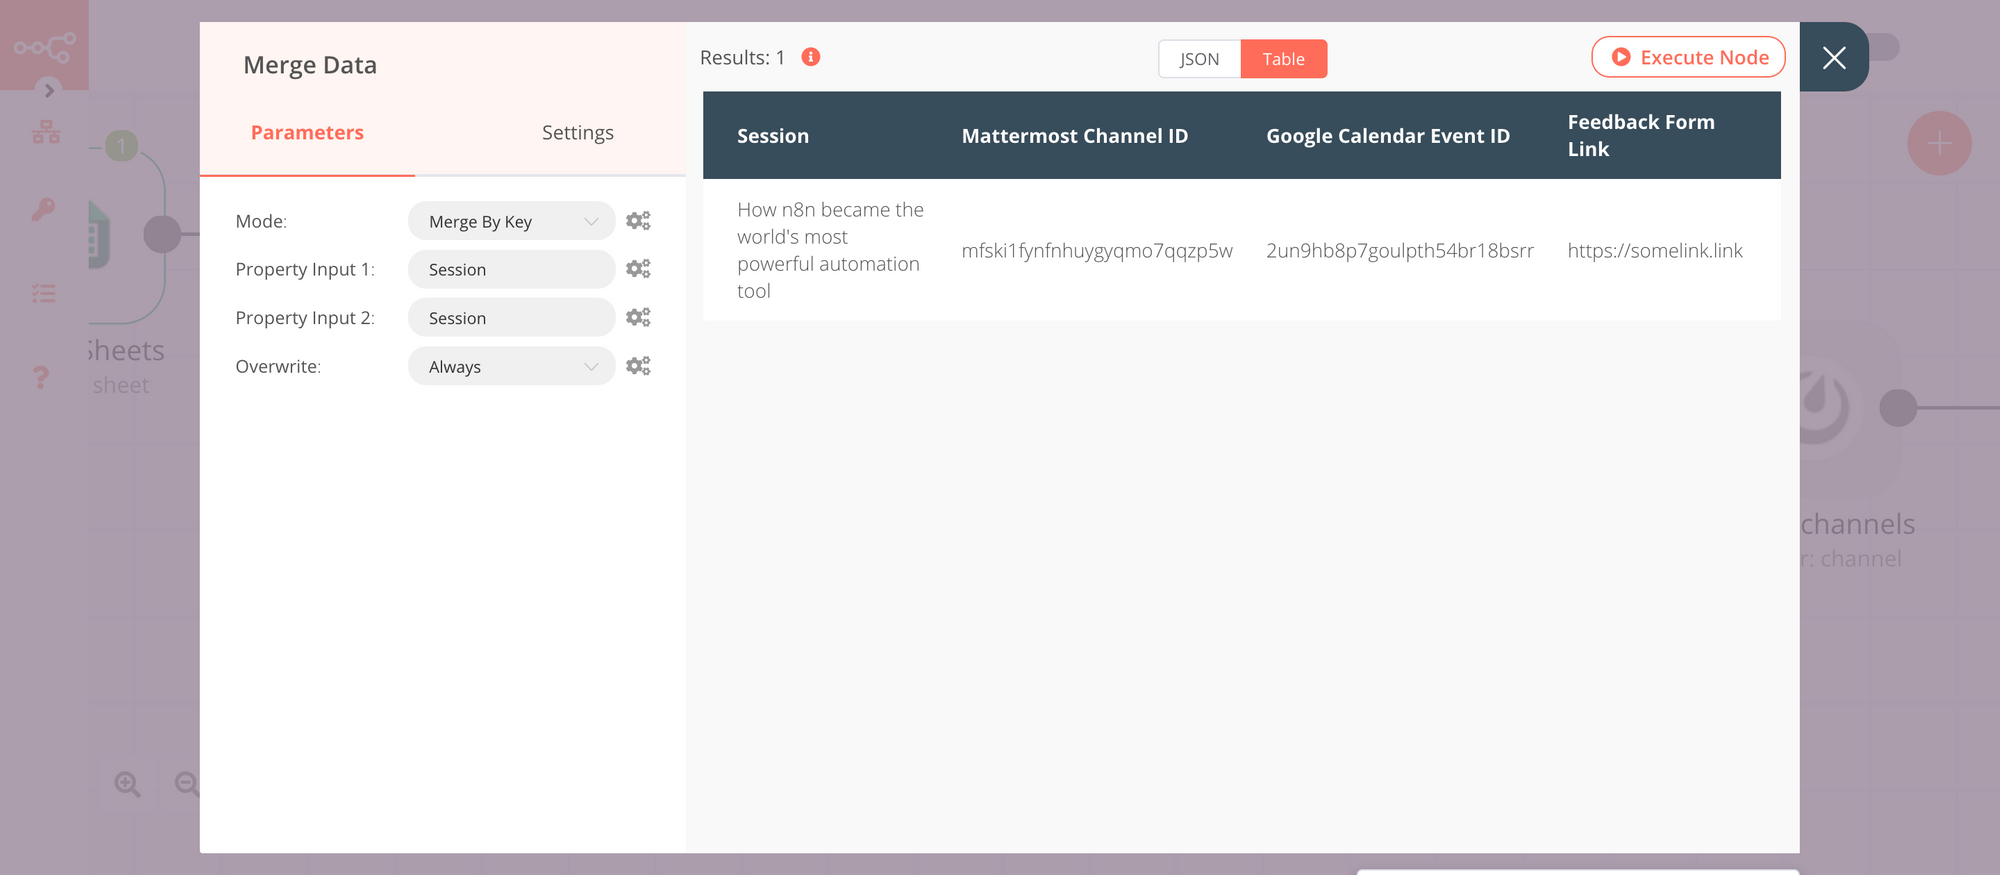
Node 7 — Merge Data
The Merge node in this step does double-duty:
- Combines the information about the attendees and sessions.
- Removes any unnecessary information about sessions that the attendees did not select during registration, keeping only the data relevant to the attendees.
Configure your Merge node in the Merge By Key mode. This will combine all the information that is needed to notify the attendees.
Here’s a screenshot of the Merge Data node.
Here’s a video of the steps I followed for Stage 3 of my workflow for reference.
Stage 4 — Communication
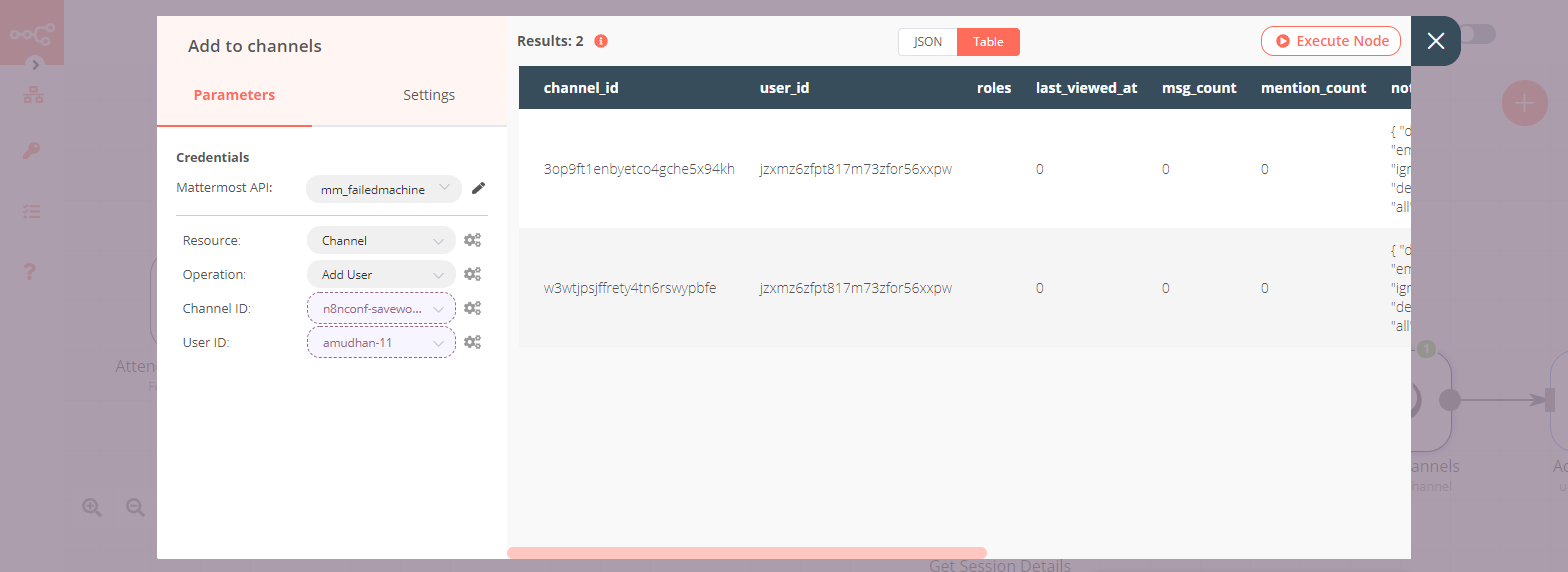
Node 8 — Add to channels
This Mattermost node adds the attendees to the appropriate channels for their sessions.
Configure your credentials, then use the Add User operation with the Channel resource to add the attendee’s Mattermost accounts to the appropriate channels.
Here’s a screenshot of the Add to channels node.
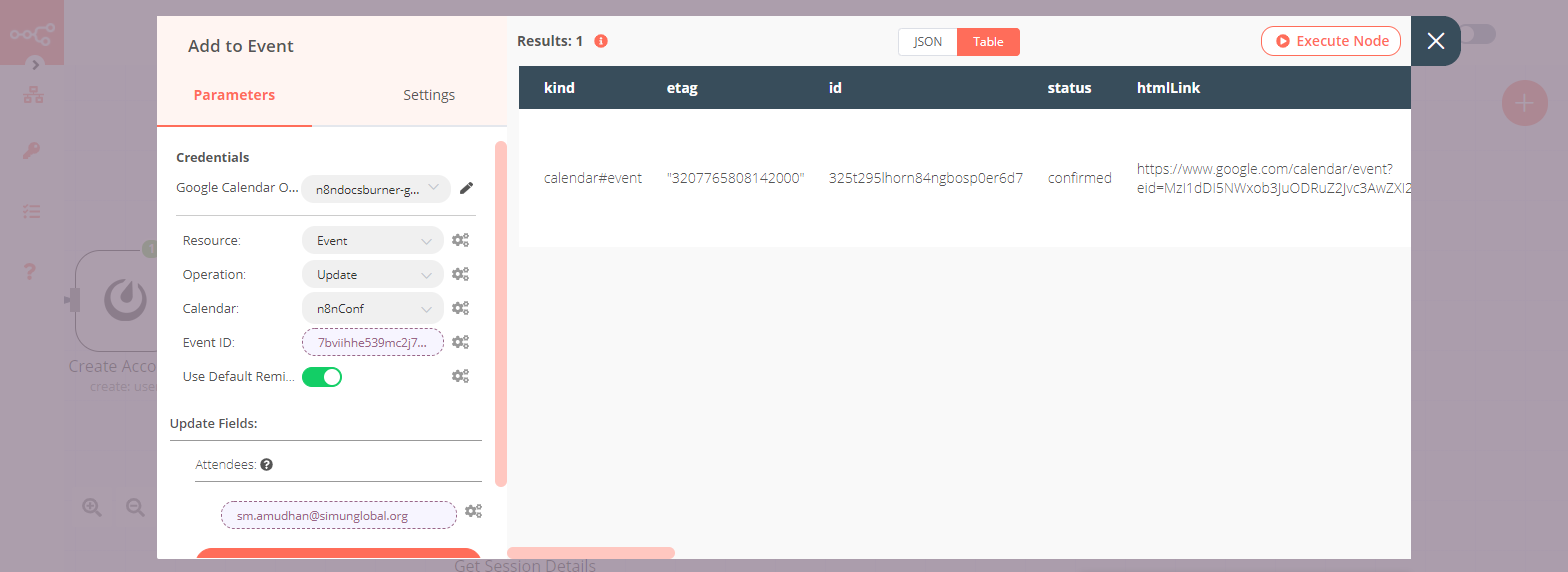
Node 9 — Add to Event
To share the meeting information and time, I scheduled events with Google Meet links on Google Calendar for each session. This Google Calendar node adds the attendees to the appropriate Google Calendar events for their sessions.
Configure your credentials, then use the Update operation with the Event resource to add the attendees as invitees to the event. This will ensure that they get timely reminders and help prevent any conflict clashes.
Here’s a screenshot of the Add to Event node.
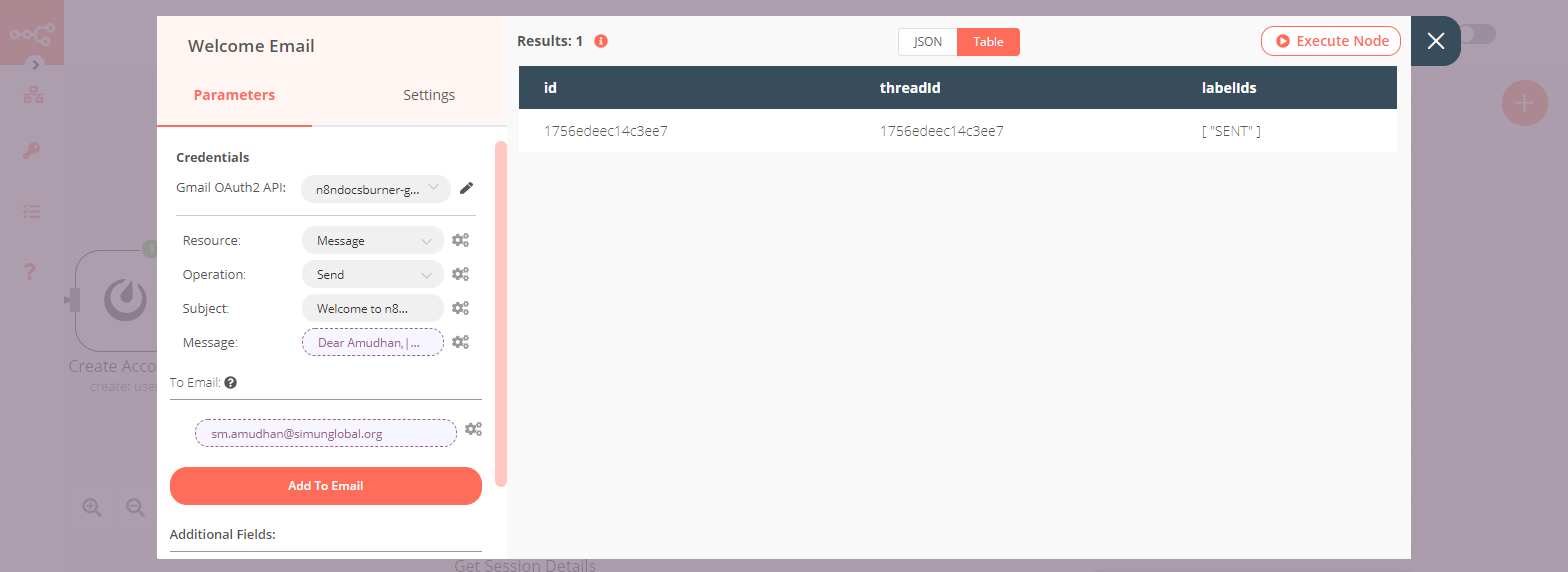
Node 10 — Welcome Email
The final stage in this workflow — we send an email via the Gmail node to the attendees. In this message, I made sure to include a summary of the sessions they have signed up for, where to find the joining information and credentials to the Mattermost server.
Configure your credentials, then use the Send operation with the Message resource to send emails using the Gmail node.
Here’s a screenshot of the Welcome Email node.
Here’s a video of the steps I followed for Stage 4 of my workflow for reference.
And that’s it! That’s the final piece!
Once the workflow is saved and activated, it will automatically repeat this process for every attendee of the conference.
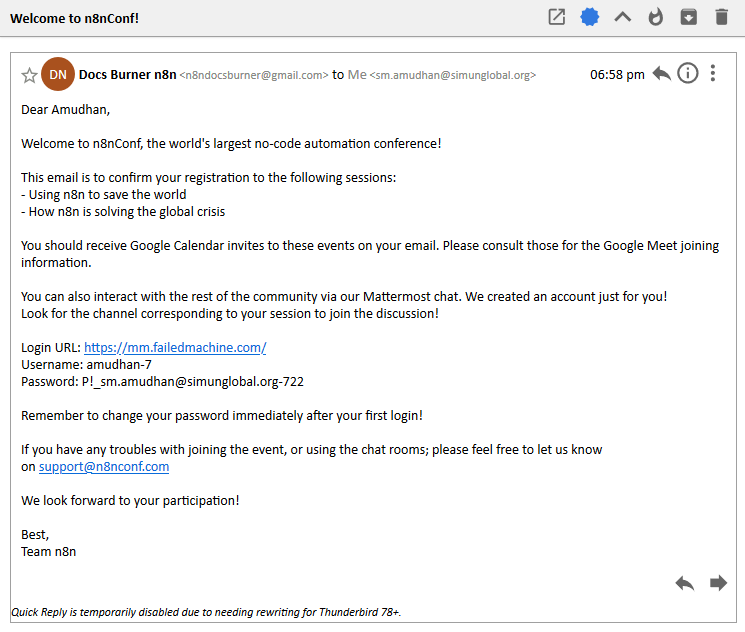
Here’s a screenshot of the message I received while running this workflow.
What Now?
Now that you’ve automated the sign-up process, you can start extending your workflow to include more features, such as adding a Bannerbear node to generate conference passes for each attendee. Another example of extending this workflow would be to use the Twilio node to automatically send SMS confirmation of registration.
However, I decided to take a different route and created a companion workflow that automates feedback collection by sending a message after the end of the conference via Mattermost. You can take a look at that workflow over here.
Conclusion
Congratulations! 🎉 You’ve successfully set up a Typeform, Google Sheets, Mattermost and automated the signup process for your conference using n8n to create accounts, send invites, and notify your attendees with a friendly welcome email.
I’ve helped save countless hours using n8n and its powerful automation workflows to take the pressure off my team. I am constantly trying to use it and automate more facets of the conference such as certificate generation, event reminders, and email drip campaigns.
Which parts of your conference will you automate with n8n?
I’d love to hear about what you’ve built using n8n! Or if you’ve run into an issue while following the tutorial, feel free to reach out to me on Twitter or ask for help on our forum 🧡
Start automating!
The best part is, you can start automating for free with n8n. The easiest way to get started is to sign up for a free n8n cloud trial. Thanks to n8n’s fair-code license, you can also self-host n8n for free.