
Twitter provides a great stream of curated information. You stay up to date on what people are working on, what technologies are important, and connect with people in the industry. To compete in this game, you have to create and post good content as often as possible.
But as a developer, my focus is on things other than frequent content creation. Since I try to work smarter, not harder, another solution was needed.
In this post, I explain how to build an n8n workflow to automate and therefore greatly simplify the content creation process to save several hours a week and create a flow of fresh ideas for tweets.
Table of contents
Prerequisites
n8n
Airtable
OpenAI
Building the tweet generator
Create an Airtable base
Build the n8n workflow
What's next?
Prerequisites
Before we start building the workflow, there are three things you should set up.
n8n
Since our tweet generator bot uses multiple services such as OpenAI and Airtable, we use n8n to connect these services and make our bot functional. The easiest way to get started is to sign up for a free n8n cloud trial. Thanks to n8n’s fair-code license, you can also self-host n8n for free.
Airtable
We use Airtable to revise the content and confirm that the generated tweet should be published. For this, you need to have an Airtable account and get your credentials, which we’ll use in the Airtable node.
OpenAI
We use the GPT-3 model from OpenAI to generate tweets. For this, you need to sign up for the OpenAI API and get your API key.
Note:
- Even though OpenAI offers a free trial budget of $18, using their API is not free. One generated tweet costs about $0.006.
- Even if it's tedious, do yourself a favor and read the TOS of the services you use. OpenAI prohibits you from automatically posting tweets generated by their AI. Therefore, you need to revise the content, like with our Airtable base, and post the tweets manually. You also need to clearly indicate that the tweets were generated by the AI. And finally, this is just an interpretation of the TOS and is subject to change. So take a look at the TOS and the Sharing Publication Terms yourself.
Building the tweet generator bot
After we've set the stage, it's on to the fun part: building the workflow for generating tweets with OpenAI.
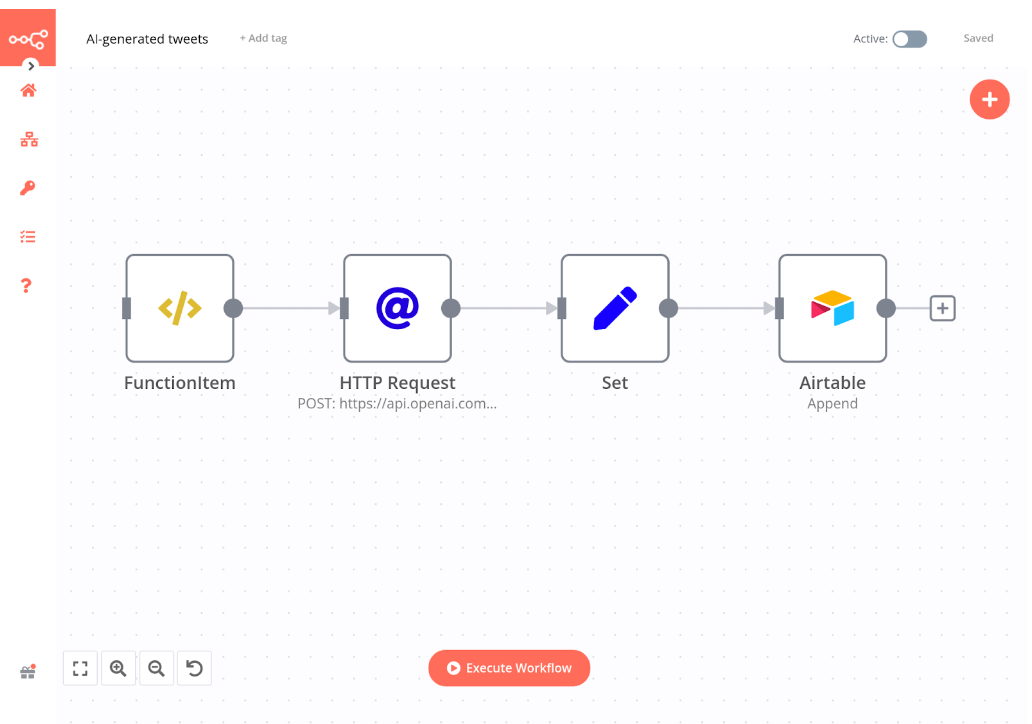
To follow along this tutorial, copy this workflow JSON and paste it in the n8n Editor UI, then follow the instructions below to tweak the configuration of each node.
1. FunctionItem node
The FunctionItem node runs the JavaScript code to select a random hashtag from an array using the math.floor and math.random functions. In the node, write the following code snippet:
// hashtag list

const Hashtags = [
    "#techtwitter",
    "#n8n"
   ];

// random output function

const randomHashtag = Hashtags[Math.floor(Math.random() * Hashtags.length)];
item.hashtag = randomHashtag;
return item;
Under the comment `// hashtag list`, in the hashtags array you can change or add the hashtags you want to use.
2. HTTP Request node
The HTTP request node can be used for any open API. Even for those that are not yet official integrations for n8n.
The node has the following parameters:
- Authentication: Header Auth
Name: Authorization
Value: Bearer <your OpenAI API key> - Request Method: POST
- URL: https://api.openai.com/v1/engines/text-davinci-001/completions
- JSON/RAW Parameters: true
- Body Parameters > Add Expression:
{
"prompt": "Generate a tweet, with under 100 characters, about and including the hashtag {{$node["FunctionItem"].json["hashtag"]}}:",
"temperature": 0.7,
"max_tokens": 64,
"top_p": 1,
"frequency_penalty": 0,
"presence_penalty": 0
}
3. Set node
We need the Set node to adjust the payload we send to Airtable. This is because Airtable will only accept our data if it is correctly labeled with the matching column titles.
Here's how to configure the parameters of the node:
- String
Name: Hashtag
Value > Add Expression: {{$node["FunctionItem1"].json["hashtag"]}} - String
Name: Content
Value > Add Expression: {{$node["HTTP Request1"].json["choices"][0]["text"]}}
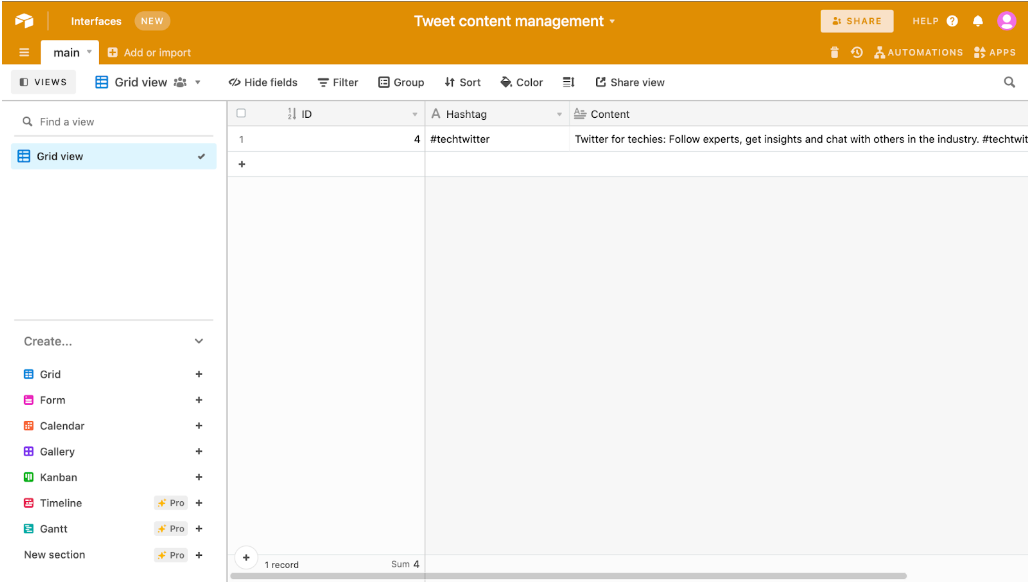
4. Airtable node
First, create an Airtable base (you can use this template) that has three columns of the following data types:
- ID | Autonumber
- Hashtag | Single line text
- Content | Long text
Next, in the Airtable node configure the following parameters:
- Operation: Append
- Base ID: <Your base ID>
- Table ID: main
Finally, run the tweet generator bot by clicking Execute Workflow. You should see how the AI populates your Airtable base with newly generated content!
Here is an example of a tweet generated with OpenAI:
Twitter for techies: Follow experts, get the latest news, and join the conversation. #techtwitter #GeneratedByAI
— Gareth Roll (@GarethRoll) March 14, 2022
What's next?
This article shows you how to create basic AI-driven content on the fly. I'll leave it up to you to expand the Airtable base to fit your Twitter workflow.
You've also looked into n8n. A fun tool to learn modern web development basics, such as using REST API and JavaScript to achieve your objectives.
Have you built a cool workflow, or do you have an idea related to workflow automation that you'd like to share on the n8n blog? Then contact us, we're looking forward to your ideas!