
October is an exciting month, with people across the world looking forward to Halloween or Oktoberfest. But for me, I'm most excited about Hacktoberfest–the month-long celebration of open-source projects. DigitalOcean has been organizing this event for the past eight years with the goal of encouraging the global tech community to support open-source projects.
Hacktoberfest provides a great opportunity on one side for individual developers to apply their skills on real-world projects, and on the other side for organizations to extend their projects with the help of contributors.
However, the popularity of Hacktoberfest also creates spam, unnecessary pull requests, and loads of comments on GitHub issues, which can become overwhelming for the project owners and maintainers.
Our solution to this problem? Automation! In this tutorial, you will learn how to create a no-code workflow that automatically assigns an open GitHub issue to a contributor interested in working on it.
Table of contents
Prerequisites for building the workflow
Workflow for assigning GitHub issues to contributors
1. Trigger the workflow on GitHub events
2. Route the workflow on specific events
3. Handle new GitHub issues
4. Assign the issue
5. Handle new comments on GitHub issues
6. Check if the issue is already assigned
7. Assign an issue to a contributor
8. Add a comment to the issue
What's next?
Prerequisites for building the workflow
- n8n: The easiest way to get started with n8n is to download the desktop app, but you can also sign up for n8n.cloud or self-host n8n.
- GitHub account: To connect the workflow with your GitHub account, follow the steps mentioned in the documentation.
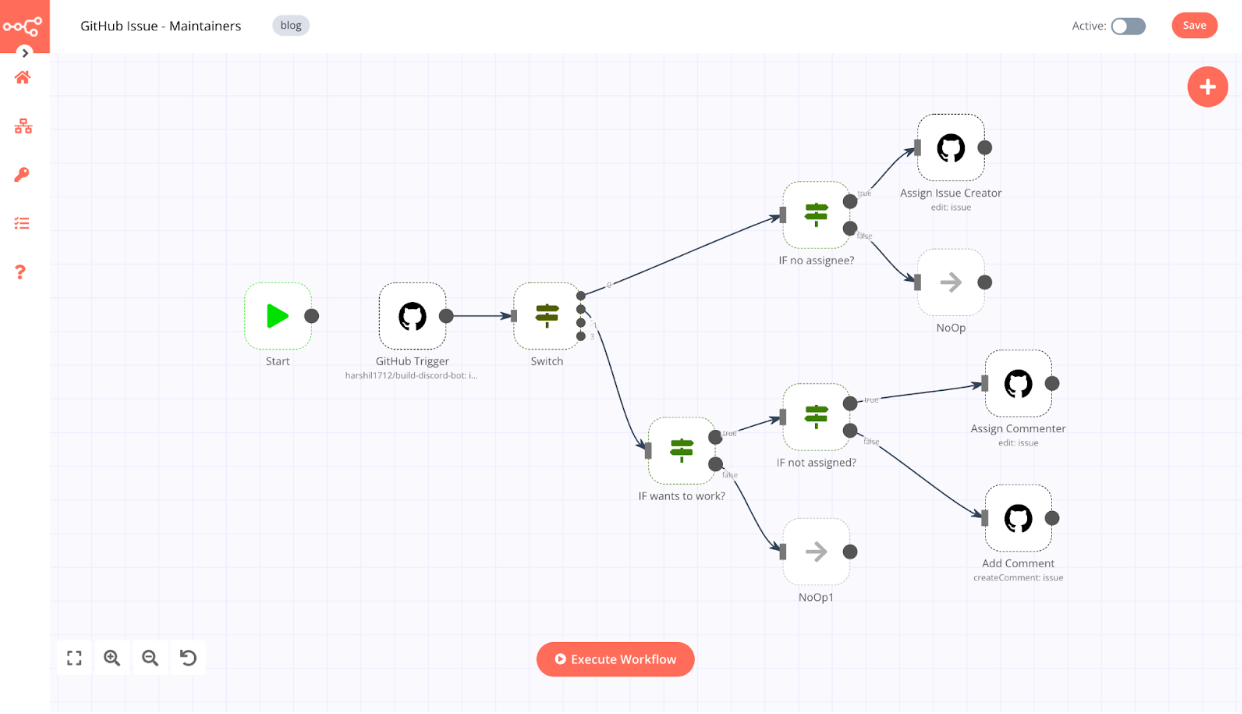
Workflow for assigning GitHub issues to contributors
The general idea of this workflow is to assign an issue to the contributor who is interested in working on it. There are four scenarios that you need to consider:
- A contributor creates an issue and wants to work on it.
- A contributor creates a new issue and doesn't want to work on it.
- A contributor is interested in working on an issue reported by another contributor and no one got assigned to it.
- A contributor is interested in working on an issue opened by another contributor, but someone else has already been assigned to it.
In popular open-source projects, you usually meet all these scenarios. If you're a project maintainer, you know it can become difficult to manage the contributions efficiently, especially during events like Hacktoberfest.
The visual builder that n8n provides helps you classify and handle issues automatically. Let's dive into it!
1. Trigger the workflow on GitHub events
The workflow should run every time someone opens a new issue or comments on an issue. For this, add the GitHub Trigger node and configure the following parameters:
- Authentication: If you're using n8n.cloud, I suggest you select the OAuth2 authentication method. This option allows you to connect the node with your GitHub account without the need to create credentials. Otherwise, you can learn how to create the credentials from our documentation.
- Repository Owner: Enter your GitHub username.
- Repository Name: Enter the name of your repository.
- Events: Select
issue_commentandissuesfrom the dropdown menu.
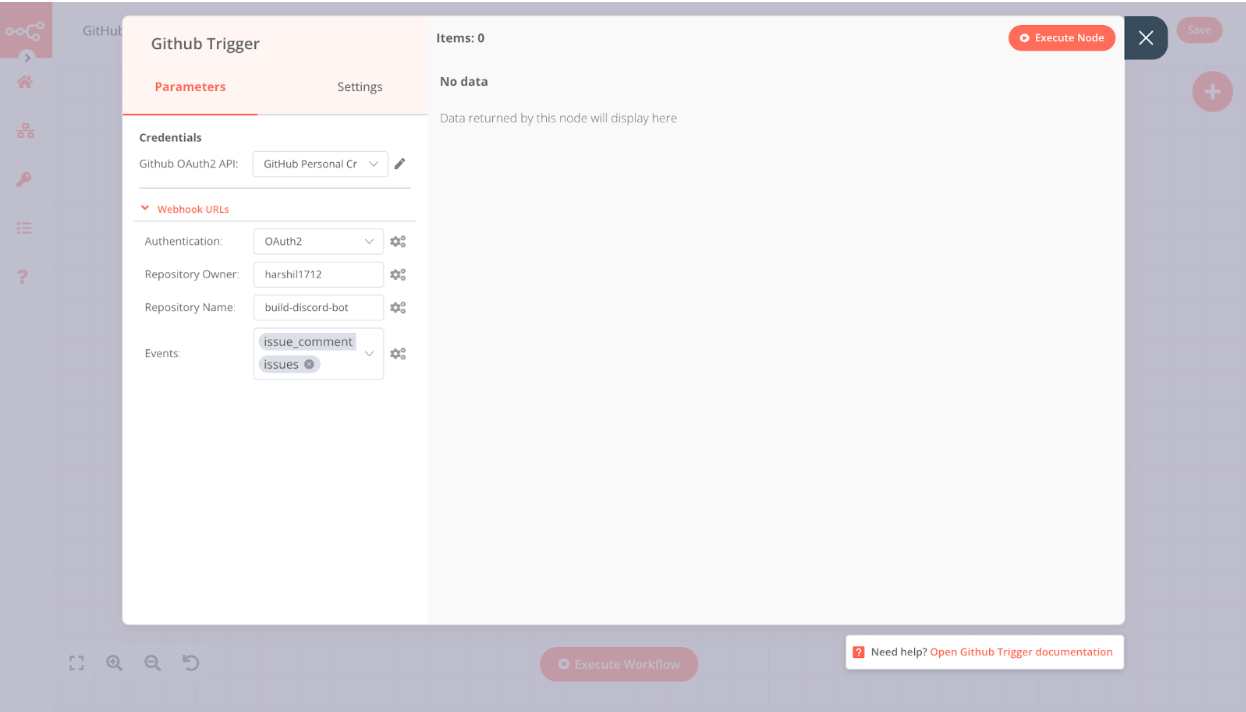
Now the workflow will run when a new issue gets created, closed, or edited, or when a comment gets posted, removed, or edited.
Note: If you want to use this workflow for a repository that belongs to an organization, you will have to use the Webhook Trigger node. Refer to the GitHub documentation to learn to add webhooks to your repository.
2. Route the workflow on specific events
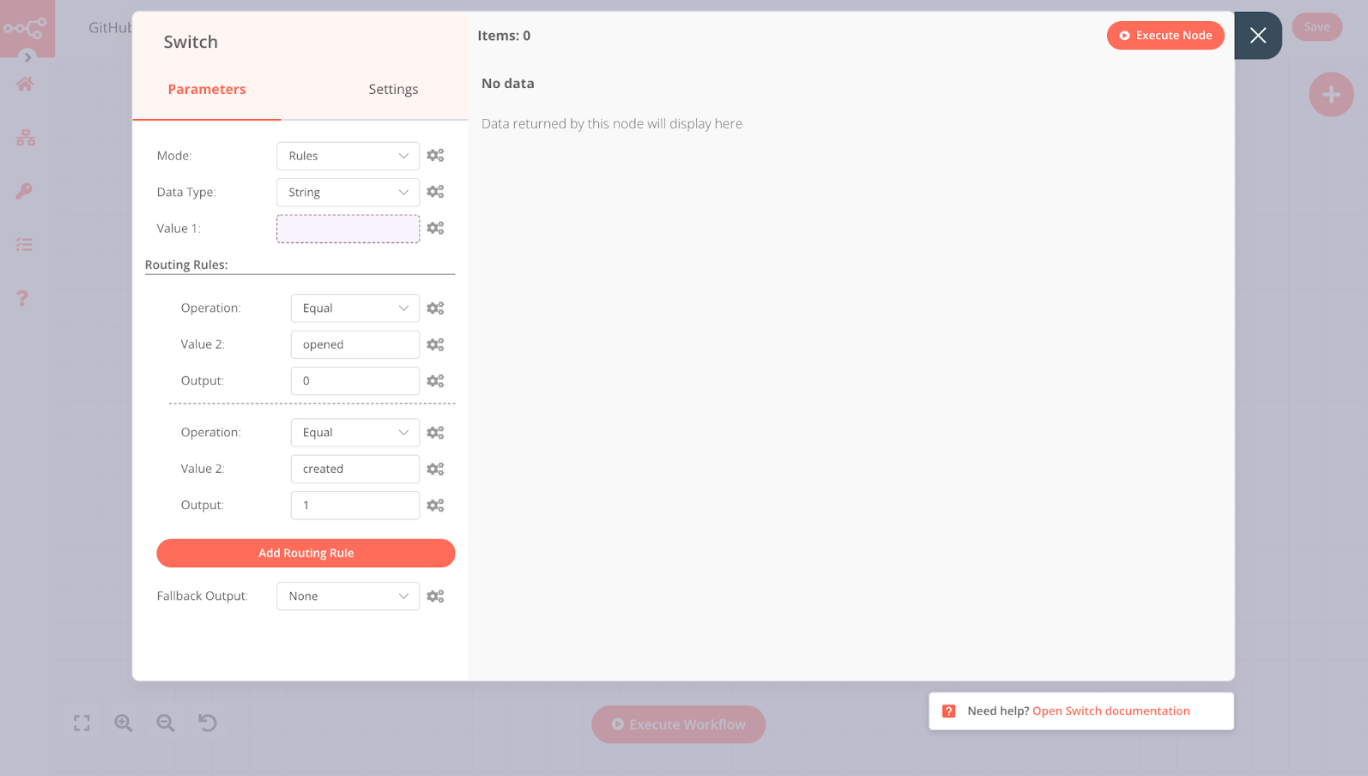
The workflow should continue only when a new issue gets created or a new comment gets posted. To identify these events, add a Switch node and set the following parameters:
- Data Type: String
- Value 1: Use the expression
{{$json["body"]["action"]}}
Click on the Add Routing Rules button. For this workflow, you need two different routes, one to handle each event mentioned above.
The first routing rule handles the scenario where a new issue gets created. For this, configure the following parameters:
- Operation: Equal
- Value 2: opened
- Output: 0
The second routing rule will navigate the data to output 1 of the Switch node when a new comment gets posted on an issue. For this, use the following values:
- Operation: Equal
- Value 2: created
- Output: 1
3. Handle new GitHub issues
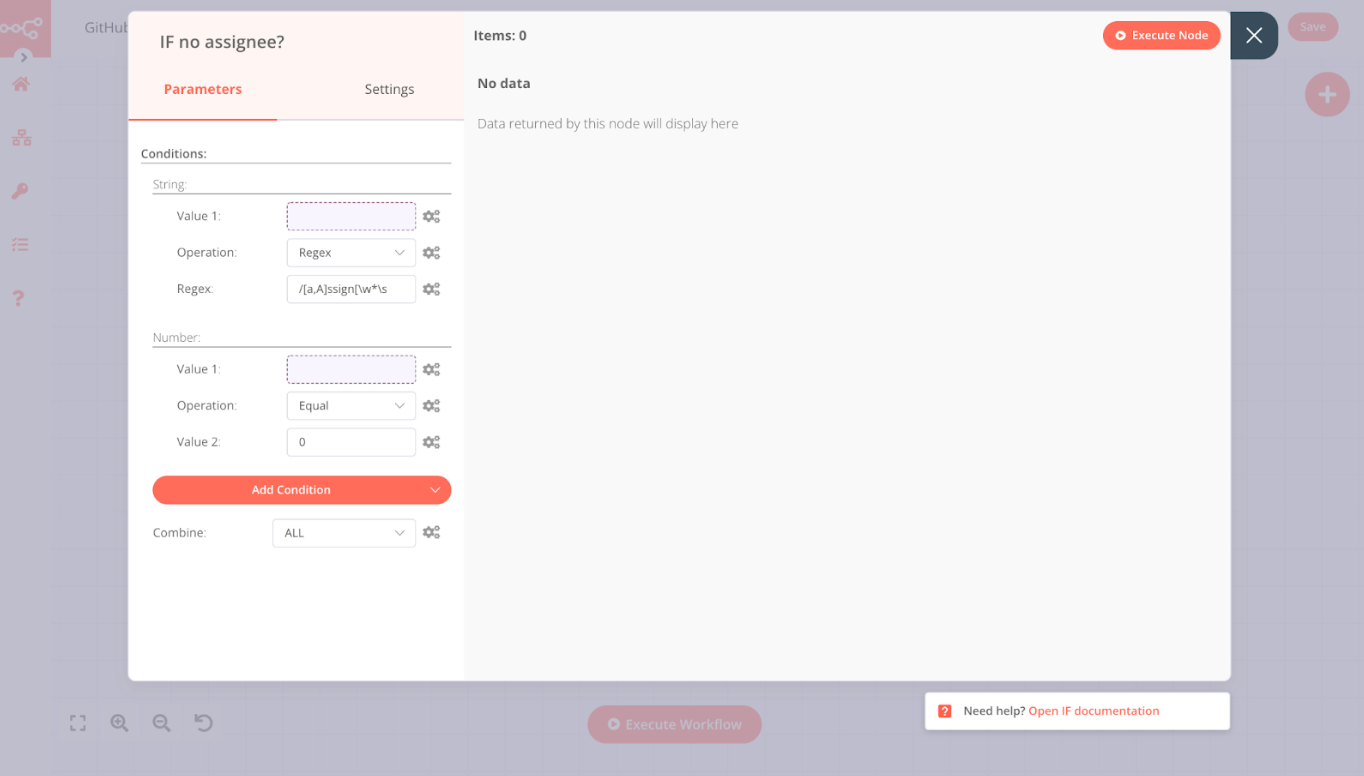
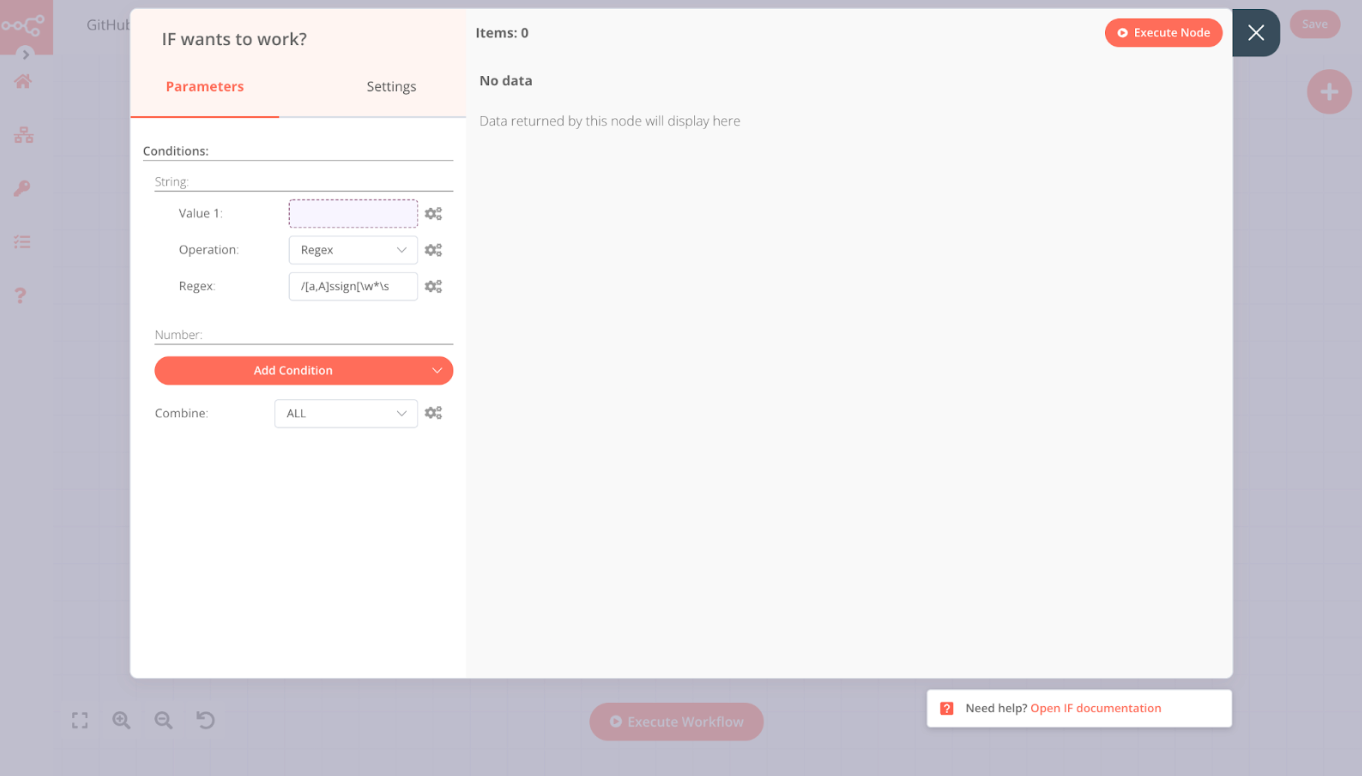
Contributors who open a new issue may or may not want to contribute to it. To make sure that you assign the contributor only if they're interested in working on it, add an IF node connected to the output 0 of the Switch node.
Configure the IF node as follow:
- Value 1: Add the expression
{{$json["body"]["issue"]["body"]}}in the Expression Editor. - Operation: Regex
- Regex: /[a,A]ssign[\w*\s*]*me/gm
The above condition checks if the user wants you to assign them the issue or not.
The workflow should also check if the issue has already been assigned to a contributor or not. For this, add another condition in the IF node. This condition should be of the type Number. Set the following parameters for this condition:
- Value 1: Use the expression
{{$json["body"]["issue"]["assignees"].length}} - Operation: Equal
- Value 2: 0
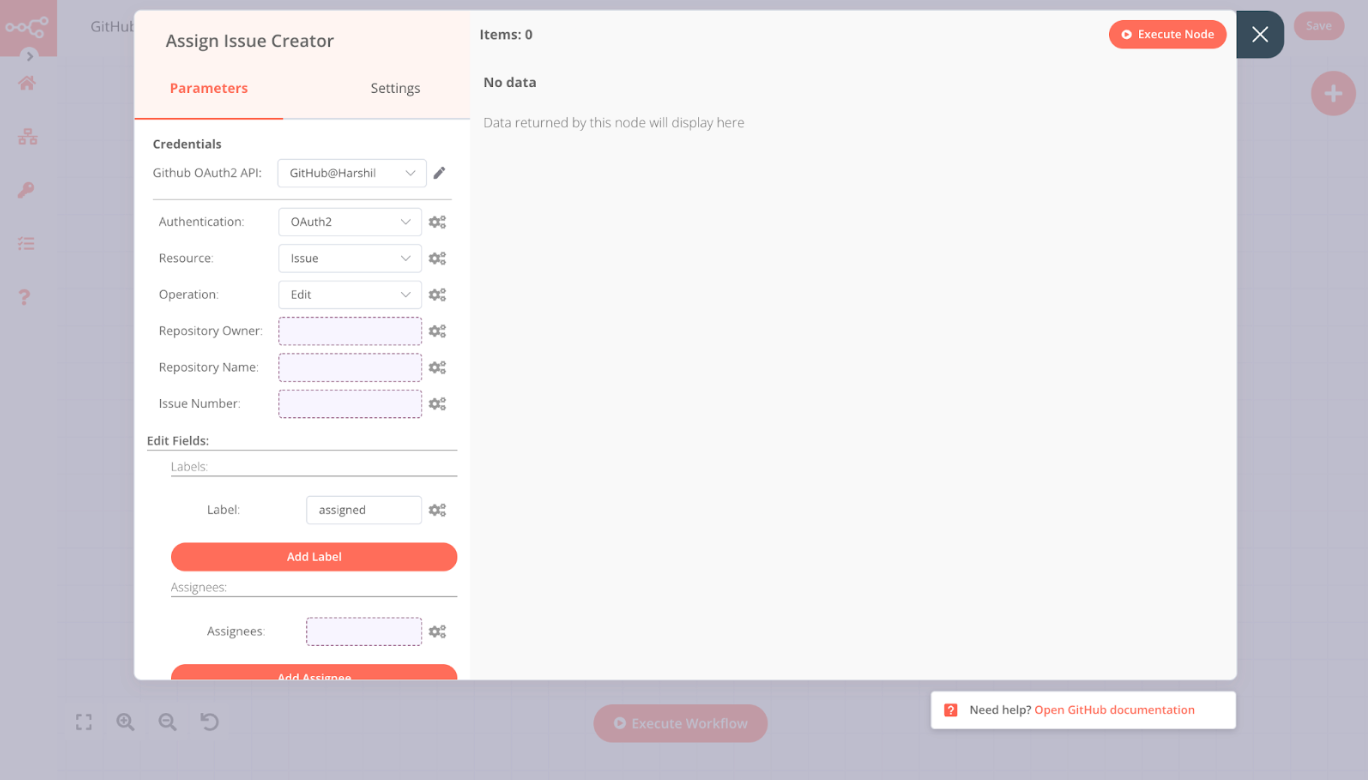
4. Assign the issue
The next step is assigning the issue to the interested contributor and label the issue as assigned. To do this, connect a GitHub node to the true output of the IF node and
Configure the parameters of the node as follows:
- Authentication: Use the authentication that you used in the GitHub Trigger node
- Resource: Issue
- Operation: Edit
- Repository Owner: Enter your GitHub username or use the following expression:
{{$node["Switch"].json["body"]["repository"]["owner"]["login"]}} - Repository Name: Enter the name of the repository you previously used, or use the following expression:
{{$node["Switch"].json["body"]["repository"]["name"]}} - Issue Number: Use the expression
{{ $json["body"]["issue"]["number"] }}
Click on Choose Option To Add, and select Labels. Similarly, add the Assignees option. Configure these parameters as follow:
- Label: Enter
assignedor any other label you want to add to the issue. - Assignees: Enter the following expression:
{{$json.body.issue["user"]["login"]}}
5. Handle new comments on GitHub issues
Your workflow currently handles the following situations:
- Assigning the issue to the contributor who opened the issue if the contributor is interested in working on it
- Stopping the workflow if the contributor who opened the issue is not interested in working on it.
You now have to design the workflow that handles the other two scenarios. For this, add an IF node connected to output 1 of the Switch node. This node will check if the contributor is interested in working on the issue. Set the following parameters for the IF node:
- Value 1: Use the expression
{{$json["body"]["comment"]["body"]}} - Operation: Regex
- Regex:
/[a,A]ssign[\w*\s*]*me/gm
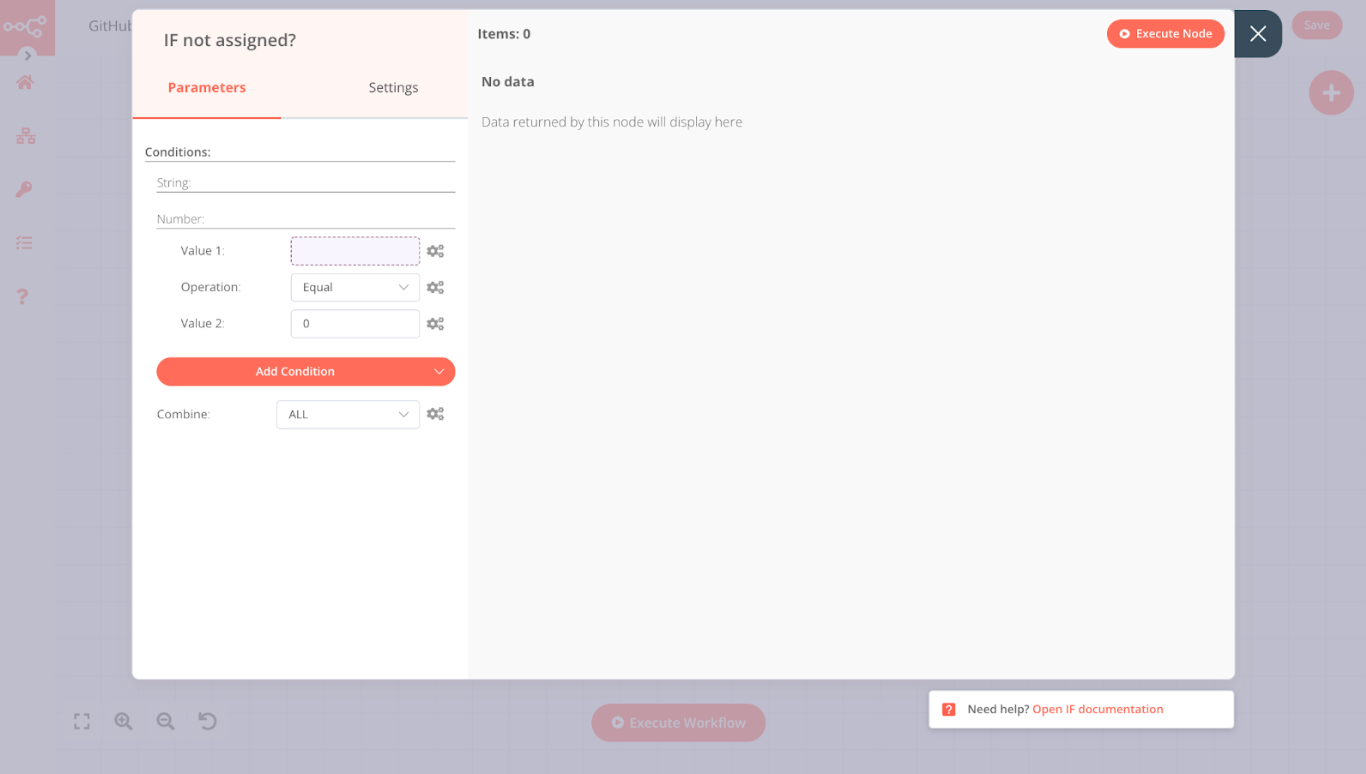
6. Check if the issue is already assigned
If a contributor is interested in working on an issue, the workflow should assign them to the issue, but it should also check if someone has previously been assigned to the issue or not. To check this, connect an IF node to the true output of the previous IF node. Set the IF node as follow:
- Value 1: Enter the expression
{{$json["body"]["issue"]["assignees"].length}} - Operation: Equal
- Value 2: 0
If no one is assigned to the issue, this node returns true, otherwise false.
7. Assign an issue to a contributor
To assign available issues to an interested contributor, connect a GitHub node to the true branch of the previous IF node.
Configure the parameters similarly to the previous GitHub node. In the Assignees fields, use the expression {{$json["body"]["comment"]["user"]["login"]}}. The rest of the parameters should stay the same.
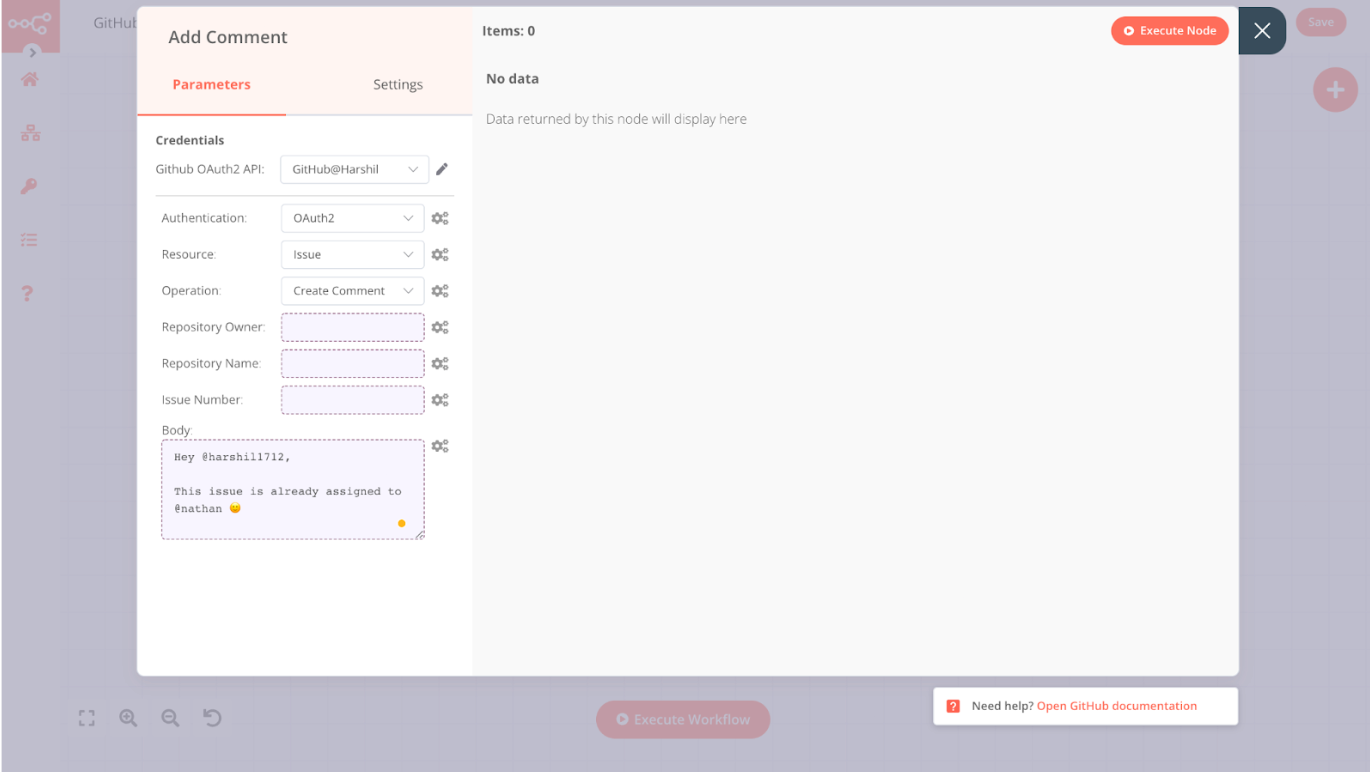
8. Add a comment to the issue
If the issue has already been assigned to a contributor, you should the interested contributor know about it. For this, connect a new GitHub node to the false branch of the IF node. This node will add a comment to the issue.
Set the node parameters as follows:
- Authentication: Similar to the previous GitHub node
- Resource: Issue
- Operation: Create Comment
- Repository Owner, Repository Name, Issue Number: Similar to the previous GitHub node
- Body: Enter the comment body in this field.
This is the last node in the workflow. Now you only need to activate the workflow by clicking on the toggle in the top right corner of the Editor UI. The active workflow will run automatically in production.
What's next?
In this article, you learned to create a no-code workflow that automatically assigns GitHub issues to interested contributors. This kind of automation will help you and our organization maintain your open-source projects–just in time for Hacktoberfest!
Here's what you can do next:
- Build more workflows: There are many other possible automation workflows that could improve your work as a project maintainer and the experience for your contributors. For example, you can build a workflow that checks the progress on an assigned issue to see if the contributor needs help.
- Contribute to n8n: You can work on open issues, create nodes, improve our docs, or write a blog post.
- Read more tutorials: Learn how to build workflows for other automation use cases, for example a no-code CI/CD pipeline with GitHub and TravisCI.
I'd like to know how you are using automation to manage your open-source projects! Feel free to message me on Twitter or discuss in the community forum 🧡 And if you want to get the latest content on automation, subscribe to our newsletter 💌