In this tutorial, we’ll walk you through how we can delegate calendar event creation to an AI Agent using n8n. By the end of the article, you’ll hopefully have the confidence on deploying your own AI Agents in a similar fashion.
This tutorial workflow is designed to help ad-hoc event organisers create and manage team calendar invites for their events via Slack. The typical scenario involves the organiser - say a product manager - posting a message in Slack proposing to gather the team at a local restaurant to celebrate their progress. They will usually ask for interested team members to react to the comment with a checkmark (✅) to RSVP. Our workflow will capture the message and will, through the power of an AI agent, autonomously create a calendar invite populating the title, summary, date and time but also location. Further, when team members respond to the message with the checkmark, we’ll add them to the calendar invite as attendees so they can benefit from the notifications.
Prerequisites
- A cloud-hosted or self-hosted version of n8n.
Easiest way is to sign up for an n8n account. The workflow template in this article can be imported without having to rebuild the steps. - OpenAI account and API key.
Sign up for an OpenAI account. Once obtained, create an OpenAI Credential through the credentials tab. - Slack App and Oauth Access Token. Instructions for setting up Slack credentials can be found here. You’ll also need to set the following scopes for the token:
Channels:history, channels:read, chat:write, groups:history, groups:read, im:history, im:read, mpim:history, mpim:read, reactions:read, reactions:write, search:read, users:read, users:read.email
- Google Calendar OAuth. As we’ll be writing directly to the calendar, we’ll need to have Google OAuth Credentials. Instructions for Google Calendar credentials can be found here.
Step 1. Create an Events Channel in Slack
In this tutorial, we’ll create a new channel called #n8n-events, however you can use an existing channel if you prefer. This will be the channel our workflow will monitor for new messages and updates to messages.
We’ll also introduce a new rule; we’ll only capture messages which are tagged with the calendar (📅) reaction. Since we are able to filter based upon this in our workflow, it helps simply the process of identifying which messages are actually invitations.
- As with all monitoring workflows, create a Scheduled Trigger and set the interval to 1 hour. We can define a longer interval as we don’t expect this workflow to handle urgent events nor urgent responses. Tweak this to best suit your team.
- Add a Slack node to trigger and select the “Search” operation for the “Message” resource. Set the filter to the following in:#n8n-events has::calendar:
This will fetch all applicable invitation messages - if you see no results, you may need to add one to the channel and tag it with the calendar (📅) reaction.
Step 2. Create a new Invite from Message
We’ll need to process each invitation message separately and to avoid duplicating calendar events, we’ll need a way to track which invitation message has already been processed. We can do this in many ways but for our tutorial, we’ll look for an automated reply to the original invitation message which we’ll create later. We expect that if this automated reply exists, it will contain a calendar event id which means the message was already processed and we can therefore skip the creation step.
- Add a Slack node to fetch all replies to our invitation messages. In the node’s settings, set the Resource to “Channel”, Operation to “Replies”, Channel to “#n8n-events” and the Message Timestamp to `{{ $json.ts }}` which is our message ID.
- With the replies, we’ll need to calculate a couple of things to determine if the invitation has a valid bot reply containing our event ID. This bit is unfortunately a bit tricky and does require a little code to perform this logic.
- Once we’ve managed to determine if a calendar event needs to be created ie. by checking that no event ID exists, we can move on to actually creating the calendar event.
Step 3. Generate the Calendar Event with AI Agent
In our tutorial workflow, we’ve introduced a branch dependent on whether a new event needs to be created. One branch will proceed to create the calendar event whilst the other will update the attendees list if the event already exists. We’ll start with creating the calendar event branch first.
Here is where we will introduce our AI Agent. Given the original invitation message which may have been kept short for brevity, there’s a lot we can do to enhance the data contained within to create a more comprehensive invite.
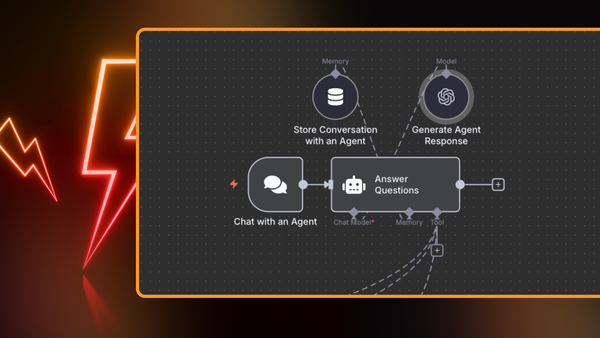
- Let’s add an AI Agent node next, and add an OpenAI subnode for the model.
- Under the tools subnode options, we’ll use the built-in tools: SERP search and Wikipedia. We could also add custom tooling for our agent but this is out of scope of this tutorial for now.
- Next, we’ll do some update the prompt section in the AI Agent node to include the original invitation message and the following instructions:
- Summarise and generate a title and description and ask to make both “eye-catching”!
- Extract the start and end dates and times for the event.
- Determine the location.of the event and use our attached SERP search tool and Wikipedia to get the exact address.
- Finally, toggle the “Require Specific Output Format” option in the AI Agent node and add the “Structured Output Parser” subnode. The purpose of this subnode is to return the final output of the Agent in a JSON format rather than prose so we can plug this straight into our next action.
Step 4. Send the Generated Event to Google Calendar
Now that we have all the properties of our generated event, we simply need to use them to construct a call to the Google Calendar API to create the actual event in our calendar.
- Add a Google Calendar node and set the resource to “Event” and the operation to “Create” and ensure the Calendar dropdown is set to your desired calendar.
- Fill in the rest of the fields with the data provided by the AI Agent node which will include the title, summary, start and end dates and times and location.
Finally, to acknowledge that this invitation has now been processed, we will create an automated reply to the original invitation message in Slack which will contain our event ID.
- Add another Slack node with resource set to “Message” and operation set to “Send”. Set “Send Message to” to “channel” and use the same channel ID as the original invite message.
- Fill in the message text with anything you like but be sure to include your event ID. For this tutorial, we used the following format #event{{ $json.id }}.
- Finally, click on options at the bottom and select the option “reply to message”. In “Message Timestamp to Reply To” set this to the invitation message “ts” or “thread_ts” value. Leave the “reply to thread” toggle switched to the off position.
And that’s it for part 1! We’ve learnt how to use n8n’s Agent AI node to generate events based on arbitrary messages by allowing the AI to fill in key information based on hints within the original invitation message, saving a human organiser a considerable amount of time and effort.
Part 2
In part 2, we’ll go further with our alternative branch where the event does already exist. In this branch, we want to handle the case where any team member that reacted to the invitation message with a check-mark (✅) emoji to signify their desire to join the event, is added automatically as an attendee to the calendar event.
Step 5. Fetch Team member Reactions to Invitation Slack Message
In this step, we’ll need to fetch 2 pieces of data; the existing event so we have a reference to update it later and all team member reactions found on the invitation slack message.
- To get the existing event, add a Google Calendar node to fetch the calendar event using the event ID extracted from the automated reply when we created the event. Do this by setting the resource to “Event” and the operation to “Get”. Enter the Event ID accordingly.
- To get the team-member reactions, add a Slack node setting the resource to “Reaction” and operation to “Get”. Set the channel ID to that of the invitation message and the “Message Timestamp” to the ts value of the invitation message.
- Next we’ll need to filter for check-marks (✅) and extract a list of the users they belong to. Use the Split Out and Filter nodes for this purpose.
- Once this is done, you should be left with a list of Slack user IDs. We'll use these to create attendees for our event.
Step 6. Resolve User’s Email Address and Add Them to Our Event
To get the user’s email address, we’ll need to query Slack’s user API with the user IDs we obtained from the last step. Note, this API does require elevated permissions which means your Slack App for your token may need to be installed by an Administrator.
We’ll do one last check to compare the team member’s email address with the existing attendee list of the calendar invite. We’ll only add the attendee if they are not already added.
- Add a Slack node and set the resource to “User” and the operation to “Get”. Pass in the user IDs obtained in the previous step. On success, we should get the user’s profile which includes their email address.
- Next, add an IF node where we’ll use the existing event attendee list we fetched in Step 5 to filter out the current list of email addresses. This should leave us with a list of new attendees to join the calendar event.
- Finally, add a Google Calendar node and set the resource to “Event” and the operation to “Update”. Set the event ID to the existing event ID found earlier in the workflow.
- In the “Update Fields” section of the Google Calendar node, click on Add Field and select Attendees. Here is where we add the new attendee’s email address.
And that’s it for Part 2! In this second part, we learned how we can extend n8n workflows incrementally to add more value over time.

Wrap Up
In this tutorial, we’ve automated a simple events Slack channel into an AI-powered events management system which is sure to increase engagement and attendance for internal company gatherings or community building.


