Whether you're a seasoned veteran or new to the IT world, you're likely well aware of the importance of data transformation. While JSON may be the favorite amongst web services, industries such as finance and healthcare still rely heavily on XML. As a result, the ability to convert SQL to XML and vice versa is a crucial skill in the corporate environment.
In this in-depth tutorial, we'll dive into the intricacies of working with XML and SQL using the power of n8n, a workflow automation tool. We'll walk you through every step of the process:
- How to export SQL data into XML format;
- How to import an XML file back into an SQL table;
- We'll briefly touch on the different ways to submit the XML file;
- And finally, how to present the XML data in a visually appealing way.
This extensive tutorial aims to provide a unified, platform-independent approach to converting SQL data to XML, eliminating the need for platform-specific, esoteric SQL syntax.
But before we dive in, let's set the stage.
What is n8n?
n8n is a source-available (not open-source!) flexible workflow automation platform for technical professionals who want to build complex workflows faster. Connect everything to anything with hundreds of dedicated nodes or configure a generic HTTP Request.
What is XML?
XML, or eXtensible Markup Language, is a widely used format for exchanging information between different platforms. XML is highly adaptable, allowing for easy extensions. One of the many advantages of XML is that it is both human-readable and machine-readable, accommodating both end users and systems. While a newer JSON format has gained widespread adoption in web development, XML is still used in corporate platforms or required for data transfer in regulated industries. Here is an example of a very simple XML file:
<?xml version="1.0" encoding="UTF-8"?>
<note>
  <to>Tove</to>
  <from>Jani</from>
  <heading>Reminder</heading>
  <body>Don't forget me this weekend!</body>
</note>
How do I convert SQL to XML?
Different SQL engines provide their own ways of exporting SQL to XML. For example:
- MS SQL Server has a dedicated FOR XML AUTO clause.
- PostgreSQL uses a different approach via several XML functions.
- Finally, MySQL has a special option in the mysqldump CLI command to export an entire SQL database or specific tables to XML format.
As you can see, each SQL engine uses its own way of exporting to XML. How great it would be if there was a single conversion tool that works with all types of SQL data.
And such a tool does exist!
With n8n, you no longer have to grapple with separate SQL interfaces and XML converters; instead, you get an all-encompassing platform that combines both.
How to export SQL to XML with n8n?
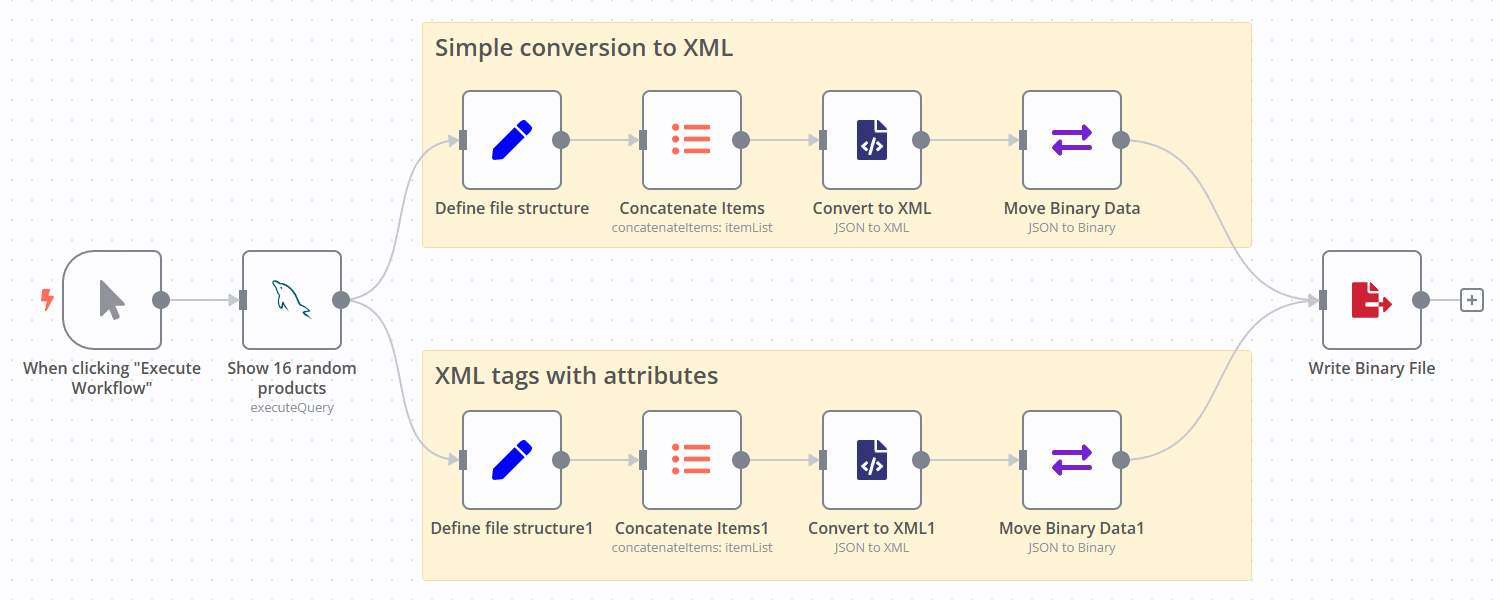
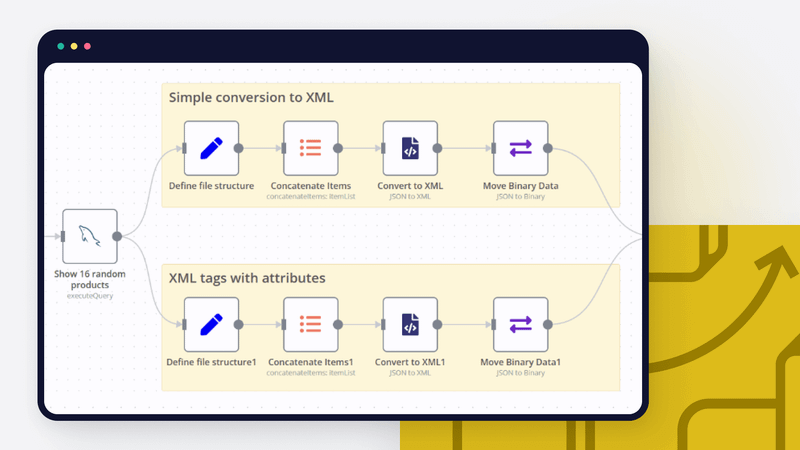
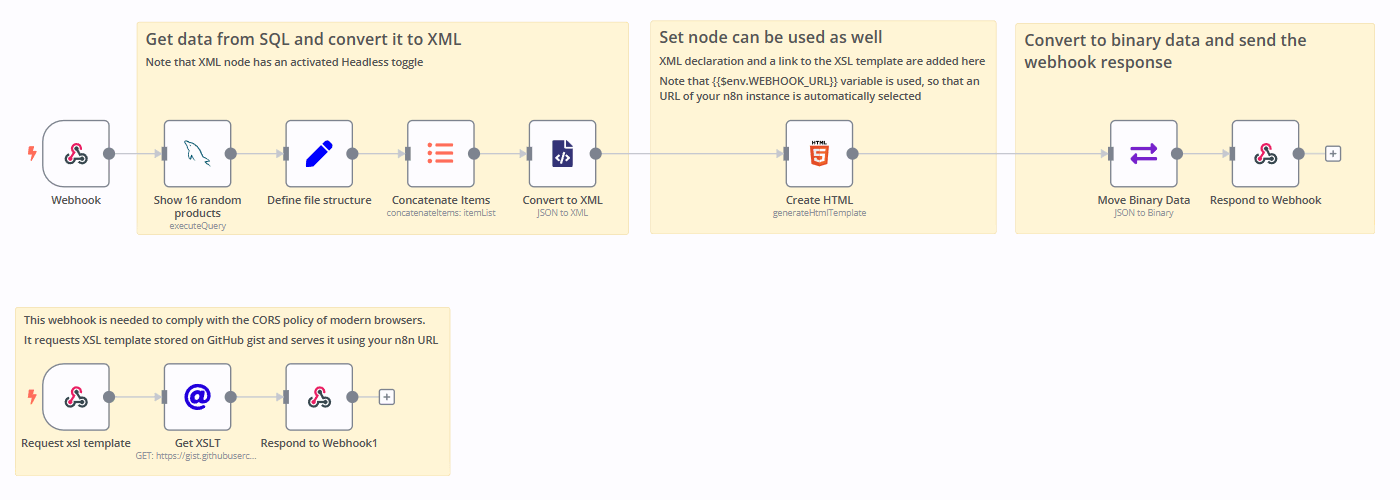
Let's look at this workflow for exporting SQL tables to XML format.
Step 1. Extract data from SQL
Firstly, there is an SQL node that fetches 16 random records from the database. If you already have some data available in SQL, go ahead and put a corresponding node (n8n supports various SQL engines via dedicated nodes).
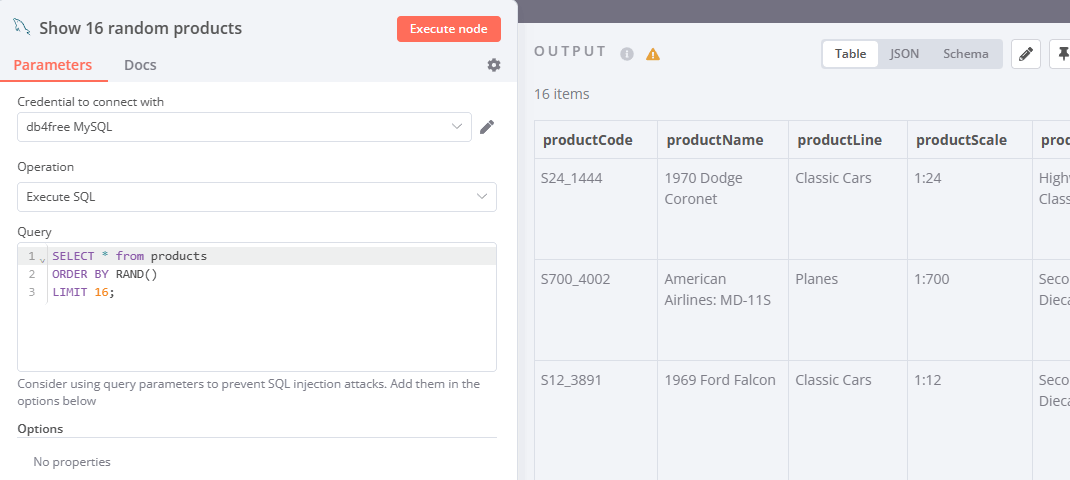
After configuring the database connection, fetch several records using the following SQL query:
SELECT * from products
ORDER BY RAND()
LIMIT 16;
Step 2. Create a simple XML file out of SQL table
Next, let’s create a simple XML file from this data. This corresponds to the top part of the workflow.
Let's add a Set node and define some string variables as shown in the screenshot.
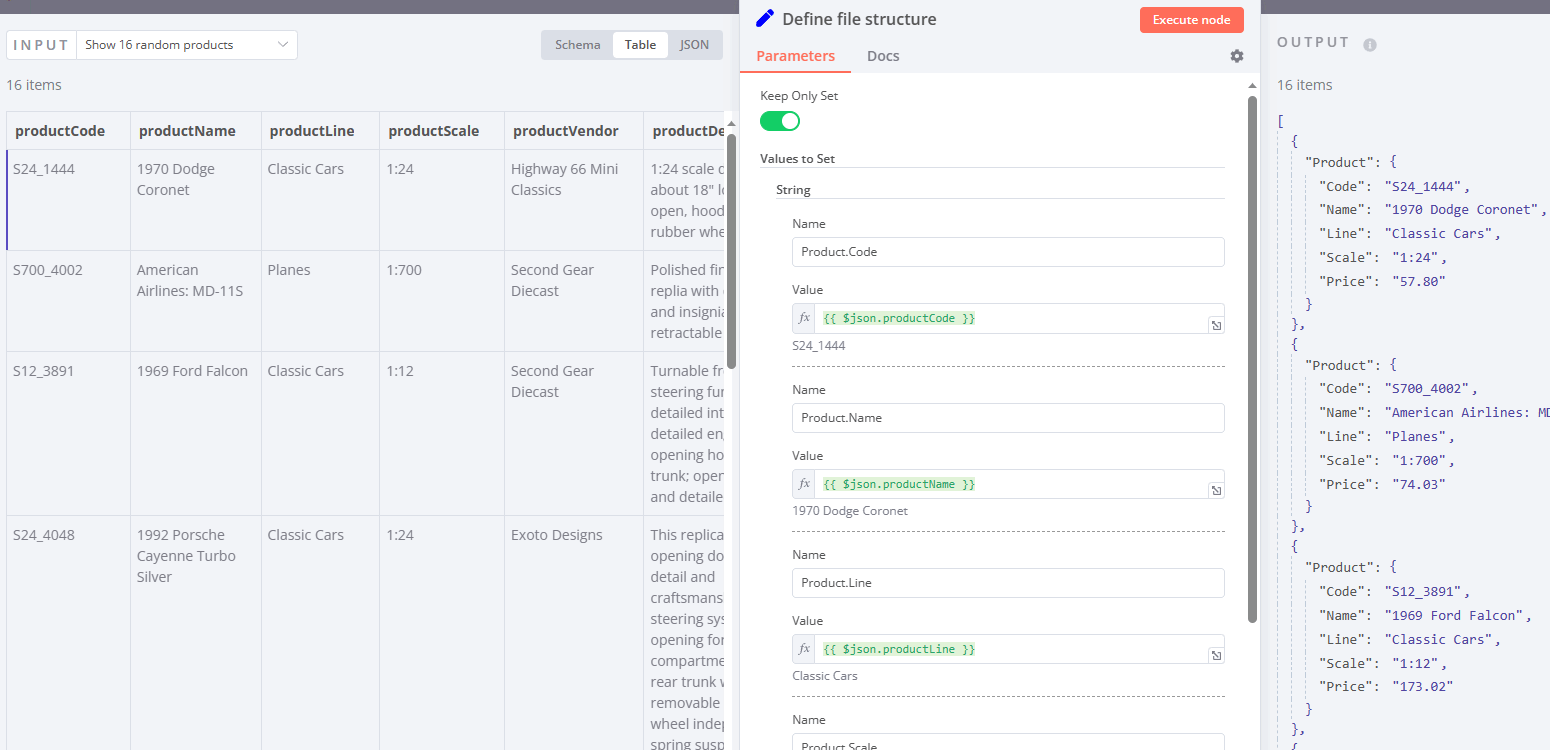
We use dot notation to define nested keys. For example, the name Product.Code means that the JSON key "Product" will be created first and then the key "Code" will be created as a child.
Take a look at the JSON structure on the right side of the screenshot.
Next, the ItemLists node is used to create an array of elements.
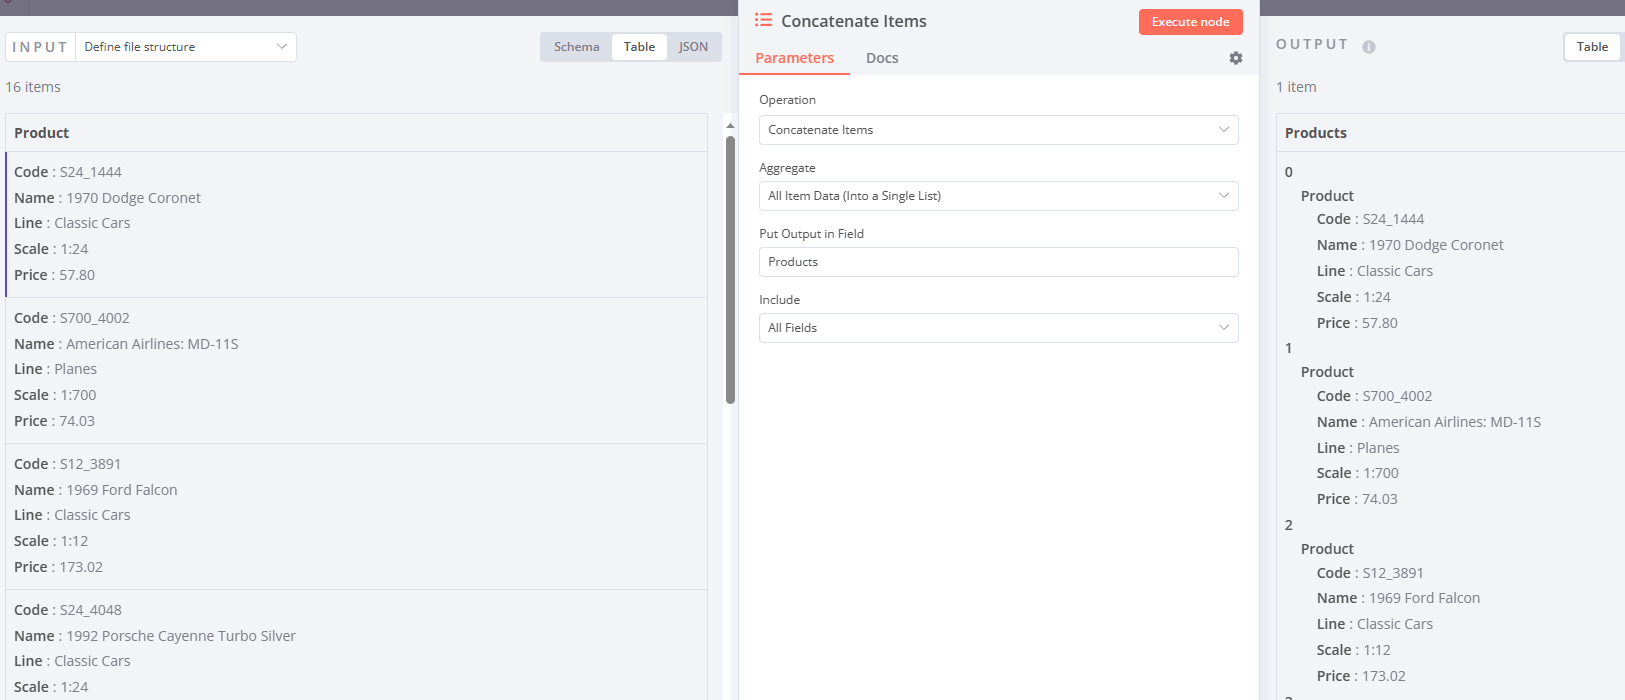
Why is this necessary?
If you skip this step, 16 single-item XML files will be created in the XML node. In case you want all 16 items in one file, then they must be concatenated.
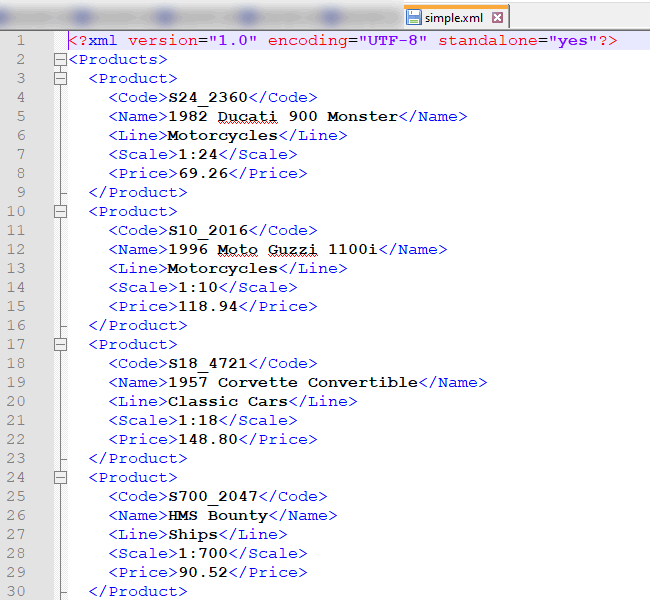
We are done with the preprocessing, now we can generate the XML file with the XML node.
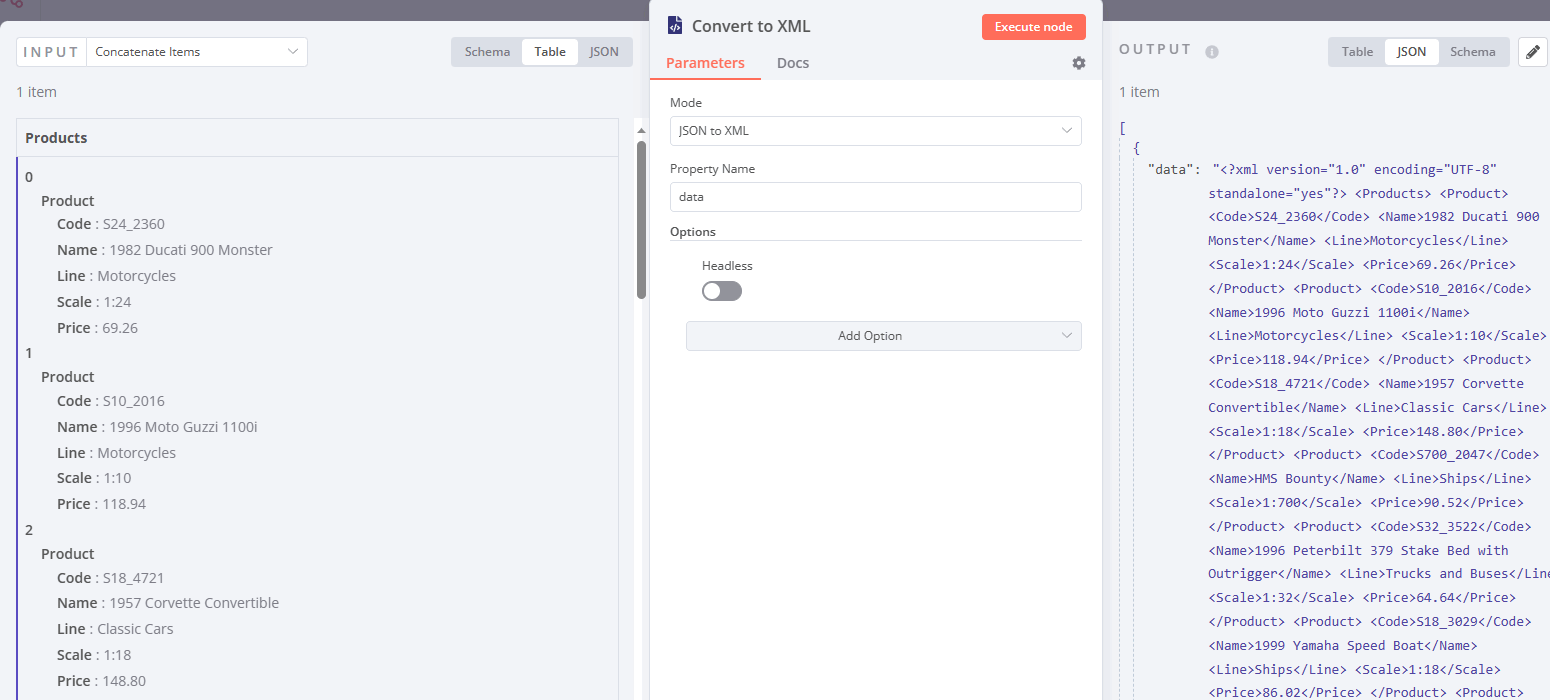
The XML node generates a text string and stores it in the "data" key. We just need to use the Move Binary Data and Write Binary File nodes to create a new XML file on the server. Here’s how the final output looks like:
Step 3. Create an XML file with attributes
Now that we have learned how to export SQL to a simple XML file, let's dive a little deeper and look at how to create XML files with attributes. A third-party system may need XML attributes, so it's important to know how to create them in n8n. Here’s a brief explanation of what an XML attribute is.
Basically, converting a SQL table to XML with attributes is done in n8n in exactly the same way. There are just two small tweaks.
Firstly, a special key $ (dollar sign) is required. This key specifies which JSON keys are converted to XML attributes. Let's look at the bottom part of the workflow, the Set node:
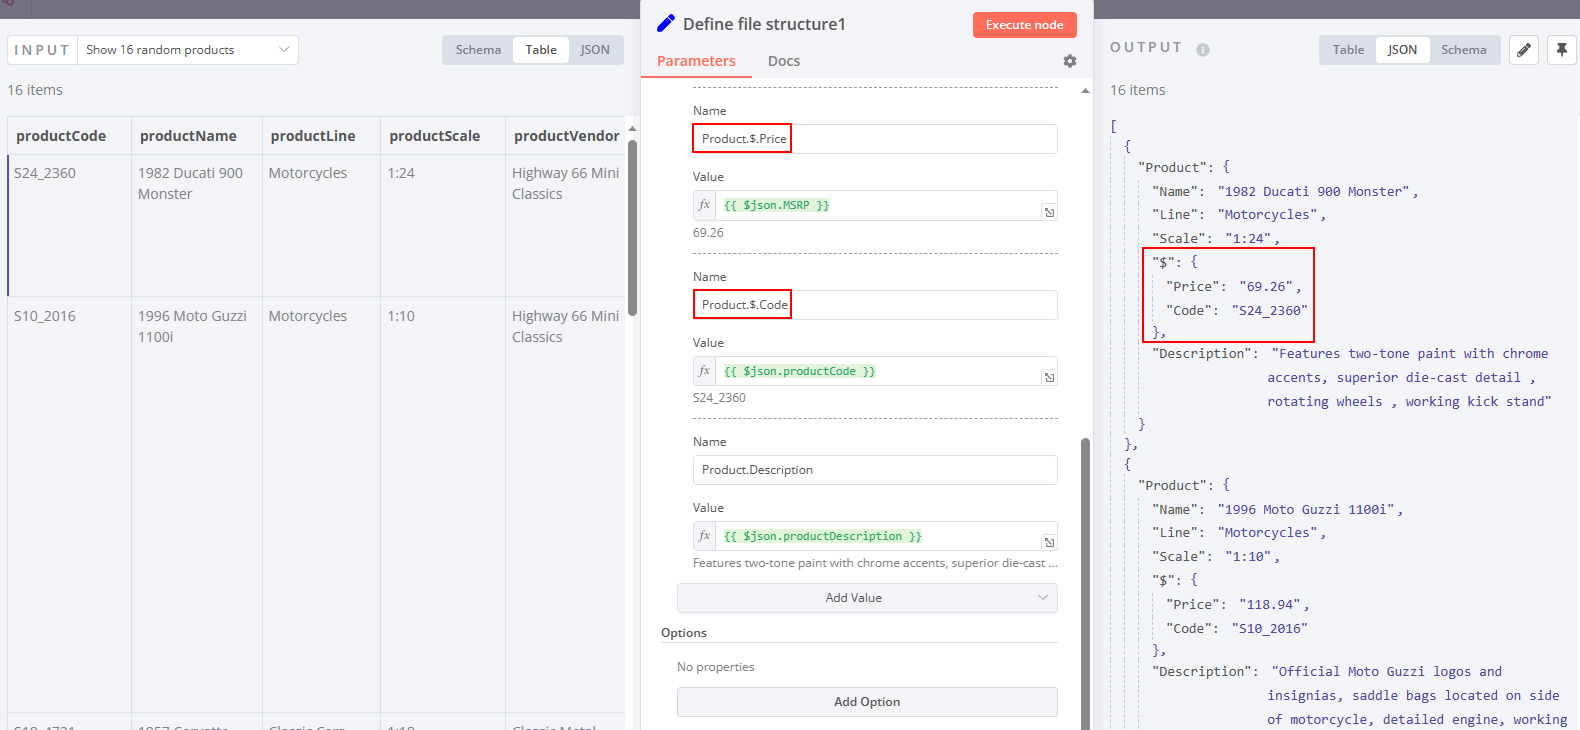
In this example, the Product JSON key has three child keys: Name, Line and Scale. It also has a $ key with two child keys, Price and Code. These two JSON keys will become attributes of the Product key.
Here's how it's done.
In the XML node, add another Attribute Key parameter and make sure it has the same value with a dollar sign:
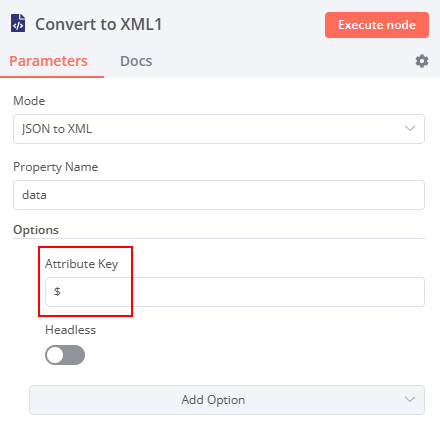
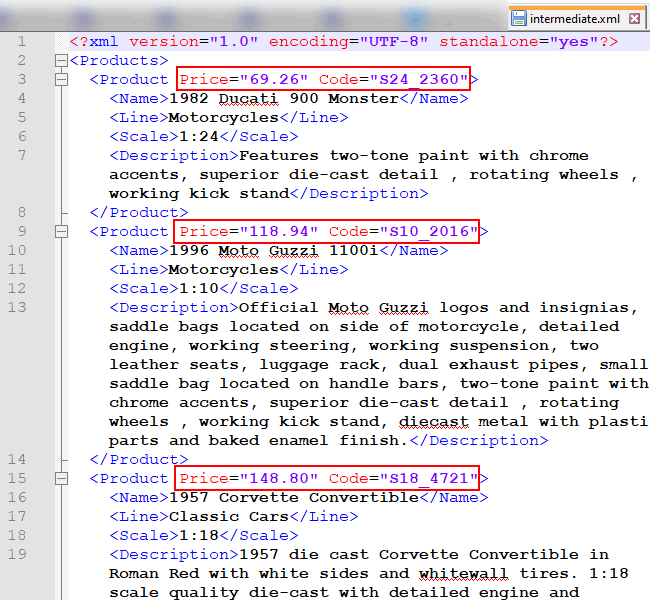
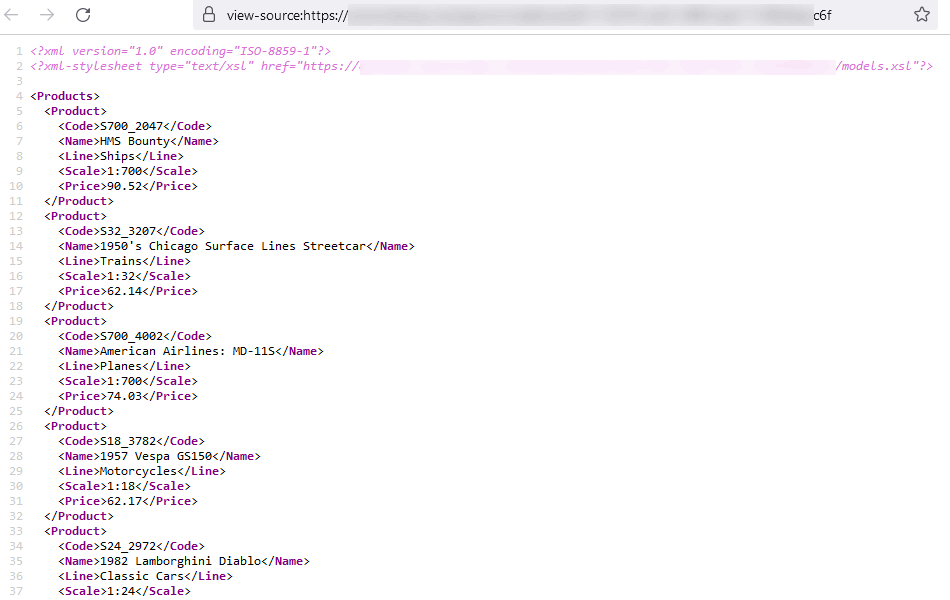
Once you have created and saved the new XML file, open it in a text editor. You can see that Price and Code are now attributes of the Product element, rather than separate elements.
So, using just three nodes: Set, ItemLists and XML, you can define an XML structure of almost any complexity and generate an XML file. This allows you to export SQL data from virtually any SQL engine supported by n8n.
How to import XML into an SQL with n8n?
So far we have looked in detail at how to create an XML file from an SQL database. But you can also set the reverse task - to add XML data back to SQL.
We will use our existing XML file and demonstrate how to import it into an SQL database.
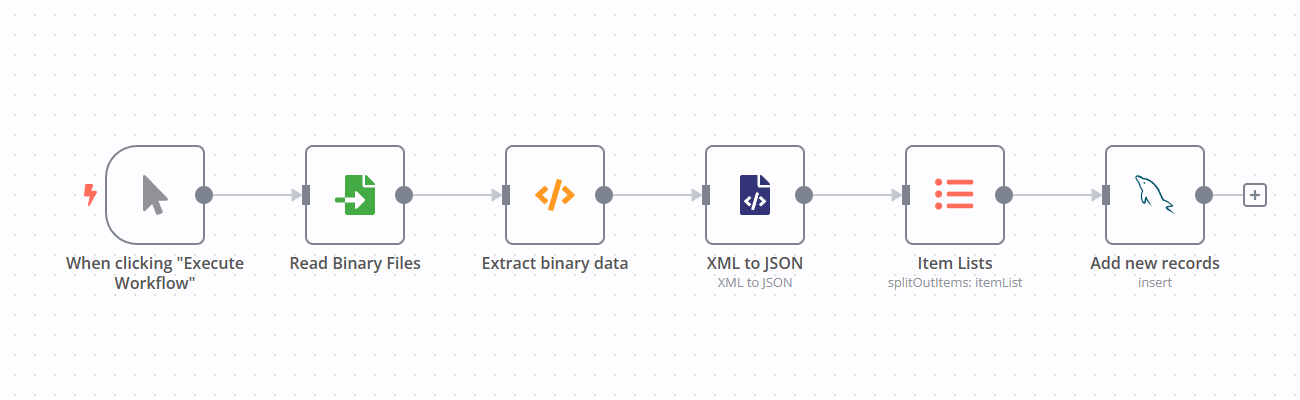
Step 1. Receive XML file
First, we read the binary file that was saved on the server. In your case, this XML file might be coming from an external system or loaded from the cloud storage. n8n supports many different ways to import an XML file.
Next, we need to convert the binary data into JSON. This is done in three steps.
There is a small JS script in the Code node that reads the binary data buffer and converts the content of the XML file into a string variable:
let binaryDataBufferItem = await this.helpers.getBinaryDataBuffer(0, 'data');
var data = binaryDataBufferItem.toString('utf8')
return {"data": data};
Step 2. Prepare XML data for import
Next, in the XML node, select the XML to JSON mode.
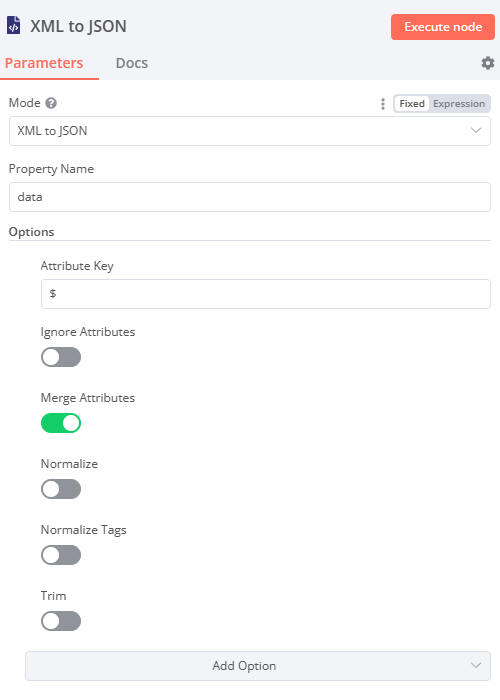
This node helps us to parse an XML into SQL and has several useful options. You can learn more about them on the XML node documentation page. For now, just select the Attribute Key option and activate the Merge Attributes toggle switch. In case you have an XML file with an even more complex structure, you can experiment with these options to get a more readable result.
Finally, before importing the data into SQL, we need to split the items from an array. This is basically the opposite step from what we did in the previous section of the tutorial.
In the ItemLists node, select the Split Out Items operation and enter "Products.Product" in the Fields option.
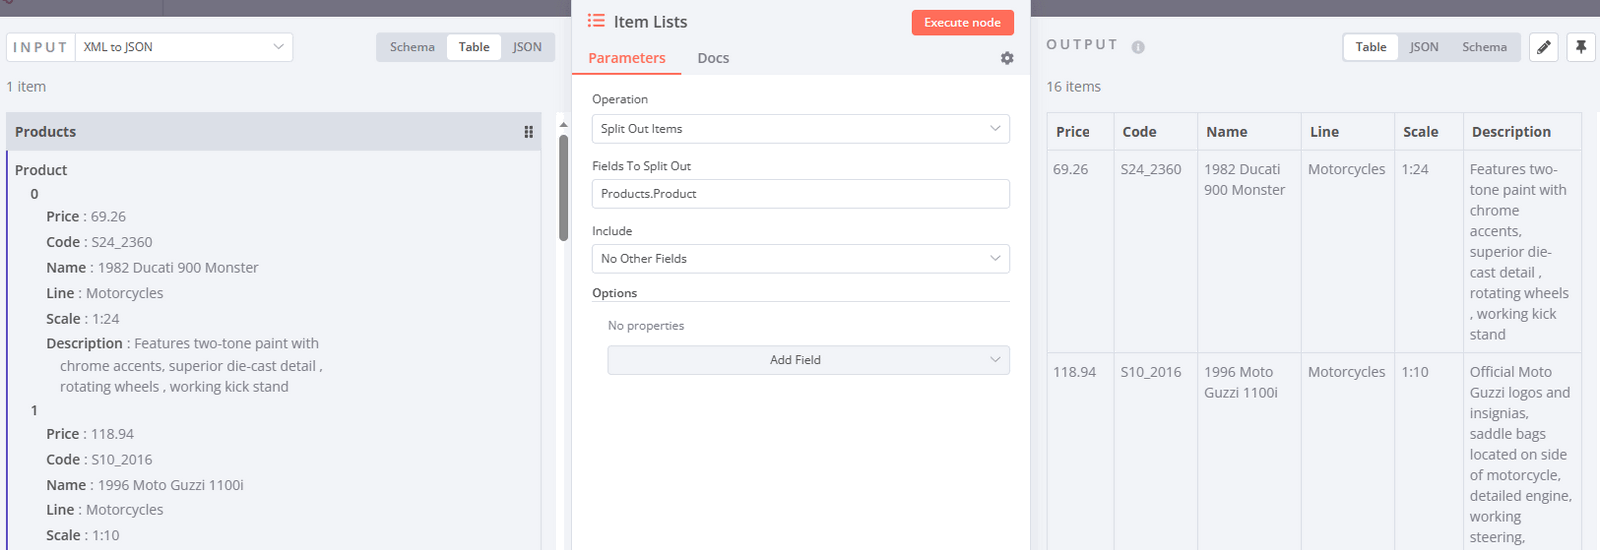
The obtained result is a flattened JSON object, which will help us in the import process.
Before importing the data, let’s create a new empty table with the same structure as the products table. The sample workflow already has an SQL node that executes two SQL statements:
CREATE TABLE IF NOT EXISTS new_table AS SELECT * FROM products;
TRUNCATE new_table;
- The first statement is rather self-explanatory. A new_table is created in which all variables and data from the products table are stored.
- The TRUNCATE statement removes all data from the new_table while preserving the table structure.
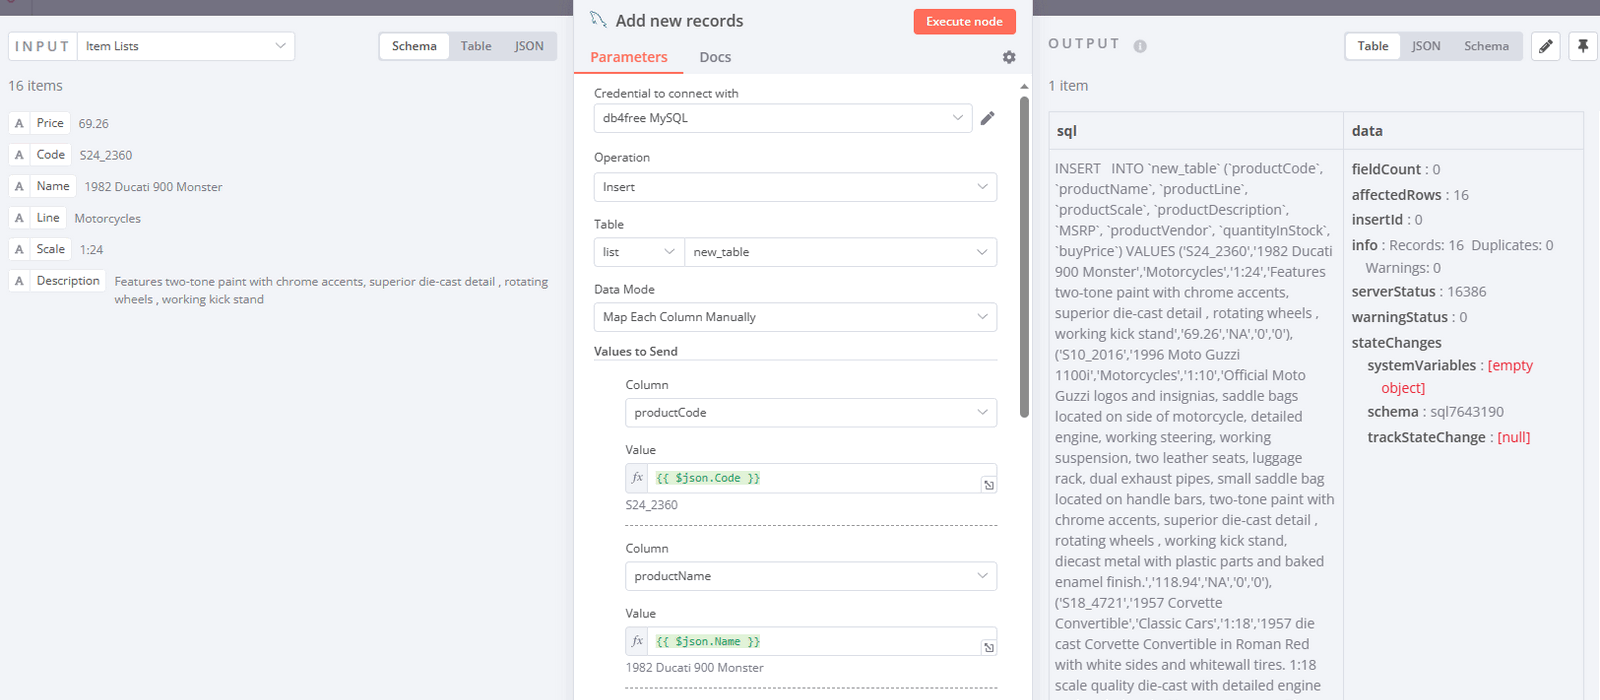
Step 3. Import records into SQL table
Now we are ready to import XML data into the SQL table. Go to the settings of the last SQL node and configure it:
- Select the Insert Operation.
- Select new_table from the dropdown list.
- If the JSON keys exactly match the SQL variable names, you can select Auto-Map Input Data to Columns.
- Otherwise, use manual selection and specify all variables to be imported.
How to deliver the XML file?
Great, now that you have learned how to export an SQL table to an XML file and convert XML back into an SQL table, let's take a step back.
So far, we've only demonstrated how to save an XML file on the server. However, you may want to send that file further. n8n has a plethora of ways to do this!
- With the Send Email node, you can send the XML file the good old-fashioned way. Perhaps your recipient needs to manually upload the data to some system.
- With the FTP node, you can save the XML file to a remote computer.
- If you are using S3 storage, a special node is at your service.
- With the HTTP Request node, you can upload the XML file directly to a third-party system.
You can discover hundreds of integration nodes in n8n and choose the one that will help you solve your task.
How to visualize an XML file?
If you expect that your recipient will view the XML file visually, you may want to facilitate this process and format the XML output in an easy-to-read way. In this bonus chapter, we'll show you how to do this exclusively with the XSL template.
Experienced developers know that XML is a long-lived format with several supporting technologies built around it. One of these technologies is called XSLT – a template language for XML. Both XML and XSLT are W3C standards, which means they are supported by most browsers.
Knowing this fact, you can simply pass an XML file with a link to an XSL template, and the browser will do the rest. Let’s take a look at the example:
The webhook serves the same XML file we created in the previous part of the tutorial. The only difference is an additional link to the XSL stylesheet.
When such an XML file is opened in a browser, it will be converted into a nicely styled page:
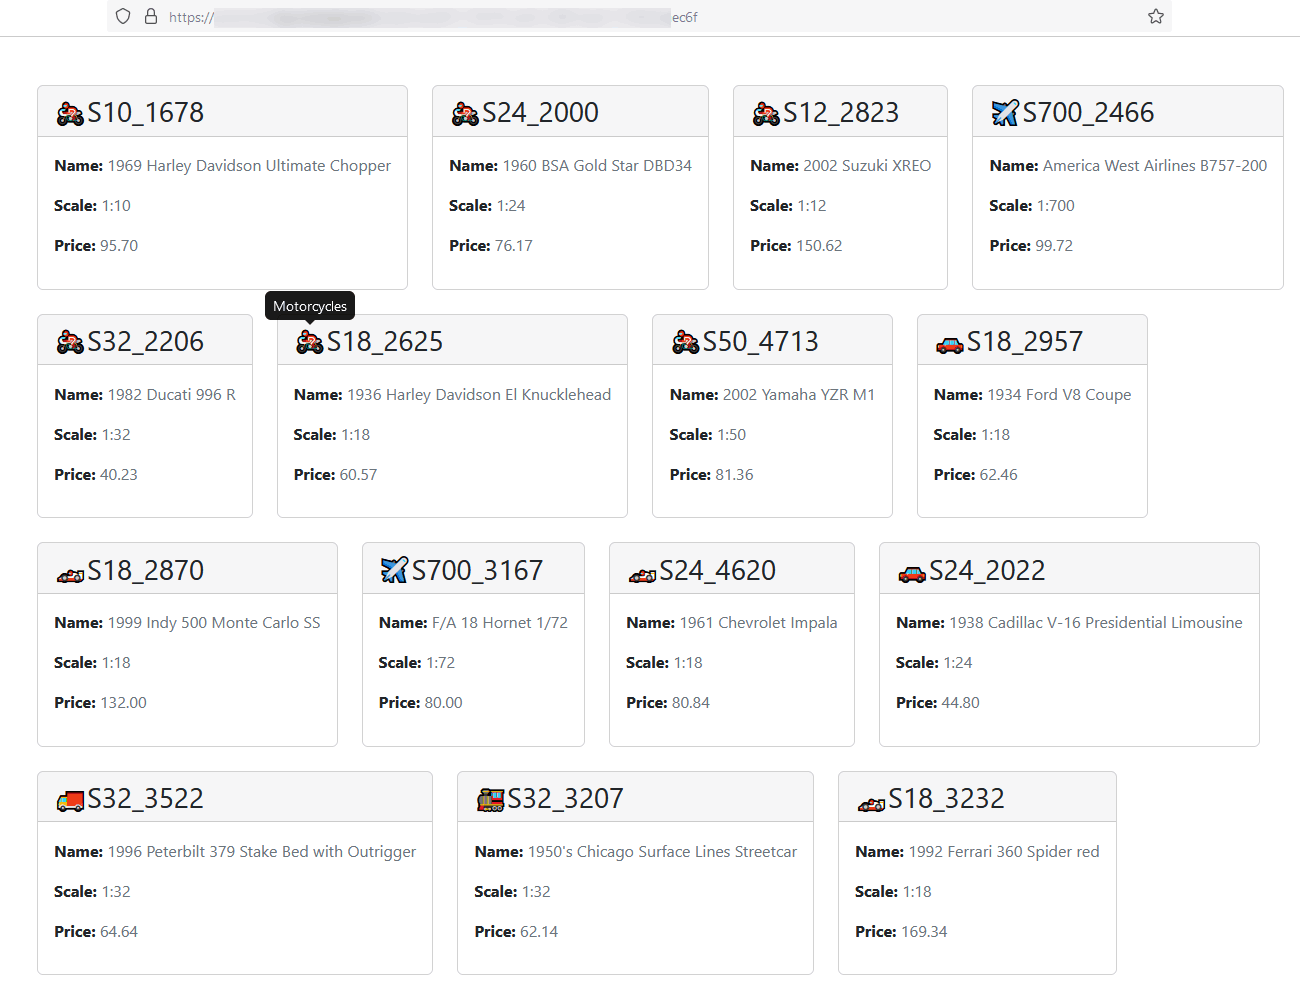
How is this possible?
Since a detailed answer would require a separate article, we'll just show our cards and provide links so you can explore it for yourself.
- The key component of this process is the XSL template file. It uses a style language for XML that parses XML elements and maps their values inside an HTML page. We've already provided all the mapping rules, added a link to the bootstrap 5 template, and created a small JS snippet for the pop-ups.
- Second, get this free example workflow, configure the database credentials and webhook URL. Note that the XSL template will only work with the example database. In case you have different data, please update the XSL template accordingly. Once everything is set up, you can enter this URL into your browser and get a nicely formatted page.
Wrap Up
In this tutorial, we've provided an in-depth walkthrough on working with SQL and XML:
- How to export an SQL table to XML format (with and without XML attributes);
- How to import XML to an SQL database;
- We also briefly looked at how to further transfer an XML file to another system or to the next recipient;
- As a bonus topic, we demonstrated an approach to visualizing XML data using XSL templates and n8n.
What’s next?
The best thing about this tutorial is that it can be used as a starting point for creating more complex workflows:
- Use other nodes and create XML files from different SQL databases such as Snowflake, MongoDB or MS SQL Server.
- To work with other formats, you can also easily export and import CSV files into MySQL.
With n8n, you can work alone, as part of a small team, or in a large enterprise. Choose from our cloud plans to get started now, or explore the powerful features of the Enterprise edition, trusted by many large corporations.