
If you are working with data, you are familiar with CSV. CSV is a very common file format for online data resources and databases to export their contents.
Porting data from one system to merge into your database is a critical workflow in data management.
In this guide, we explore three different methods of how to import CSV into PostgreSQL: import using PostgreSQL's Graphical User Interface (GUI): pgAdmin, import using raw SQL statements, and lastly with the workflow automation tool n8n.
How to import a CSV file in PostgreSQL?
Before we start importing a CSV file in PostgreSQL, we need to create a PostgreSQL database and table before anything can be imported. In this guide, we will use a books database with a booksRead table to populate a CSV of books we have read in the last few months.
To create a table containing books' titles, authors, and date read, we use the following SQL statement:
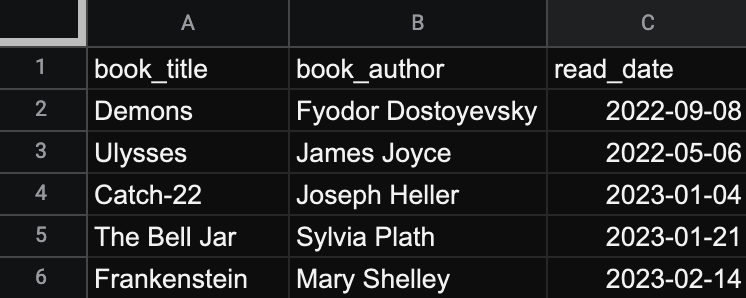
The CSV for the three import methods will populate the books database with new titles following the booksRead table schema. An example file looks like the following:
Now that we have a database, table, and file to refer to, we can explore the three different import methods into PostgreSQL.
Import a CSV file into PostgreSQL using pgAdmin
PostgreSQL is a free and open-source relational database management system with ready-to-use tools, such as pgAdmin, available upon installation. pgAdmin is PostgreSQL's GUI for modeling, creating, and managing databases.
Once you have a PostgreSQL server up and running, pgAdmin can connect to the server with user login credentials. Check out the official pgAdmin documentation to learn more about connecting pgAdmin to your PostgreSQL server.
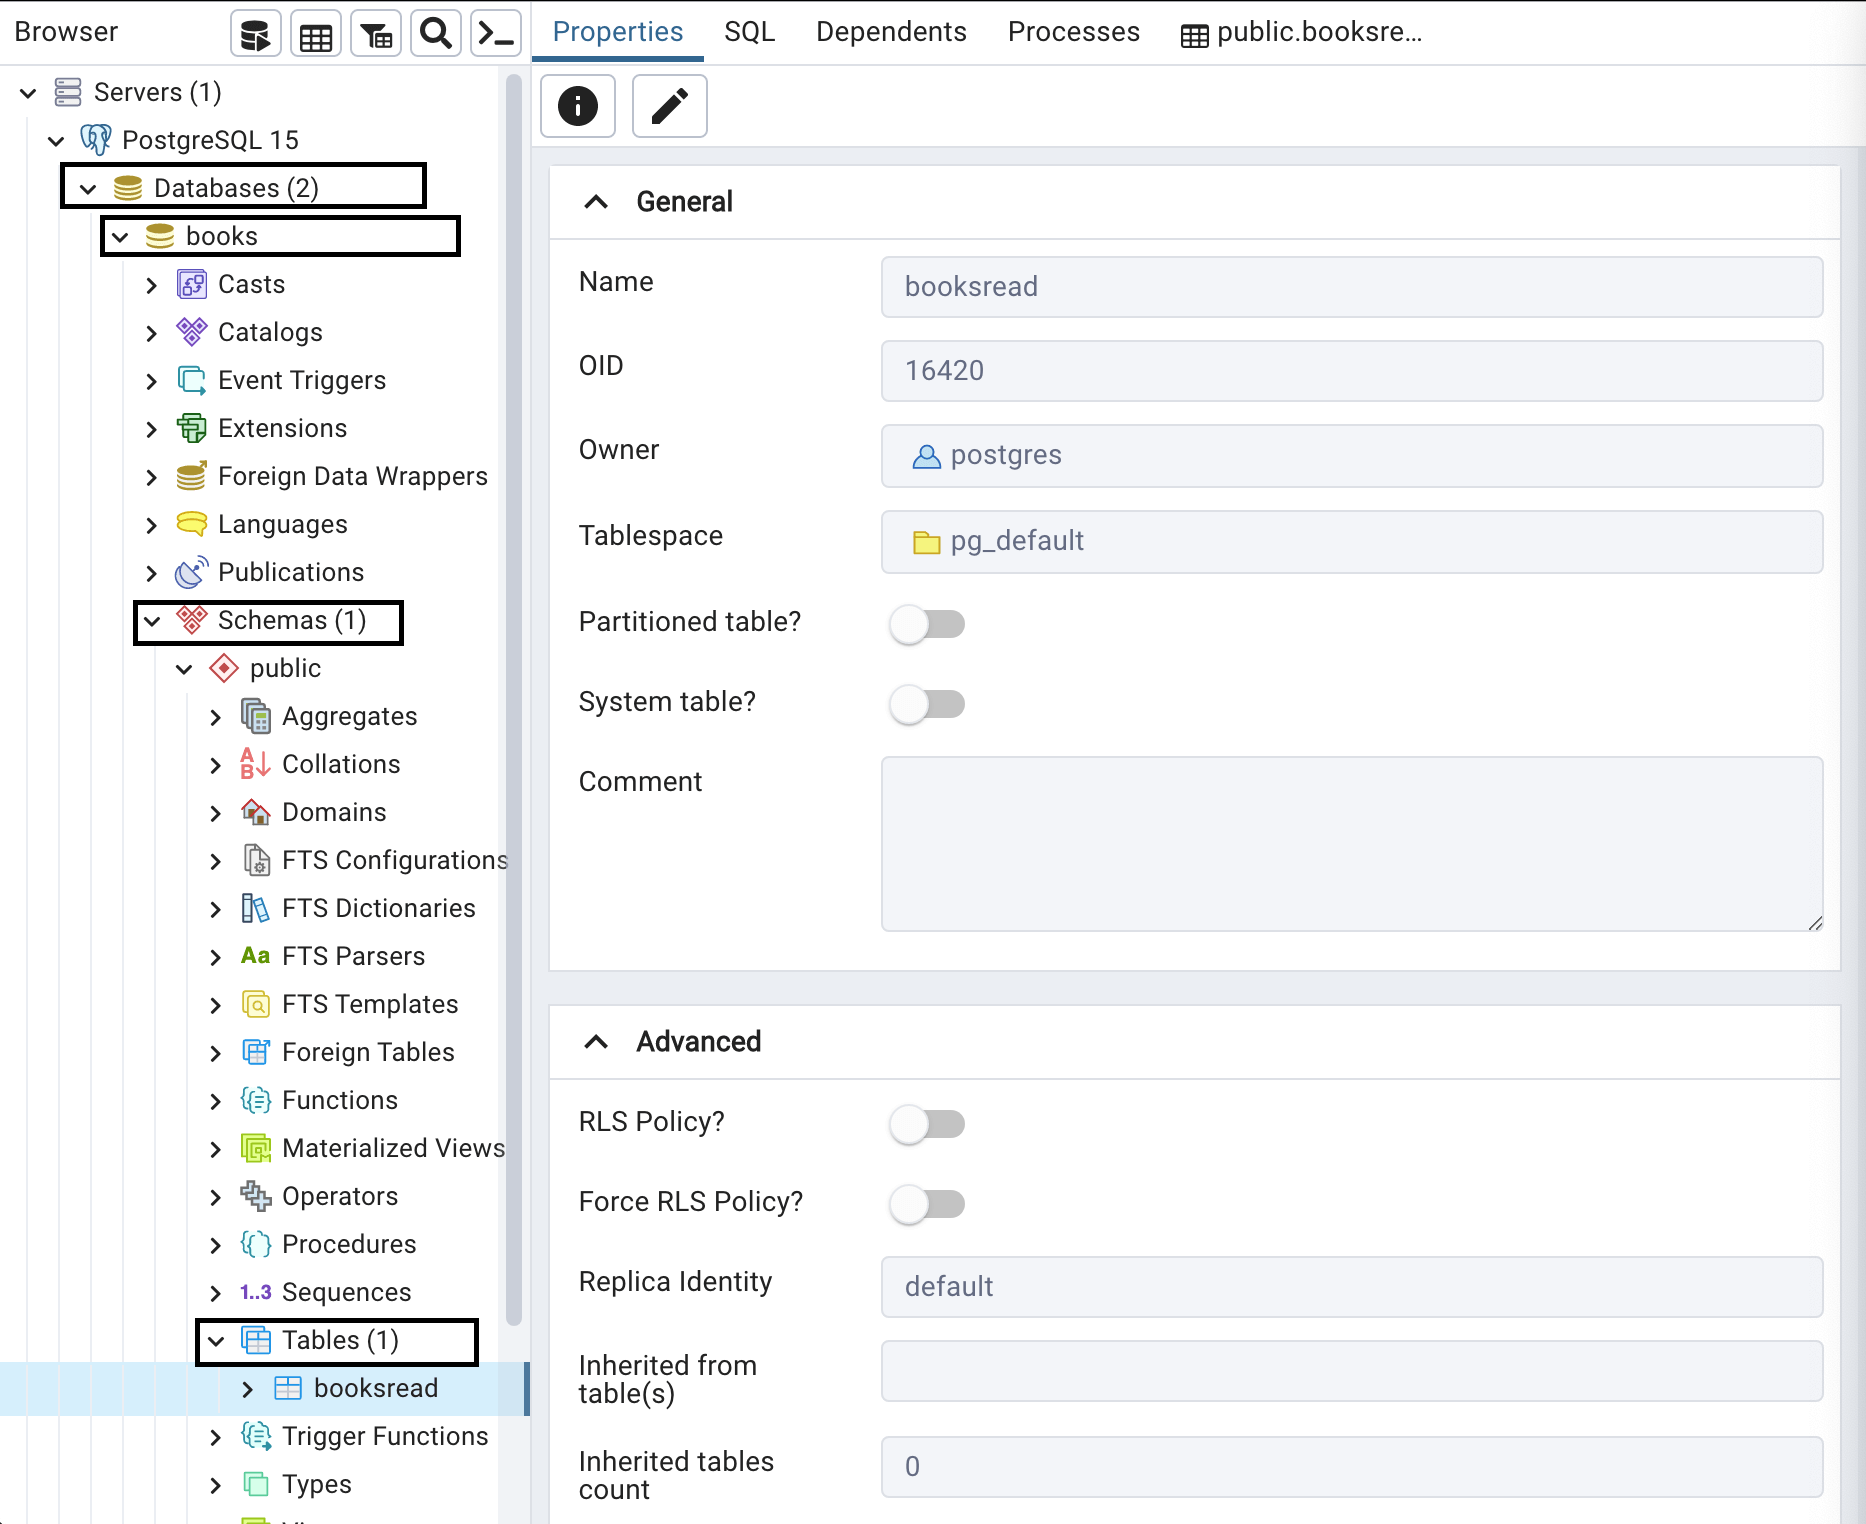
Step 1: Find the table
pgAdmin provides an interface for users to get a robust amount of information about their databases. To get to the desired import function of the tool, you want to drill down in the Browser's tabs to the booksRead table by expanding the Databases > books > Schemas > Tables tabs like below:
Step 2: Configure the import
After right-clicking on booksRead, you can select Import/Export Data... which opens the following dialog window:
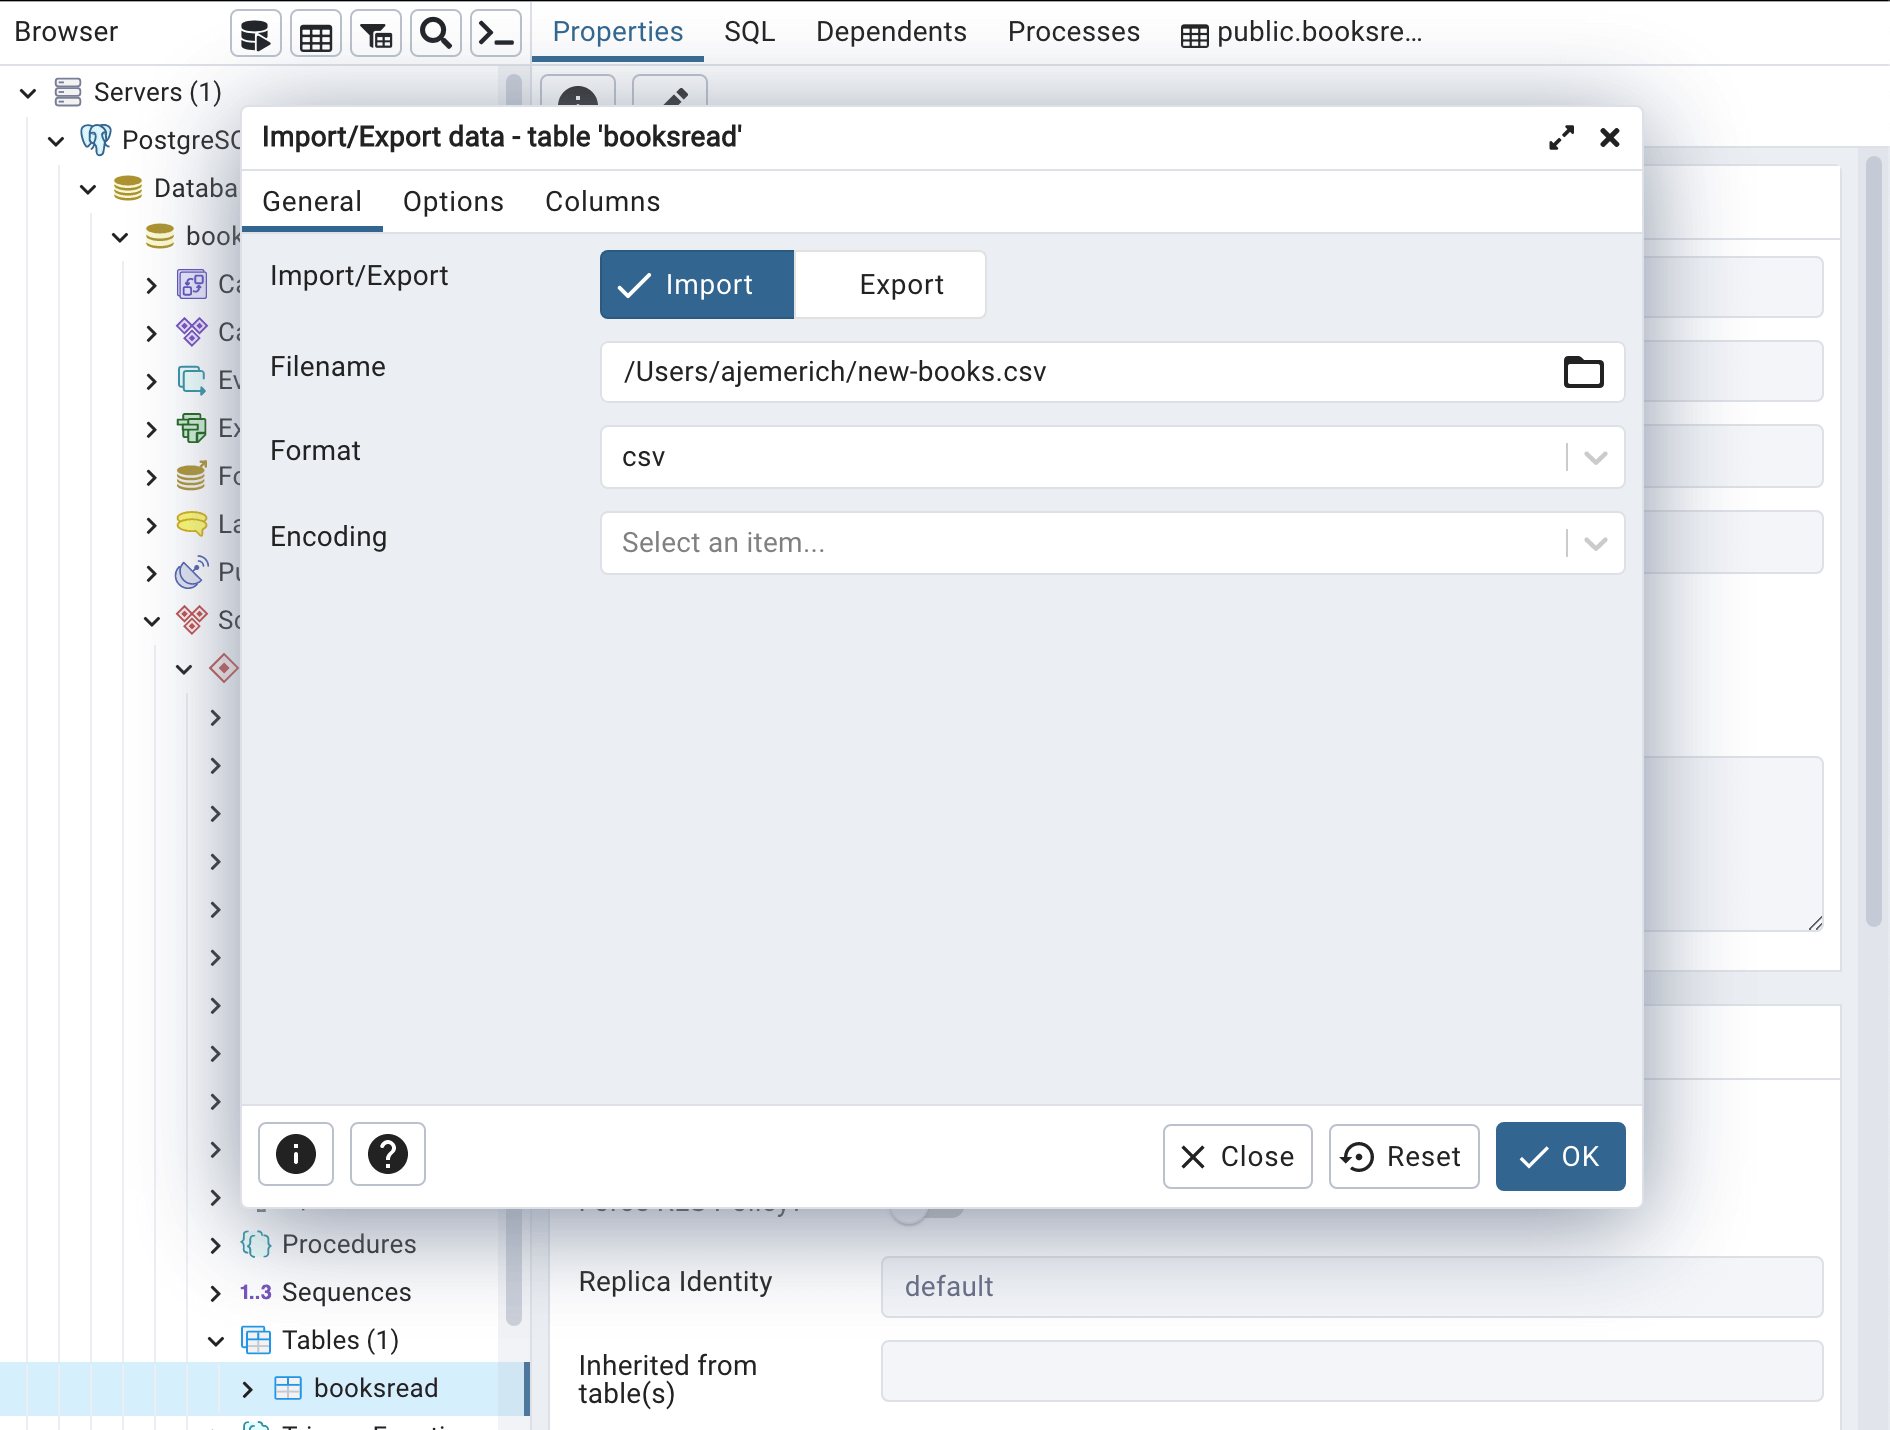
You then specify the file path for your CSV which in this example is /Users/ajemerich/new-books.csv.
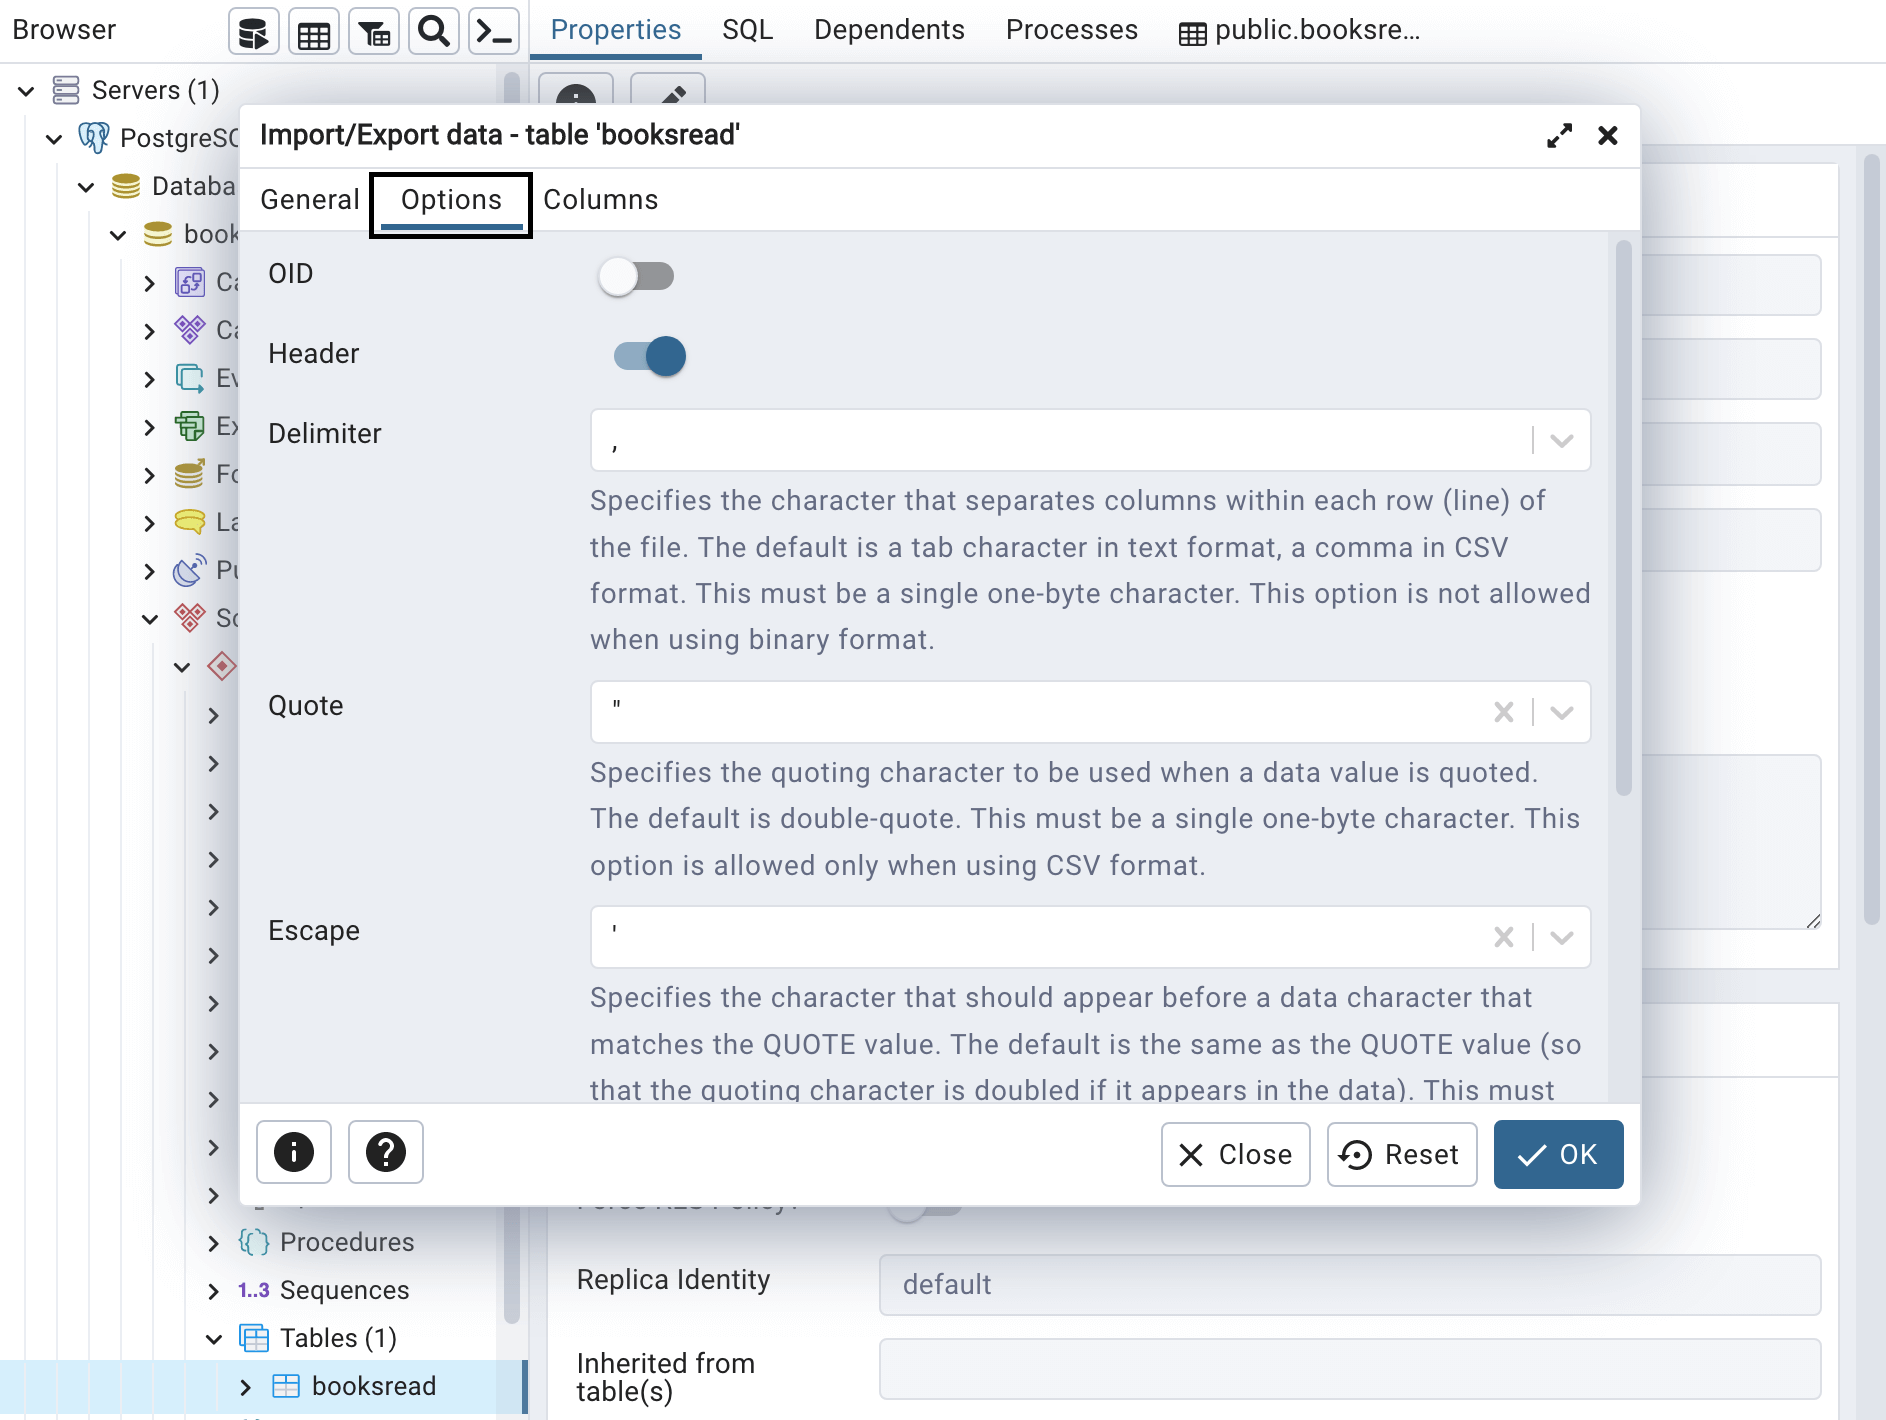
Next, under the Options tab, specify to import the CSV into PostgreSQL with headers and the delimiter as a comma.
Step 3: Confirm successful import
After selecting Ok, the action takes place, and we can verify that the import was successful by right-clicking on booksread again and selecting View/Edit Data.
By importing CSV to PostgreSQL using pgAdmin, we can see that our five newly-read books are now in the database with all the expected columns.
Import a CSV file into PostgreSQL using SQL statements
You can also import a CSV file into PostgreSQL using SQL statements in the terminal command line.
Once connected to your server and logged into your user, you can import a CSV into your PostgreSQL table by using a COPY SQL statement. The COPY statement's function is to copy data between a file and a table. You can read more about the COPY statement in PostgreSQL's Official Documentation.
Step 1: Configure the import specifications
To use COPY to import our CSV into PostgreSQL, we need to specify the table the data should be imported into, the columns that are in the file, the location of the file, the delimiter, and lastly if the file includes a row for headers.
Our statement looks as follows:
PostgreSQL replies with the following message:
This reply confirms to us that five records have been copied to the booksRead table.
Step 2: Confirm successful import with SQL
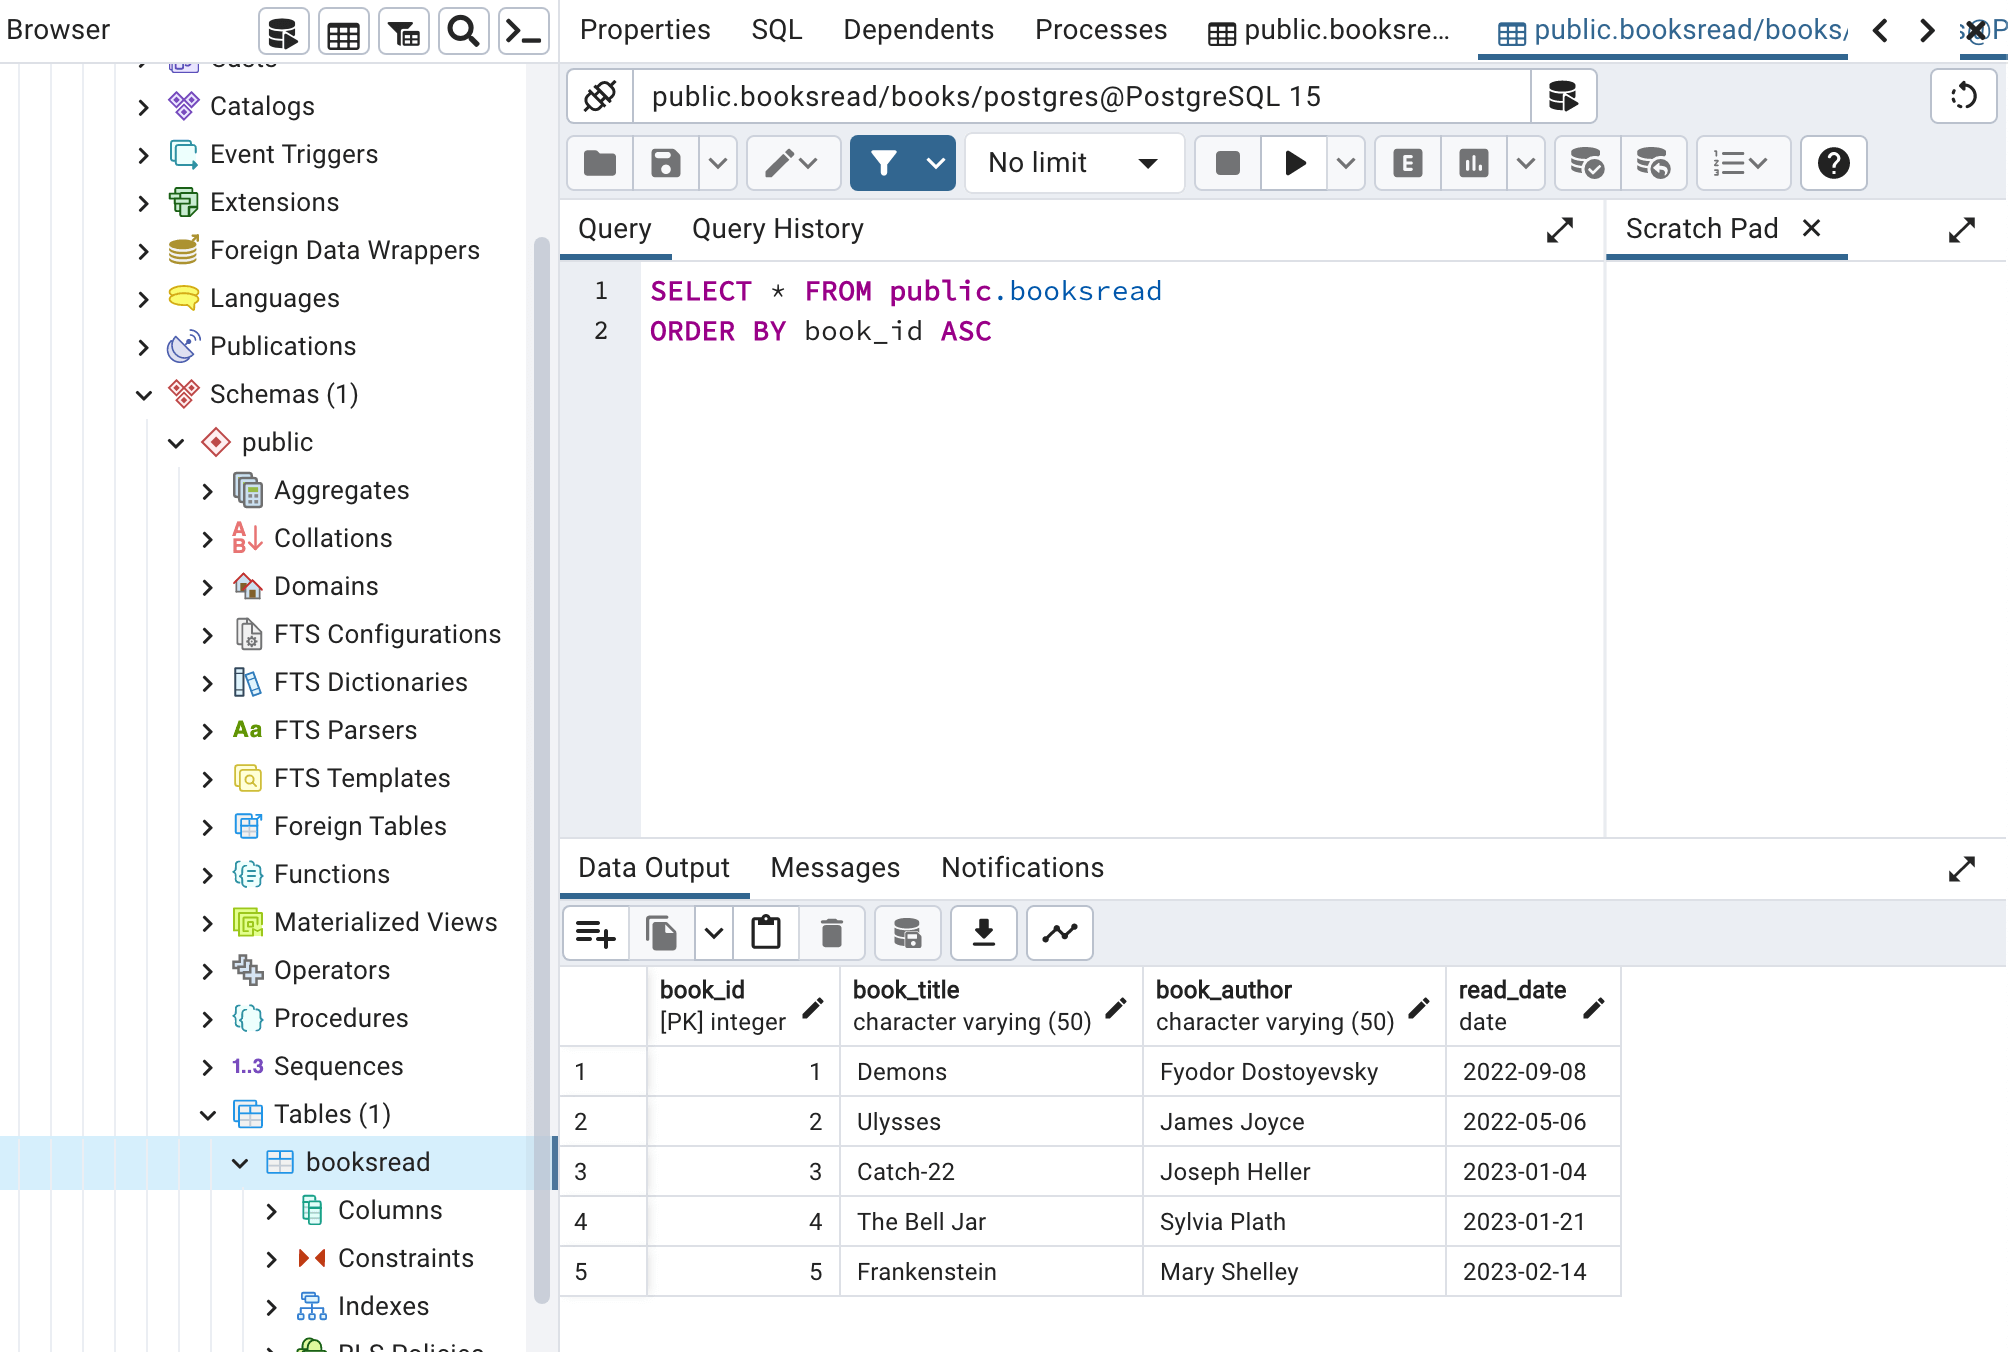
To confirm for ourselves, we can use a SELECT statement to read back imported data:
This statement asks for all of the records in the booksRead table and orders them by their book_id returning the following output:
Import a CSV file into PostgreSQL automatically with n8n
Up to this point, the discussed methods to import CSV into PostgreSQL successfully achieve our goal. However, as imports scale up in frequency, these methods’ manual steps become time-consuming and detrimental. With n8n, you can automate the button clicks and SQL statements, freeing up time for more exciting tasks.
Without further ado, let’s take a look at using an n8n workflow to automate importing a CSV file into PostgreSQL

Step 1: Connect nodes to your workflow
Within this workflow, there are 4 nodes:
- The first node tells the workflow to run on click of Execute Workflow. In real-world applications, the trigger could be on a schedule or from another app event. You can check out all available options in the Trigger Node Documentation.
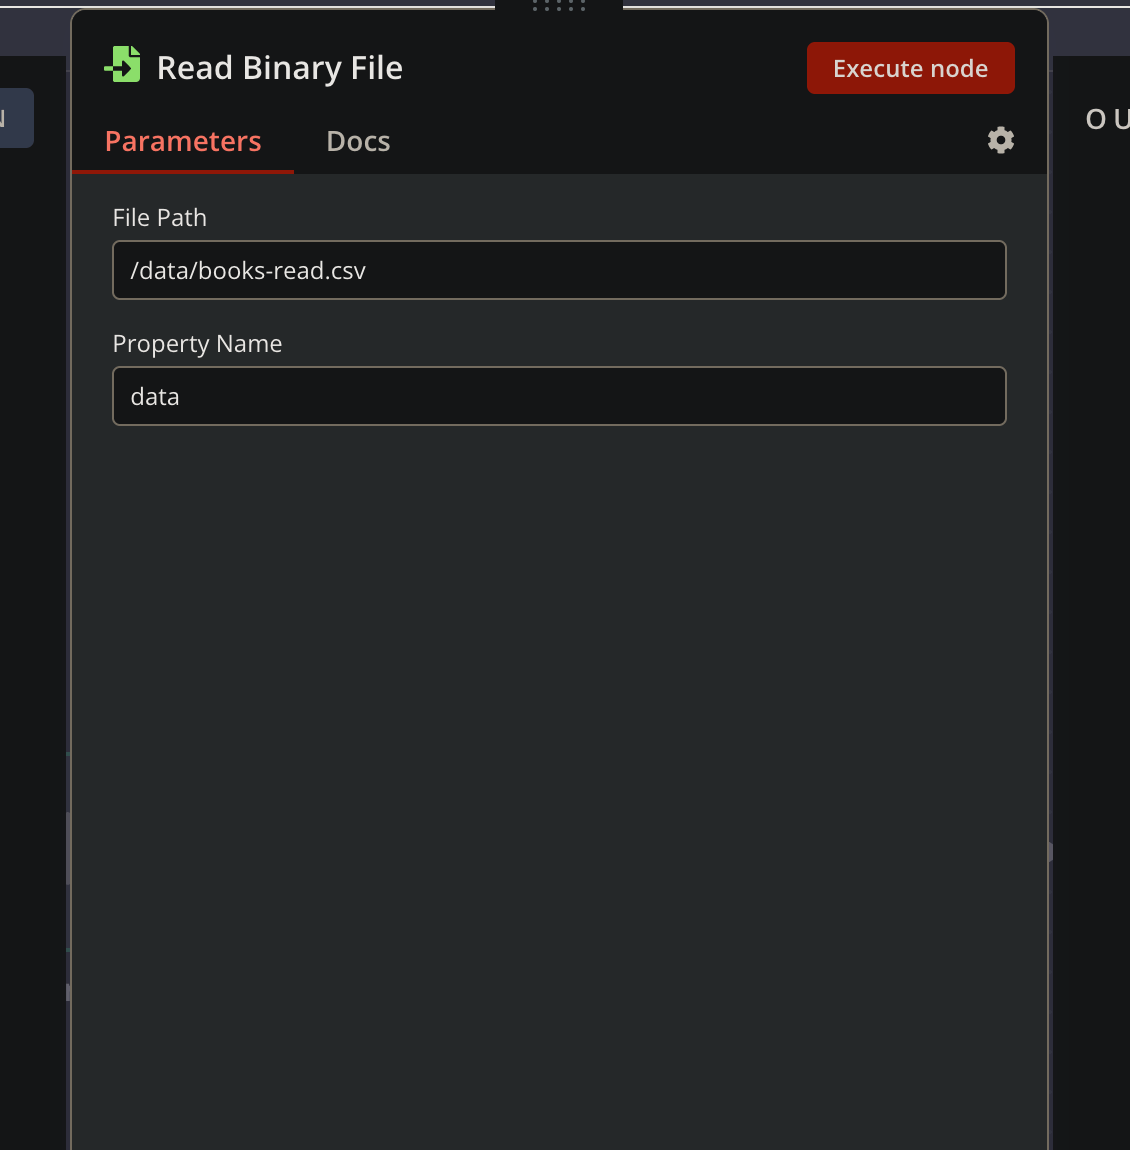
- The second node loads a CSV file from the local drive onto the server. You specify the file path like in the screenshot below. Additionally, file upload could be done by extracting a file from an FTP server or an incoming E-mail.
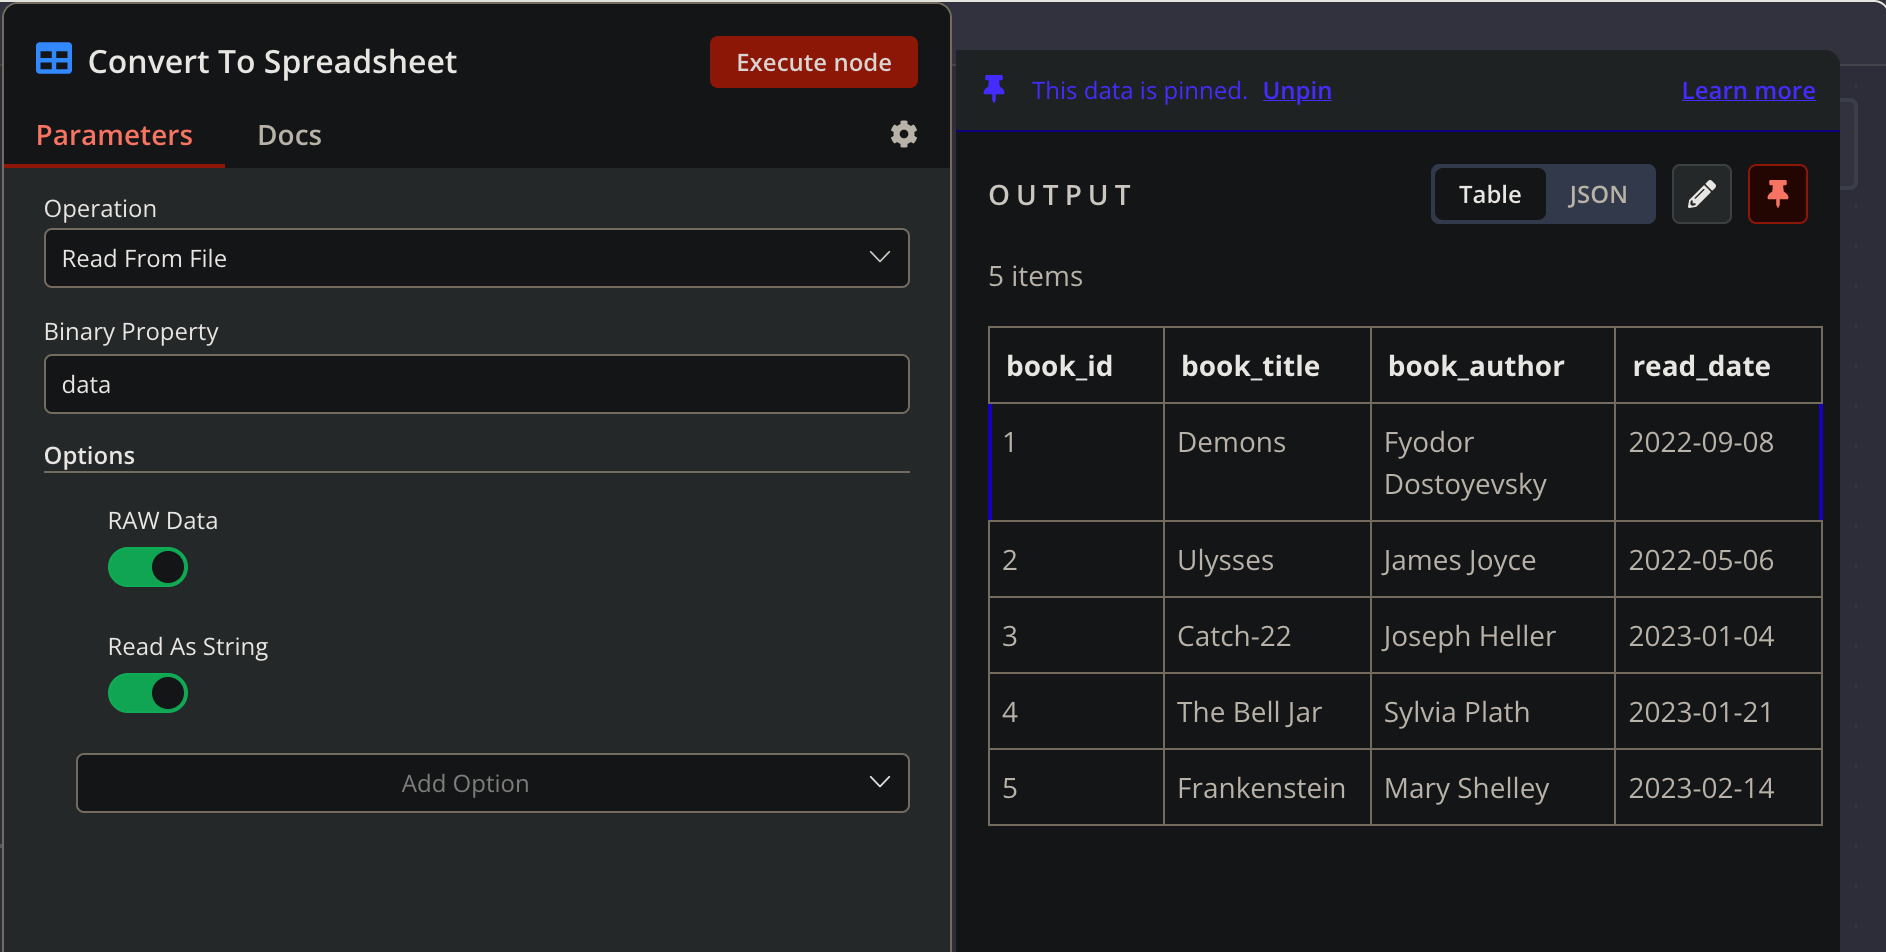
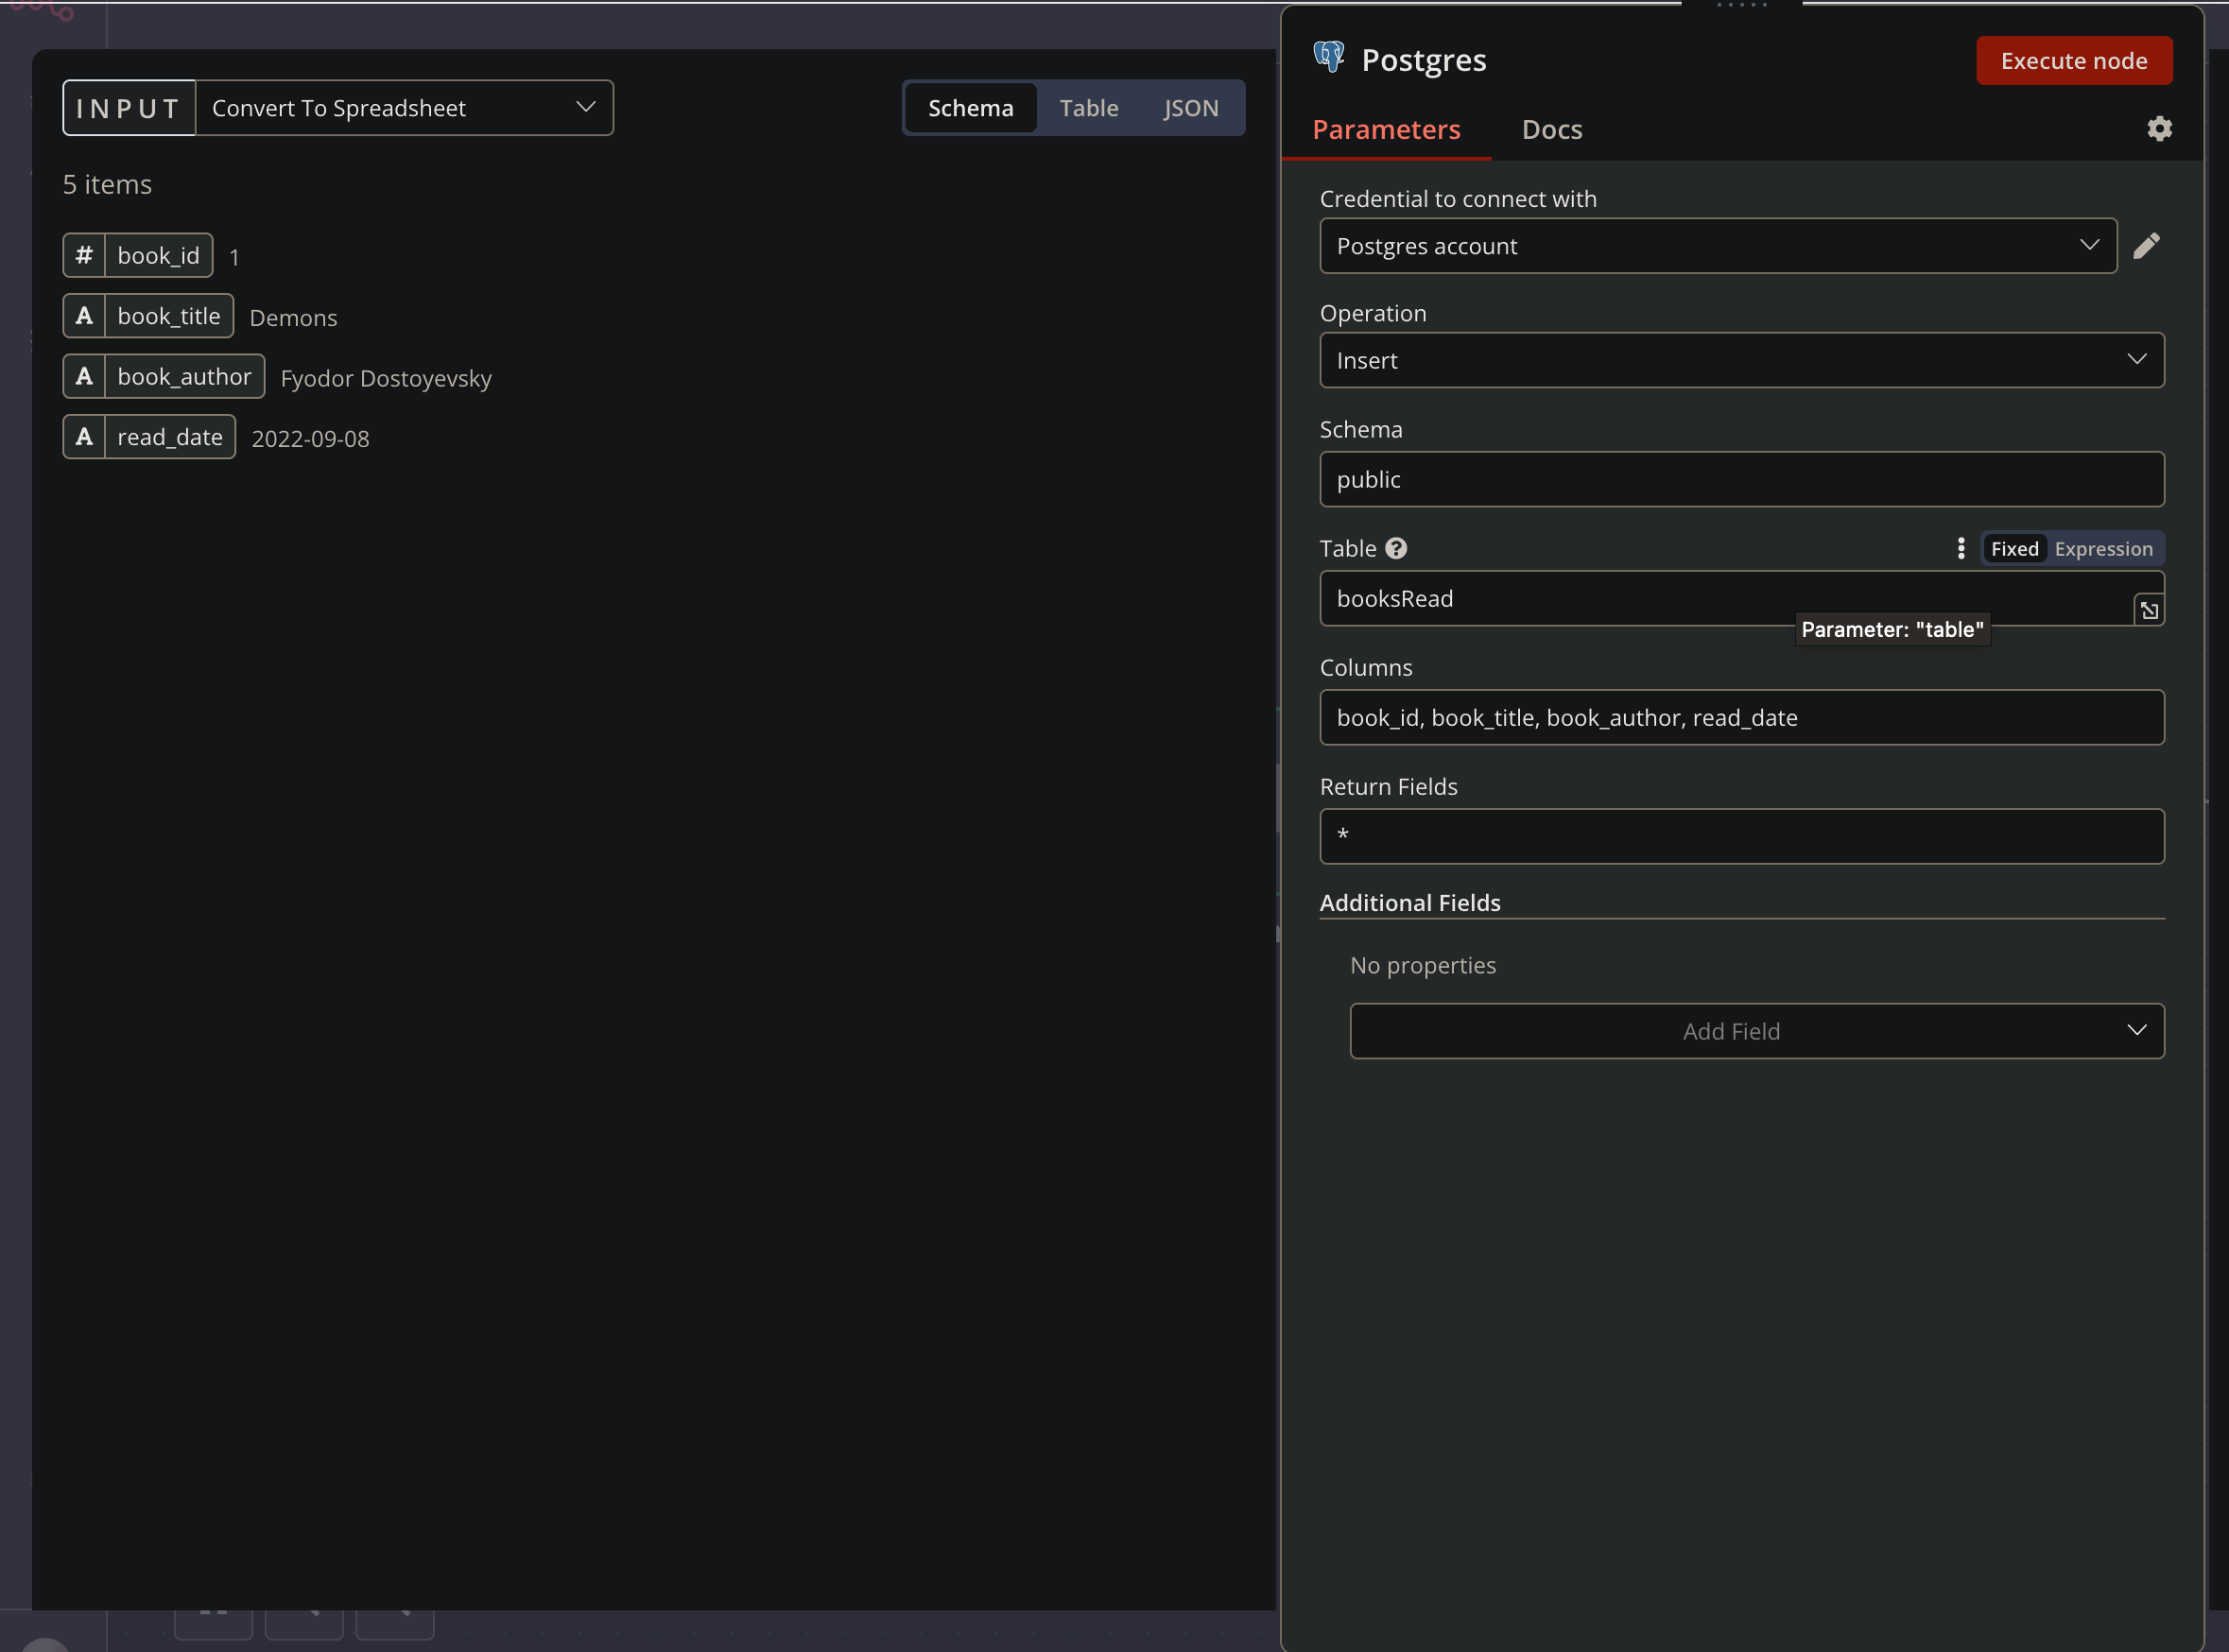
3. The third node converts the CSV contents into a JSON object. The data is displayed in a table as depicted in the following screenshot:
4. The fourth node is the PostgreSQL integration where our CSV ultimately gets imported.
Step 2: Configure PostgreSQL integration
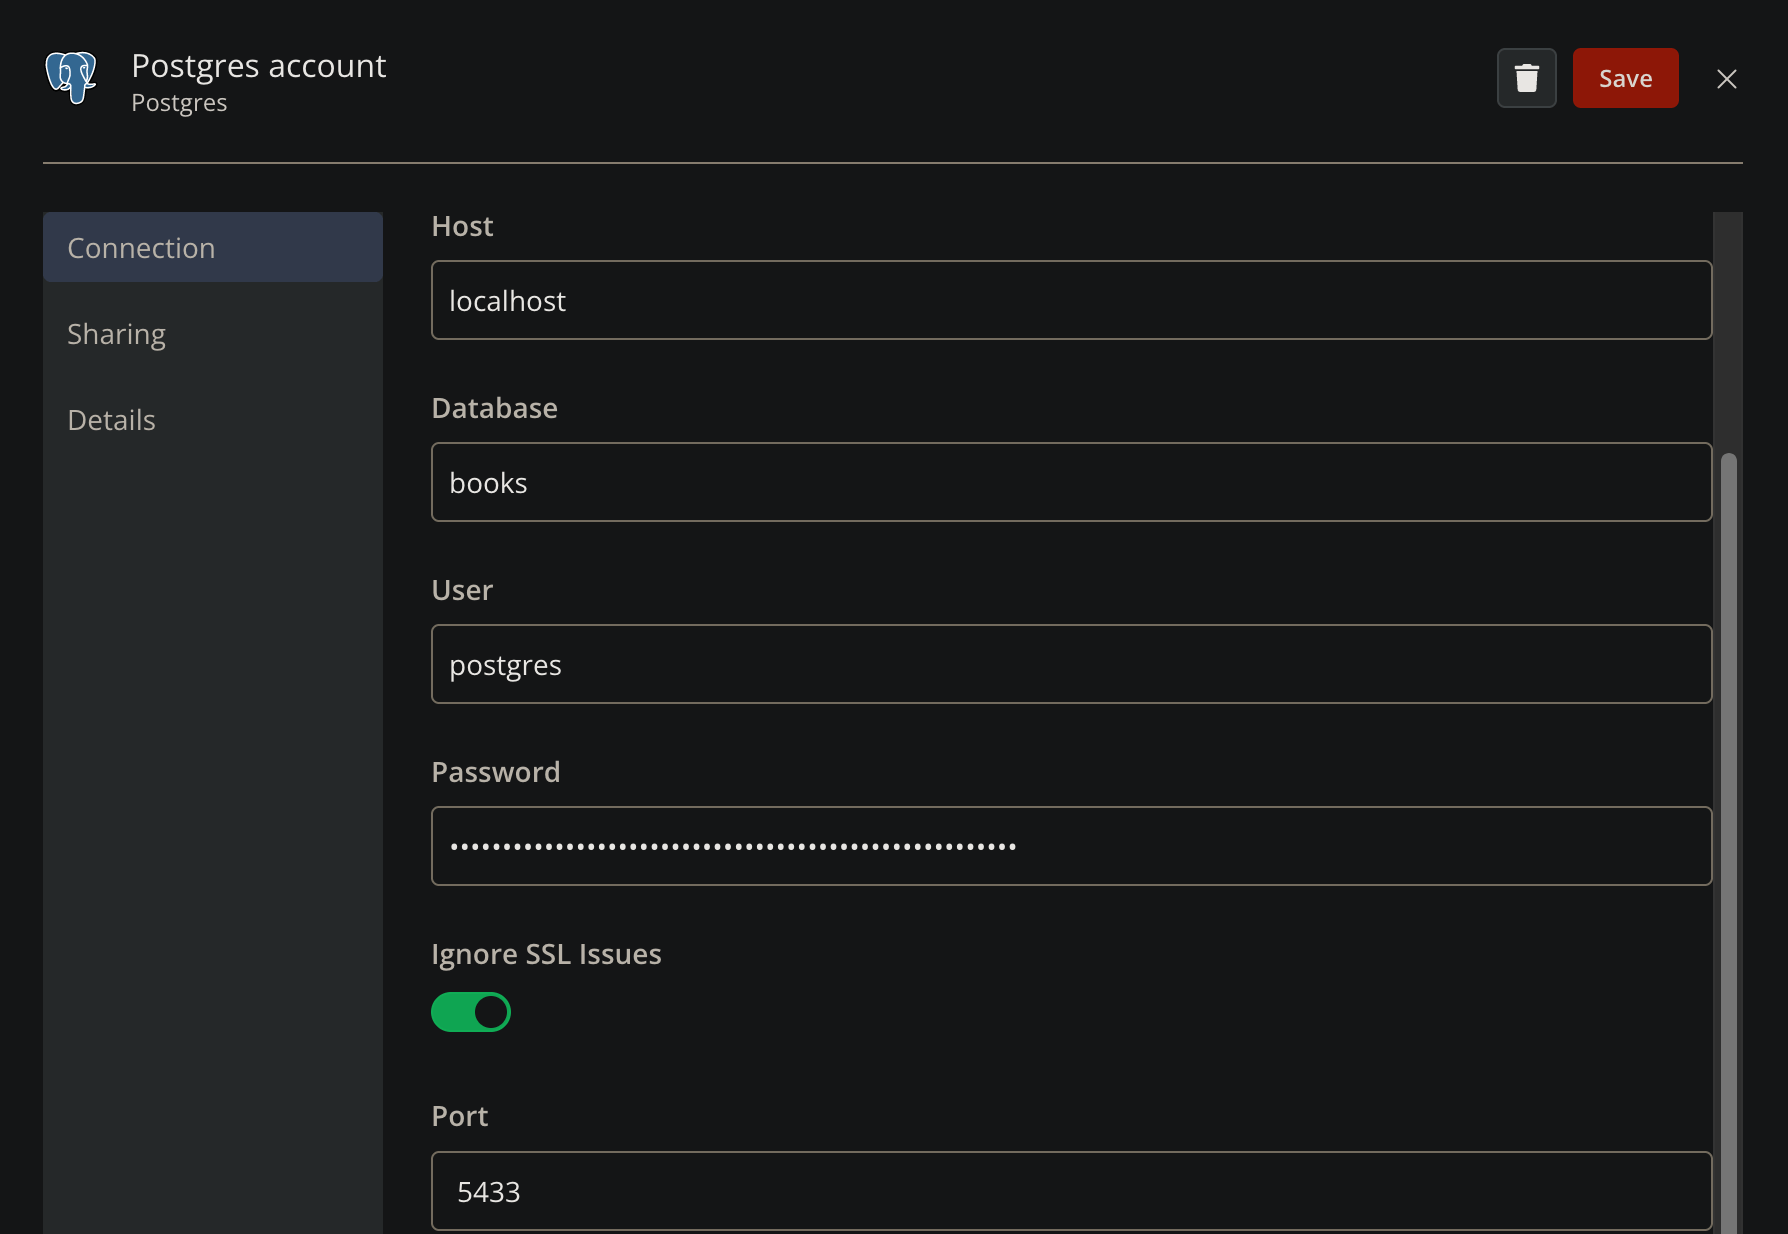
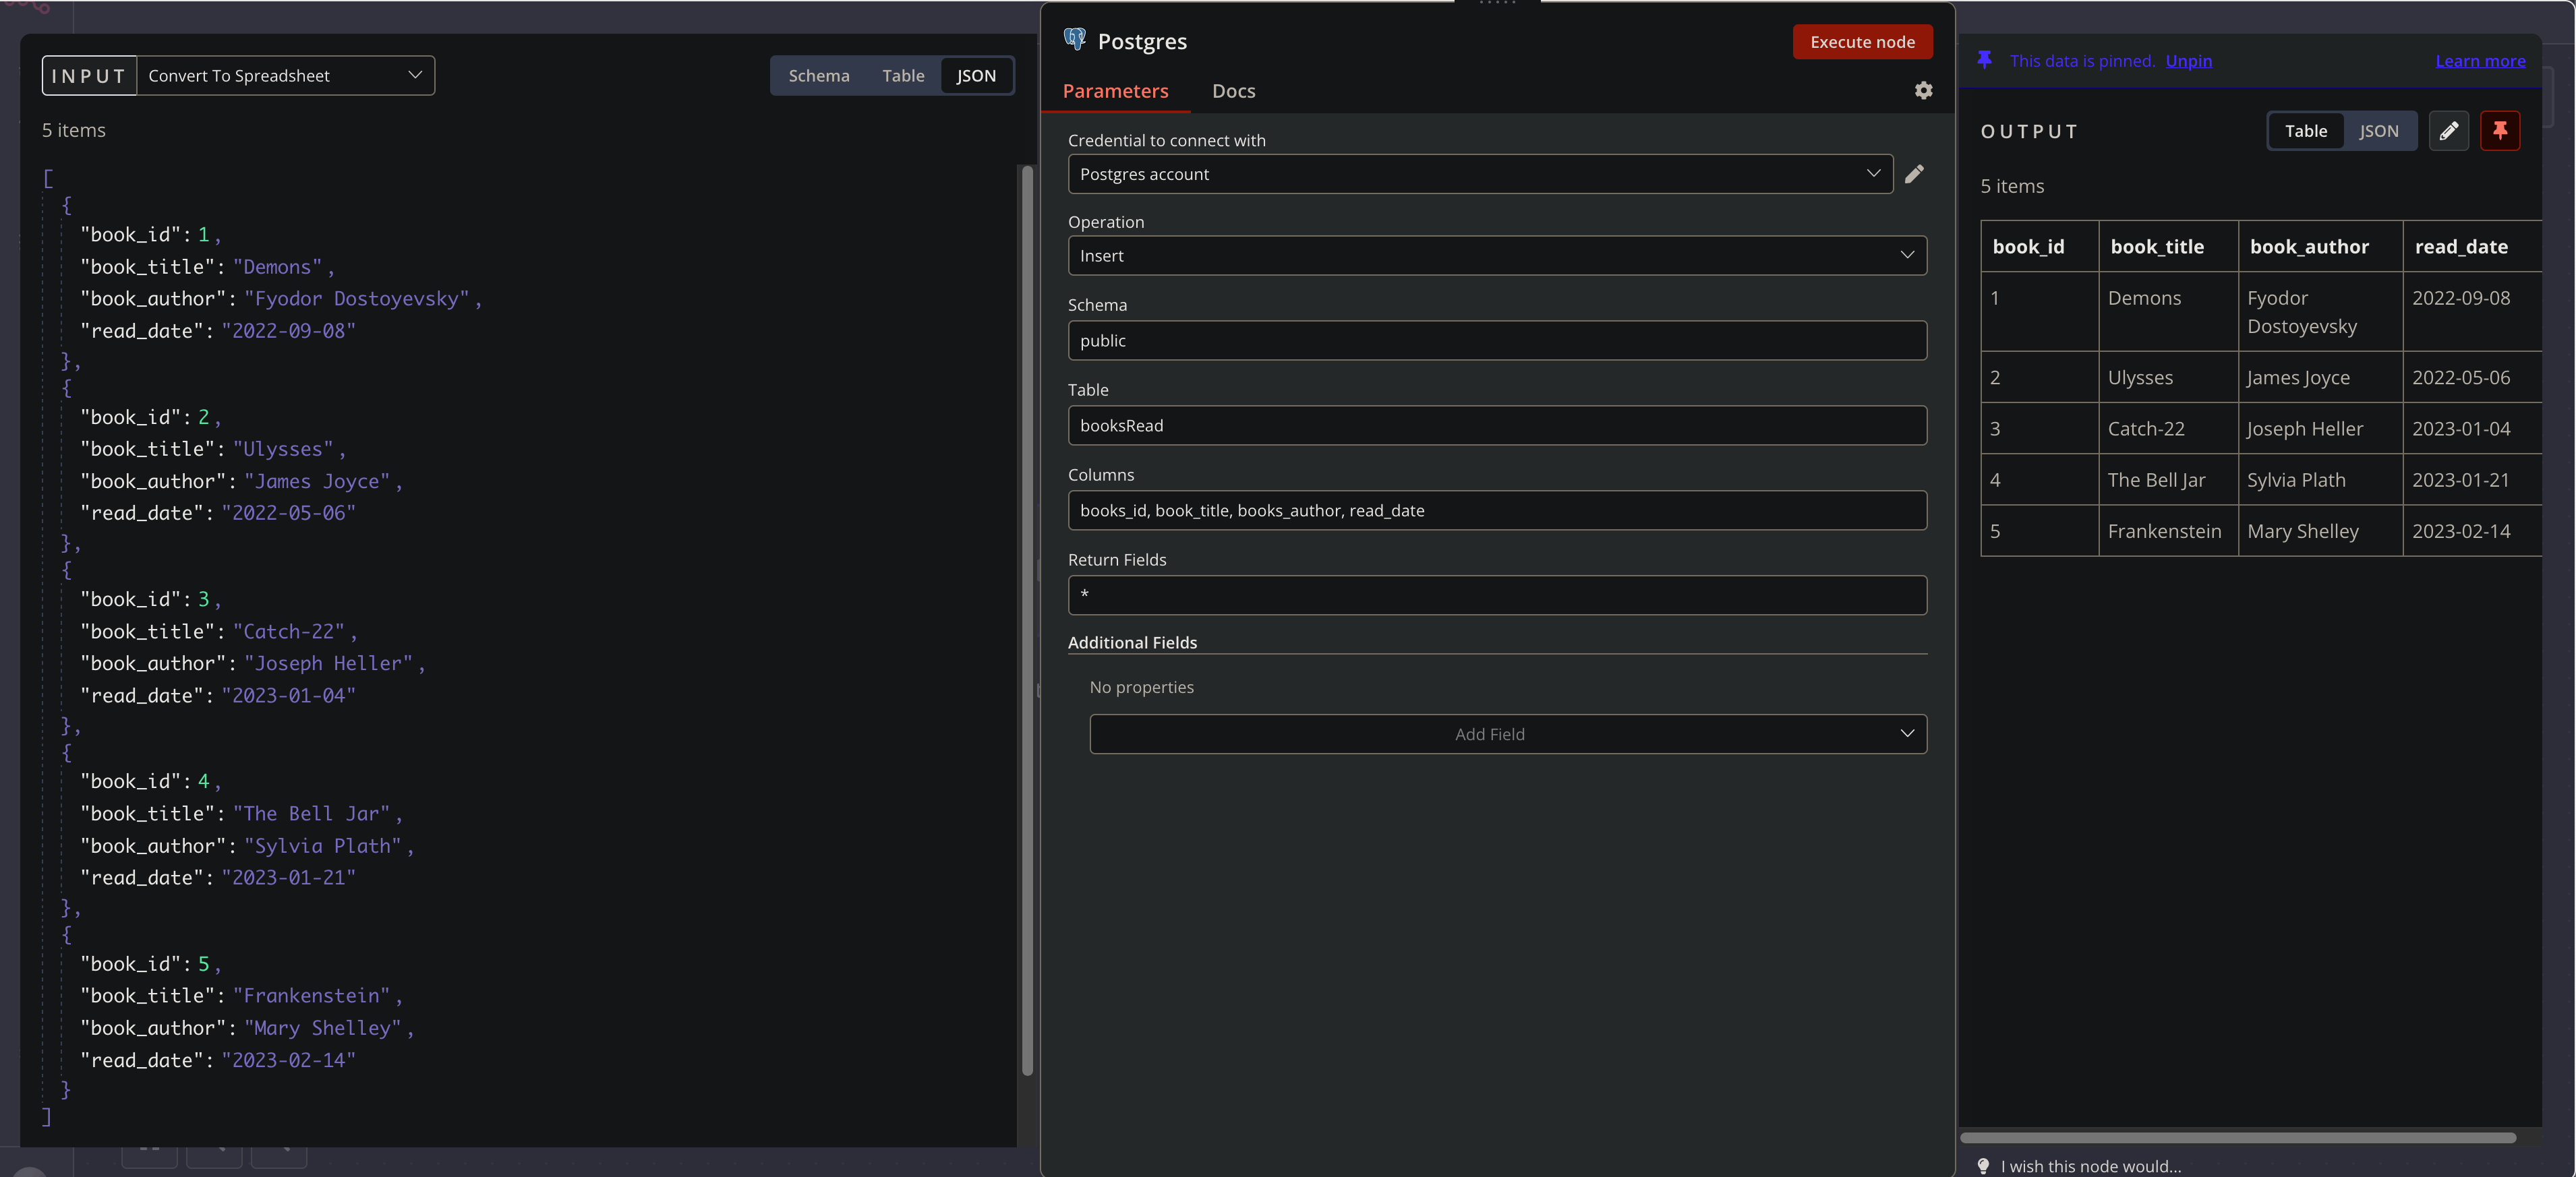
With the other three nodes configured, the final steps are configuring the PostgreSQL integration connection and verifying the workflow output. First, you open the integration node and enter the connection credentials for your PostgreSQL database.
With the credentials inputted, you now specify the node parameters:
- Operation: This parameter tells the integration whether to query the database, insert rows, or update rows. In our example, we want to insert new rows from the incoming CSV.
- Schema: In PostgreSQL, the schema contains the database tables. This parameter points the integration to our table location. In our example it is public.
- Table: This parameter specifies which table the data import should target. In our case it is booksRead.
- Columns: This parameter communicates to PostgreSQL what columns are being imported from the CSV. Our file contains book_id, book_title, book_author, and read_date.
After clicking Execute node, we see the successful output on the right-hand side in the following screenshot.
Now that the initial workflow configuration is complete, we have a repeatable, scalable, automated way to import CSVs into PostgreSQL with n8n.
With the import workflow as a foundation, we can now process the data further with additional n8n core nodes for data functions and data manipulation.
Wrap-up
In this guide, we covered three techniques for importing a CSV file into PostgreSQL. We covered two manual methods: PostgreSQL’s GUI, pgAdmin, and SQL COPY statements. In the third approach, we use n8n to set up the import process and automate it for any future need.
For one-off use, the manual methods achieve our goal, but rarely is importing new data a one-time thing. With one workflow, n8n does the heavy lifting moving forward, and you can focus on more productive tasks.
What’s next?
Here’s what you can do next:
- Use different nodes for working with n8n and other databases like Snowflake, MongoDB, and MySQL.
- Check out a workflow that joins PostgreSQL and MySQL data.
- Check out how Dropsolid creates personalized marketing campaigns with n8n.
- Learn how to import CSV into MySQL.
Register your n8n account in the cloud and start automating for free! You can also run n8n on your server!