Many applications support CSV import and export because of its easy-to-read plain text or tabular format. Regardless of the use case, taking data from one program and putting it in another is a key step in data management processes.
PostgreSQL offers several ways to export your data to CSV so that it can be used with other tools for reporting, analytics, or visualization. Knowing the methods PostgreSQL has at its disposal makes your data tasks simpler.
In this guide, we explore three different methods of PostgreSQL export to CSV: export using PostgreSQL COPY SQL statement, export using PostgreSQL \copy command, and lastly with the workflow automation tool n8n.
How to export a CSV file from PostgreSQL?
Before we begin exporting PostgreSQL data to CSV, we will briefly recap the data in our sample table. If you have read our guide on how to import CSV into PostgreSQL, we will use the same example.
This table was created including a book’s title, author, and date read using the following SQL statement:
You can check the data in the table by using the SELECT SQL statement:
This statement asks for all of the records in the booksRead table and orders them by their book_id returning the following output:
Our exported CSV will include these columns in an easy-to-read spreadsheet format. CSV format will also make the data easy to integrate with other tools outside of PostgreSQL.
PostgreSQL export to CSV using the COPY statement
The first method we will demonstrate is exporting our PostgreSQL table in the command line using the COPY statement.
The COPY statement's function is to copy data between a file and a table or vice versa. You can read more about the COPY statement in PostgreSQL's Official Documentation.
Step 1: Configure the export specifications
To use COPY to export a PostgreSQL table to CSV, we need to specify the table to export, the location to export the file to, the delimiter, and lastly if the file includes a row for headers.
Our statement looks as follows:
PostgreSQL replies with the following message:
This reply tells us that our statement was executed successfully and a new file named books-read-export.csv has been written to the specified file location.
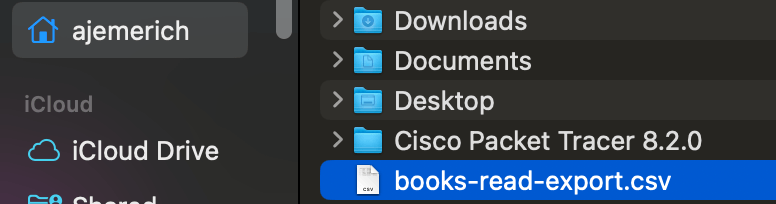
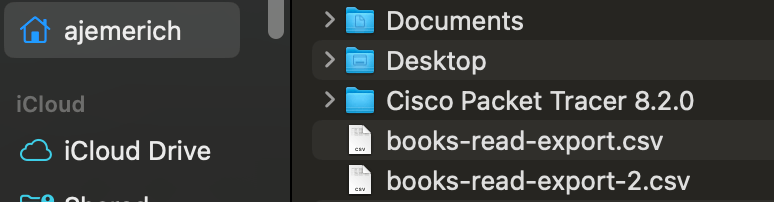
Step 2: Confirm successful export
To verify, we can navigate to the folder we specified and see that the new CSV file is indeed there:
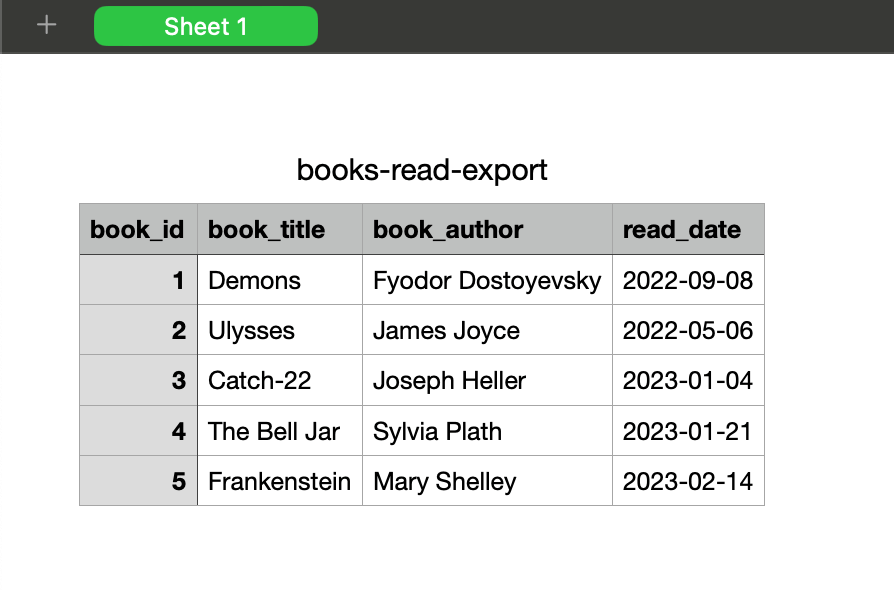
Additionally, if we open the file, we’ll see that our CSV is formatted correctly with the expected data:
COPY export with specific columns
To take things one step further, you can also specify PostgreSQL to export the table with only a subset of the table’s columns. To do this, we alter our previous COPY statement to include only the column names we went.
Our altered statement looks like the following:
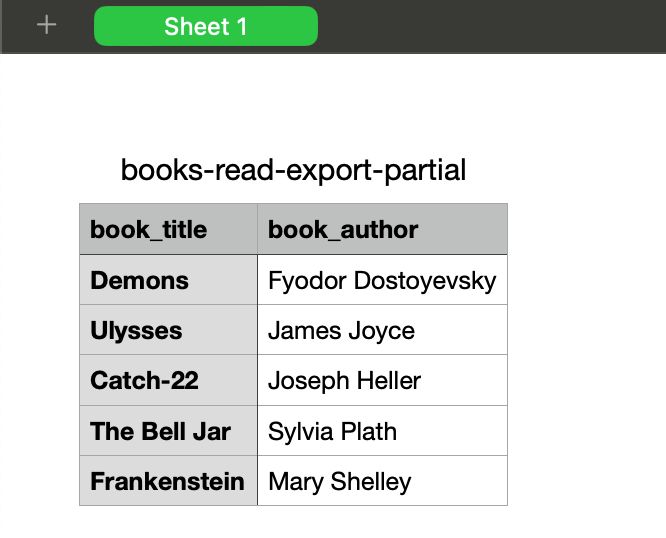
Everything else remains the same, except we call the file books-read-export-partial.csv , and our CSV export will only include the book_title and book_author column data.
We can confirm by opening the file:
PostgreSQL export to CSV using the \copy command
We can also export a PostgreSQL table to a CSV in the command line using the \copy command. This method is best when you have access to a remote PostgreSQL database, but you don’t have file-writing permissions to use the COPY statement from the previous method.
The \copy command is a built-in PostgreSQL command executed by psql. You can read more about \copy in the Official PostgreSQL Documentation.
Step 1: Configure the export
The \copy command method has the same steps as the COPY statement method with changes in the syntax. To export a PostgreSQL table to CSV, we need to specify the table to export, the location to export the file to, the delimiter, and lastly if the file includes a row for headers.
Our command looks as follows:
PostgreSQL replies with the following message:
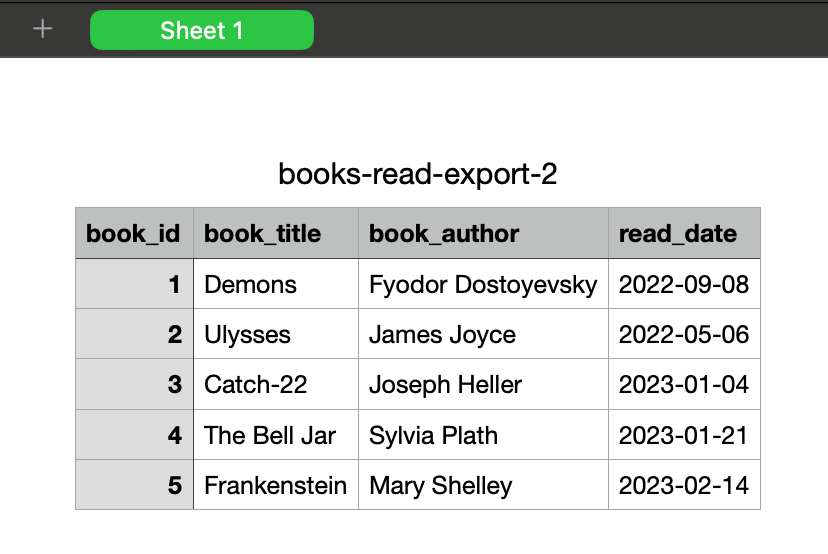
This reply tells us that our statement was executed successfully and a new file with the name books-read-export-2.csv has been written to the specified file location.
Step 2: Confirm successful export
To verify, we can navigate to the folder we specified and see that the new CSV file is indeed there:
Additionally, if we open the file, we’ll see that our CSV is formatted correctly with the expected data:
\copy export with specific columns
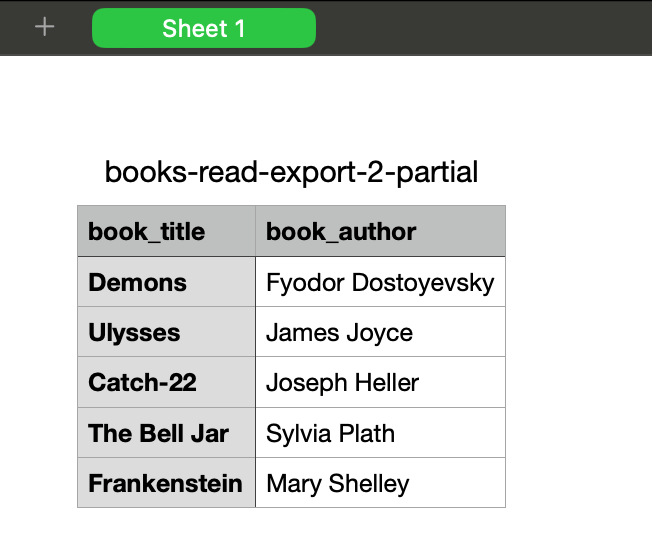
You can also specify PostgreSQL to export the table with only a subset of the table’s columns. To do this, we alter our previous \copy command to include only the column names we went.
Our altered statement looks like the following:
Everything else remains the same, except we call the file books-read-export-partial-2.csv , and our CSV export will only include the book_title and book_author column data.
We can confirm by opening the file:
PostgreSQL export to CSV automatically with n8n
So far, the discussed methods successfully achieve our goal, but they primarily work well as one-off methods to create a CSV. As database exports increase, manually connecting to your PostgreSQL server and generating a file becomes tedious and takes time away from more important tasks.
With n8n, you can automate typing in the command line, grabbing the file, and sending it where it needs to go, freeing up time for more exciting work.
Let’s take a look at using an n8n workflow to automate exporting PostgreSQL tables to CSV:
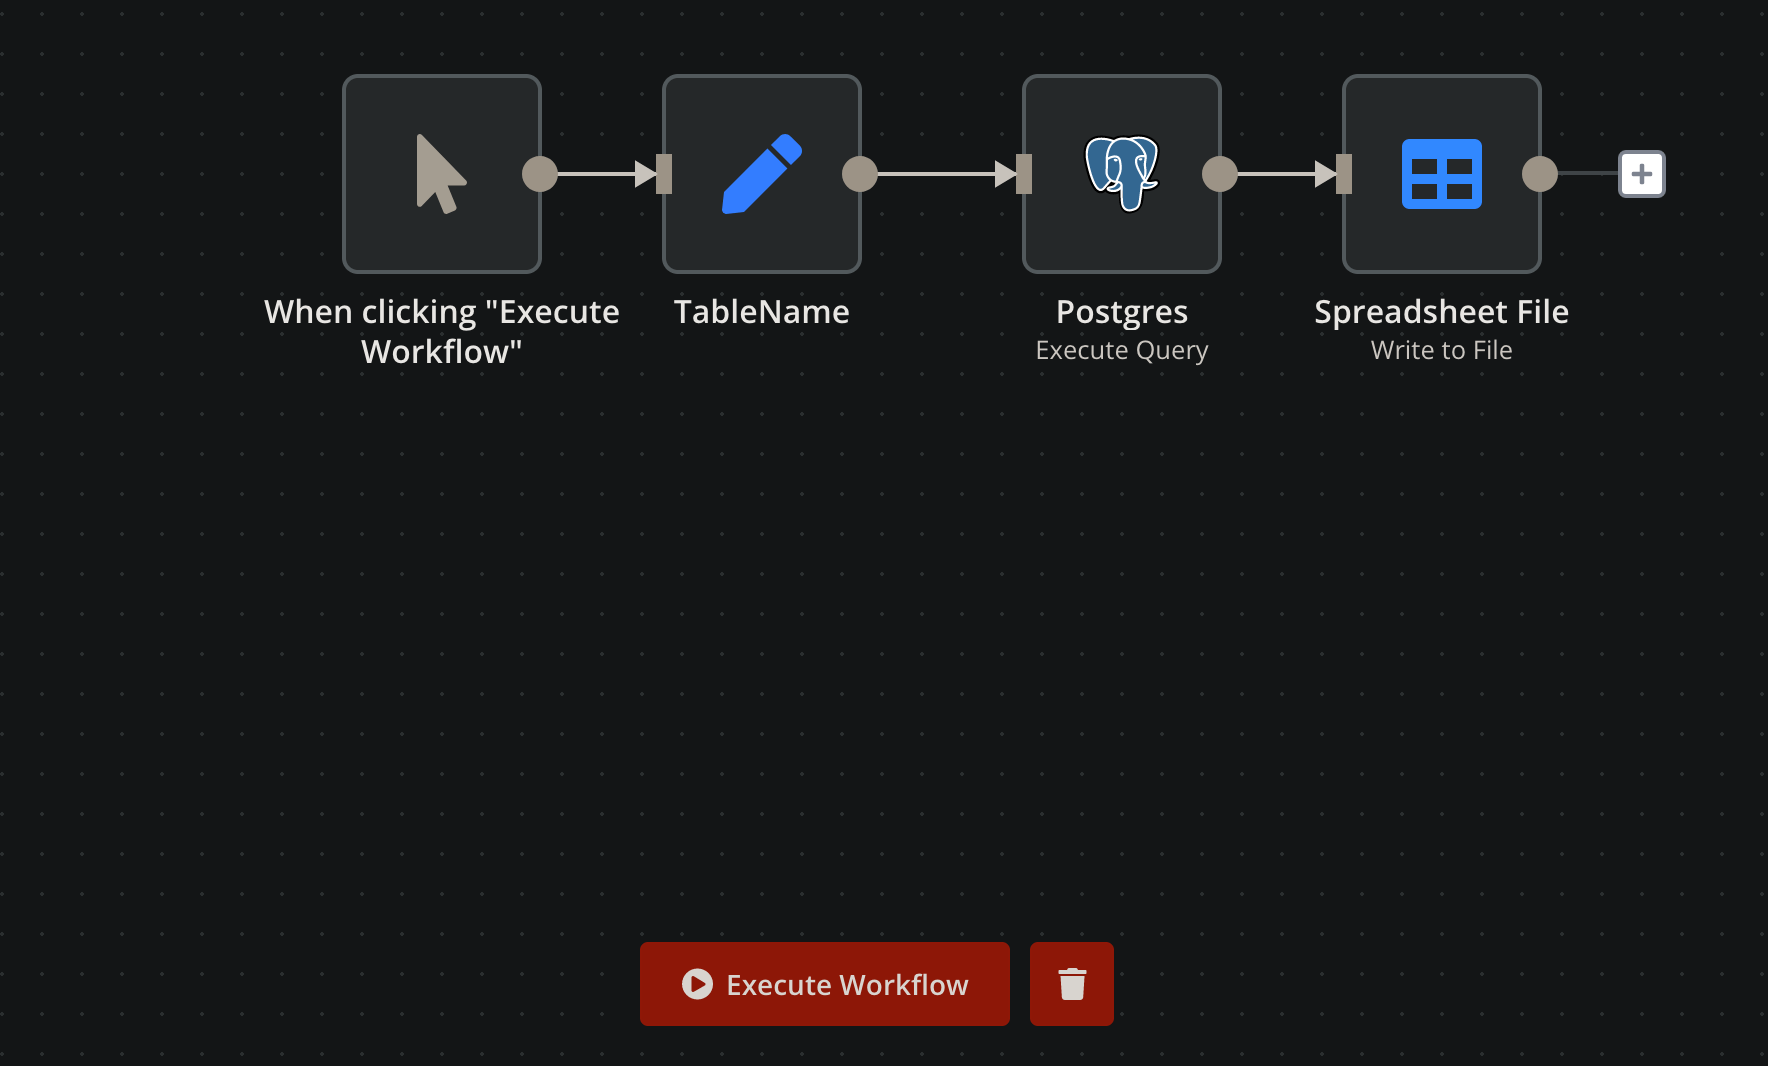
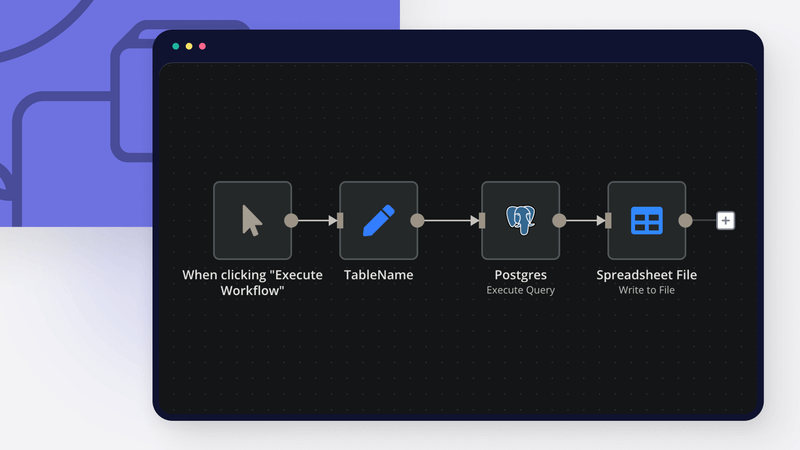
Step 1: Connect nodes to your workflow
Within this workflow, there are 4 nodes:
- The first node tells the workflow to run on click of Execute Workflow. In real-world applications, the trigger could be on a schedule or from another app event. You can check out all available options in the Trigger Node Documentation.
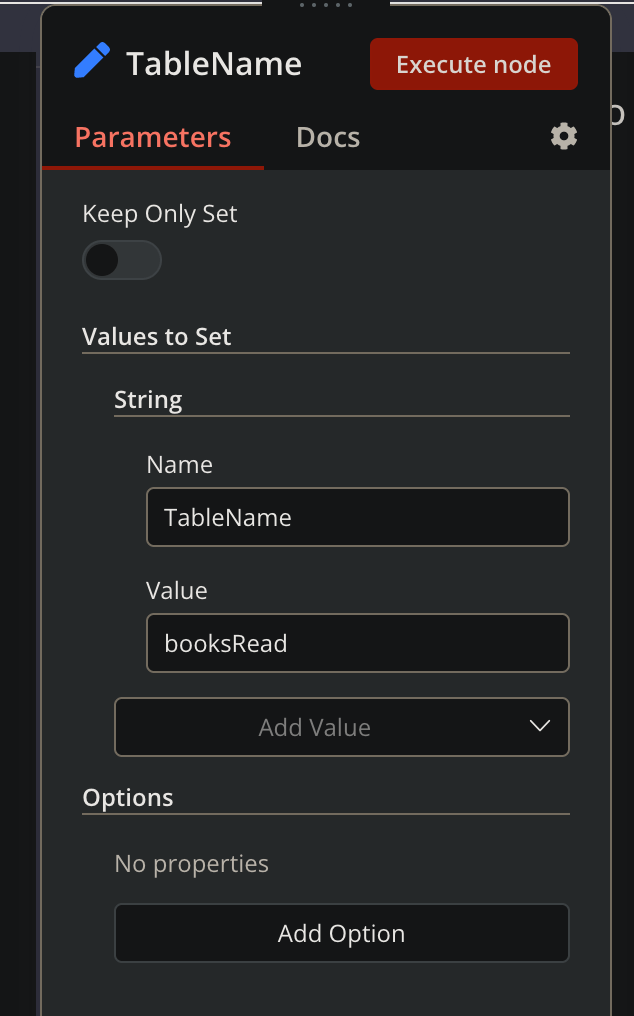
- Next goes the Set node. String variable TableName is declared there and it is equal to booksRead. Set node allows us to automatically create Excel file and sheet names.
3. The third node is a PostgreSQL node which connects to a remote database. You will need to set up credentials first, please refer to a tutorial on how to import a CSV into PostgreSQL.
4. Lastly, the Spreadsheet File node is used to specify the final operation telling the workflow what to do with the PostgreSQL table.
Step 2: Configure the PostgreSQL node
With our Trigger and Set nodes configured and our PostgreSQL connection secured, we can configure our PostgreSQL node to generate an export.
Our configuration will look as follows with a few key things to point out:
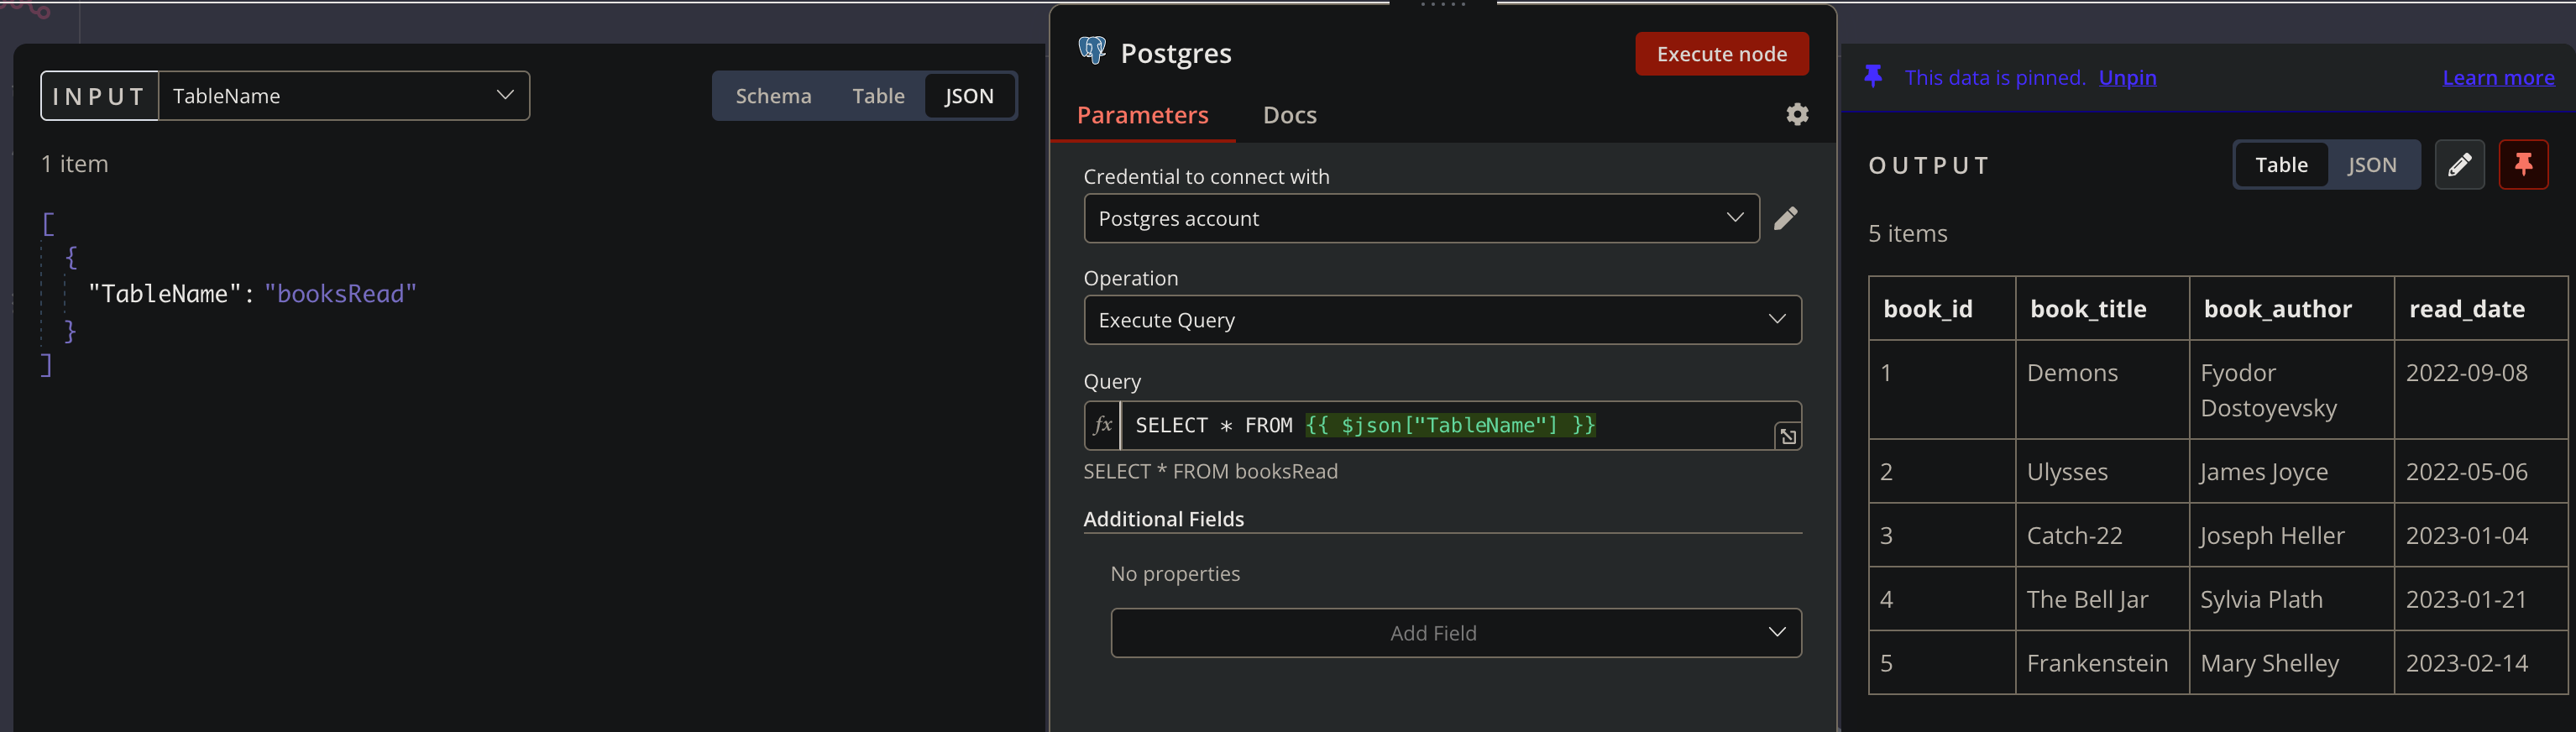
Firstly, we want our node operation to be set to Execute Query. This tells the node to execute the SQL query that we specify in the next field.
In our Query field, we populate with the following expression referencing the string variable name we declared in the Set node.
We can see on the right-hand side in the output that all of our expected records have come through from the booksRead table defined in the Set node.
Step 3: Configure the Spreadsheet File node
Now that we configured our PostgreSQL node and have verified the correct data is piping through, we can configure the Spreadsheet File node.
Our configuration will look as follows with the PostgreSQL data as the input:
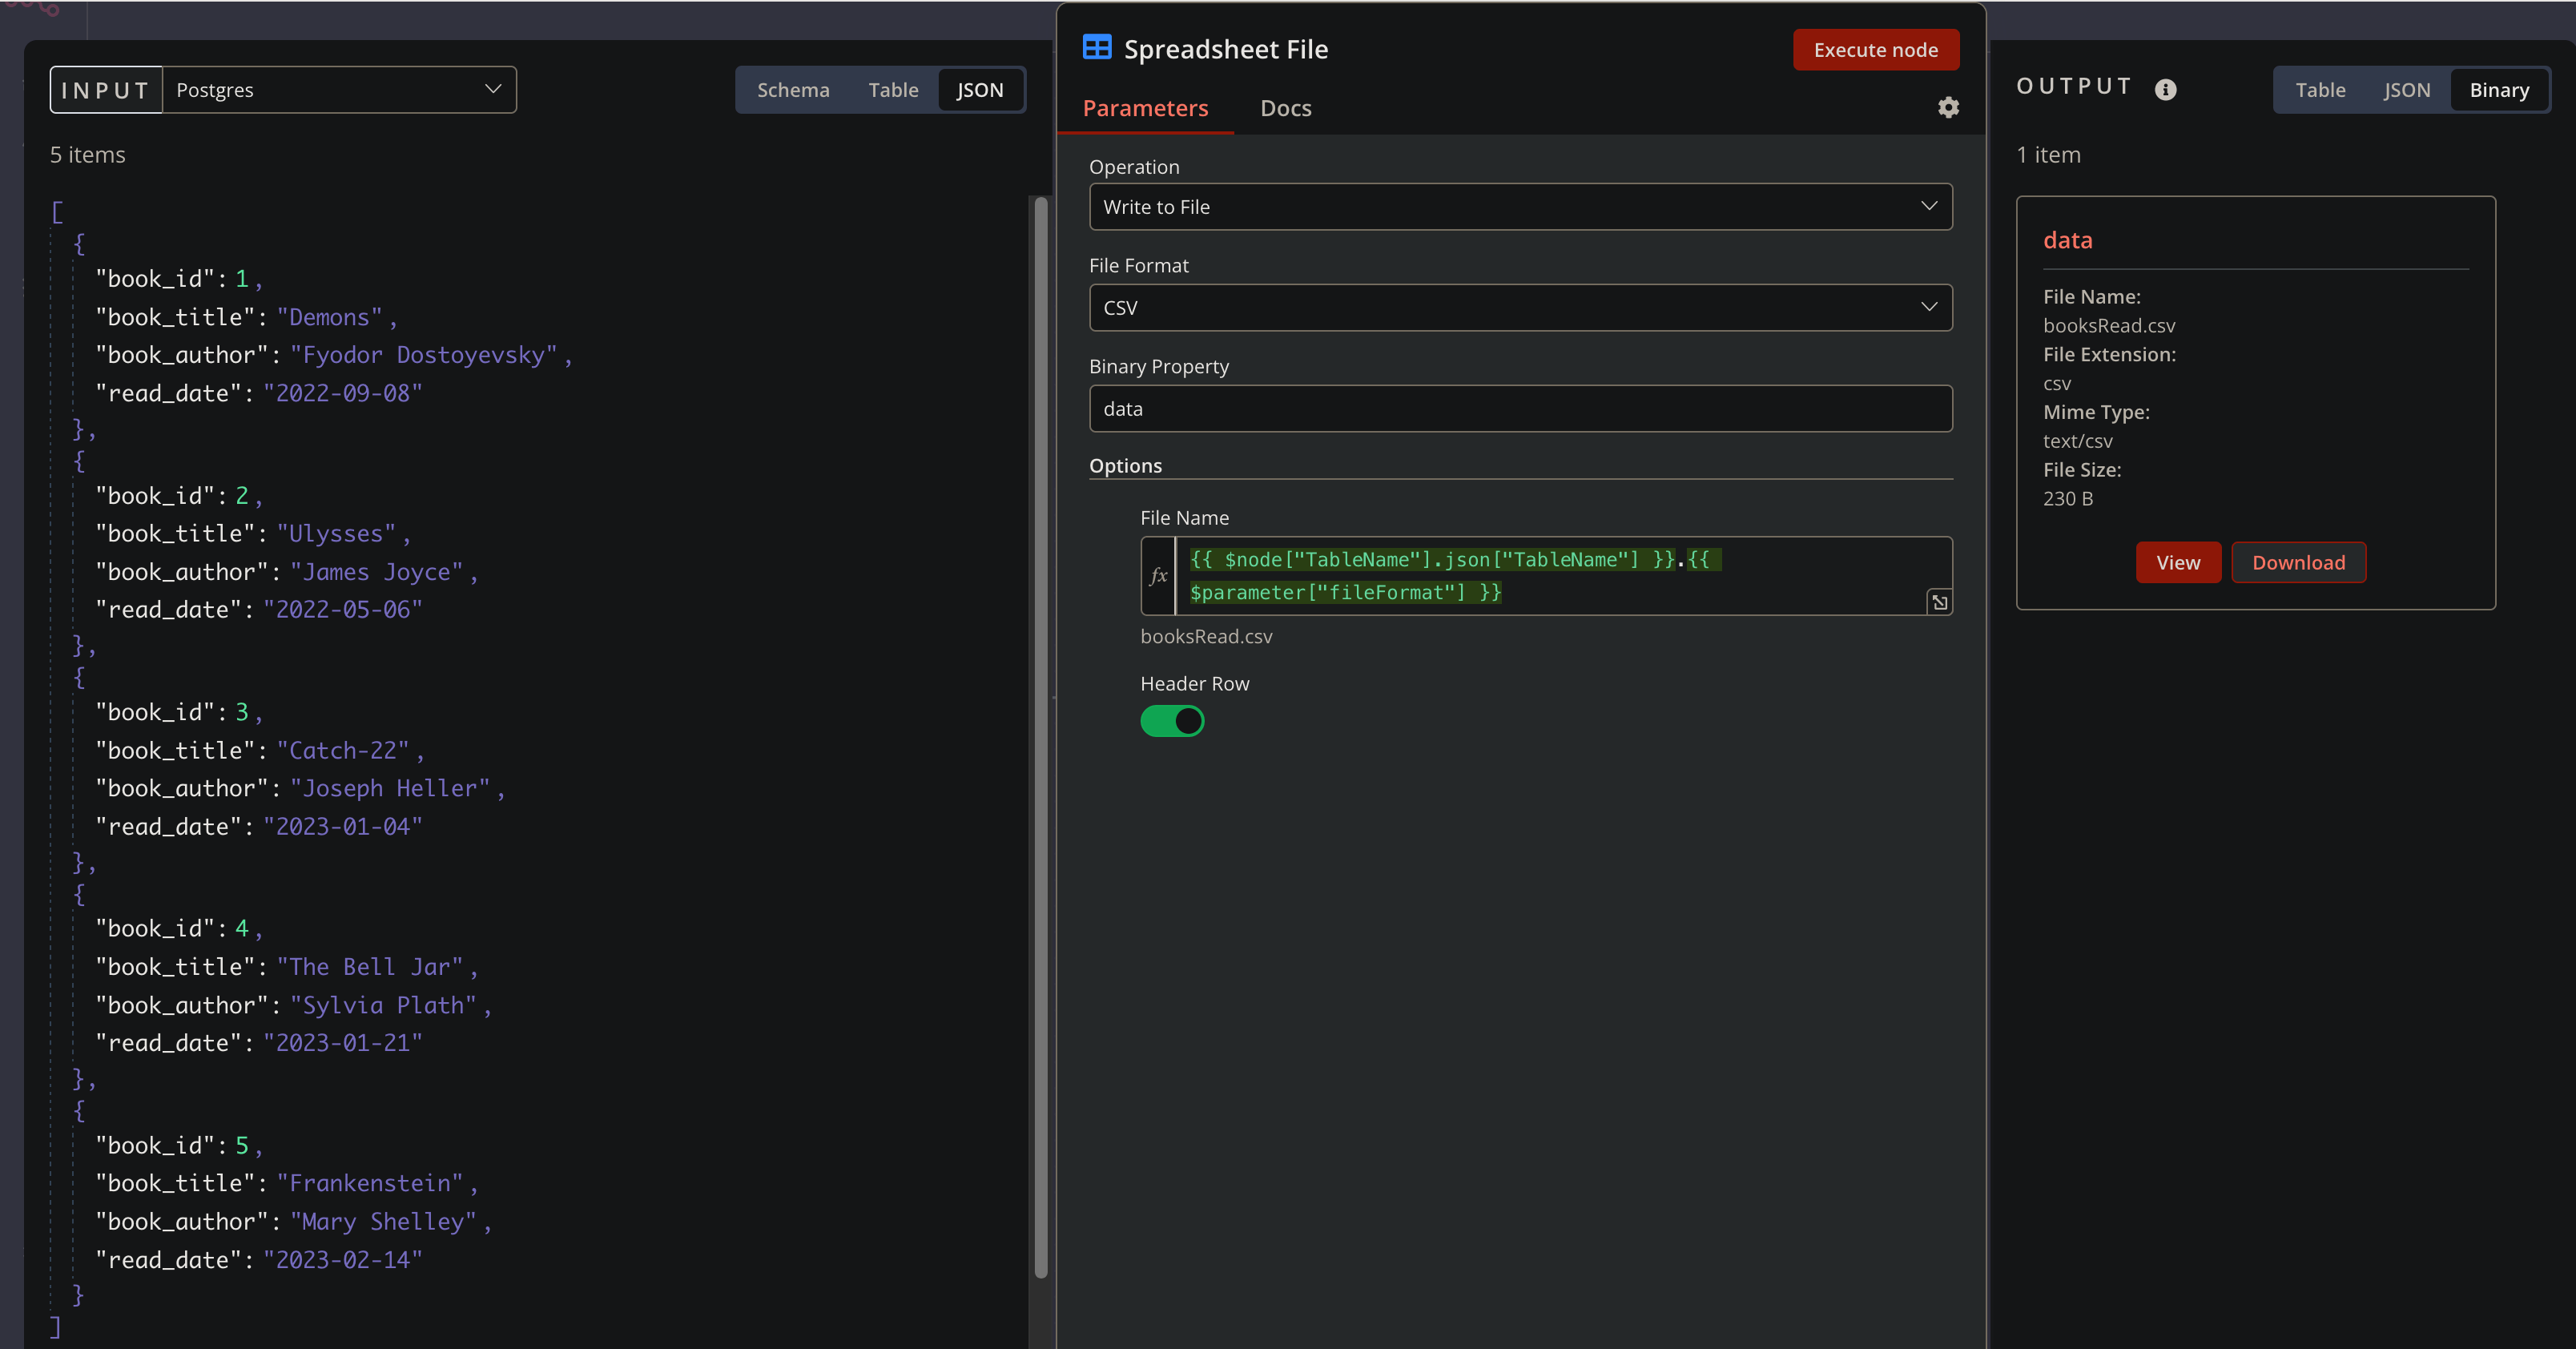
The first option is to select Write to File as our Operation. This selection dictates to the node that we want the data outputted as a file. Next, we choose CSV as our File Format.
We choose data as our Binary Property, and lastly, we open up options to specify how we want our file named. You can use the following expression to specify that our file is named with the string variable TableName from the Set node and that we want our file to include a Header Row.
We can see from the righthand Output that our node created our booksRead.csv from the values defined in the Set node with the correct csv file extension.
With our export workflow in place, we now have an automated path to trigger PostgreSQL data exports into easy-to-work-with CSVs.
Wrap-up
In this guide, we covered three techniques for exporting PostgreSQL tables to CSV. We covered using a COPY statement and \copy command. These methods are not overly time-consuming on their own, but they require manual effort that becomes tedious at a higher scale. In the third approach, we use n8n to set up an export workflow that automates the process.
As new data enters the database, it is likely to be perpetually needed in new reports and synced to third-party tools. With one workflow, n8n removes the need to manually connect to your database server, specify the data that you want, and create a CSV export. From trigger to file creation, all the steps occur without a manual click of a button.
What’s next
Here’s what you can do next:
- Use different nodes for working with n8n and other databases like Snowflake, MongoDB, and MySQL.
- Check out other relevant workflows:
- Joins PostgreSQL and MySQL data
- Insert Excel data to PostgreSQL
- Transfer data from PostgreSQL to Excel
- Check out how n8n powers a $100K online business.
- Learn how to export MySQL to Excel.
Register your n8n account in the cloud and start automating for free! You can also run n8n on your server.